Need a printable version of this article? Download the Article (PDF Version).
Managing contacts can be done from multiple places throughout CLW. In fact, contact management options to create new contacts and edit existing ones are available everywhere contacts can be applied or searched. Deleting contacts must be done by someone with access to the System Management module, such as a System Administrator.
Contact management can be done without first accessing a matter by selecting either the Find People icon in the Global Toolbar, or else opening System Management and selecting People from the Files tab of the Global System view.
Otherwise, contact management can be done whenever a Find a Person window is available.
The steps in this article will use the Find People option for creating and editing, which should be available to all users. The same steps for creating and editing contacts apply regardless of the approach used.
NOTE: It is important to understand that “contact” in this article refers to any person or organization maintained in CLW, excluding users. In some modules, such as Litigation, a “Contact” has specific meaning to distinguish it from a “Party”, “Related Party”, or “Witness”. All of these people types are considered CLW contacts for the purpose of this article.
Contents:
Create New Contact
There are four steps to complete this task:
Step 1. Open People Search Criteria
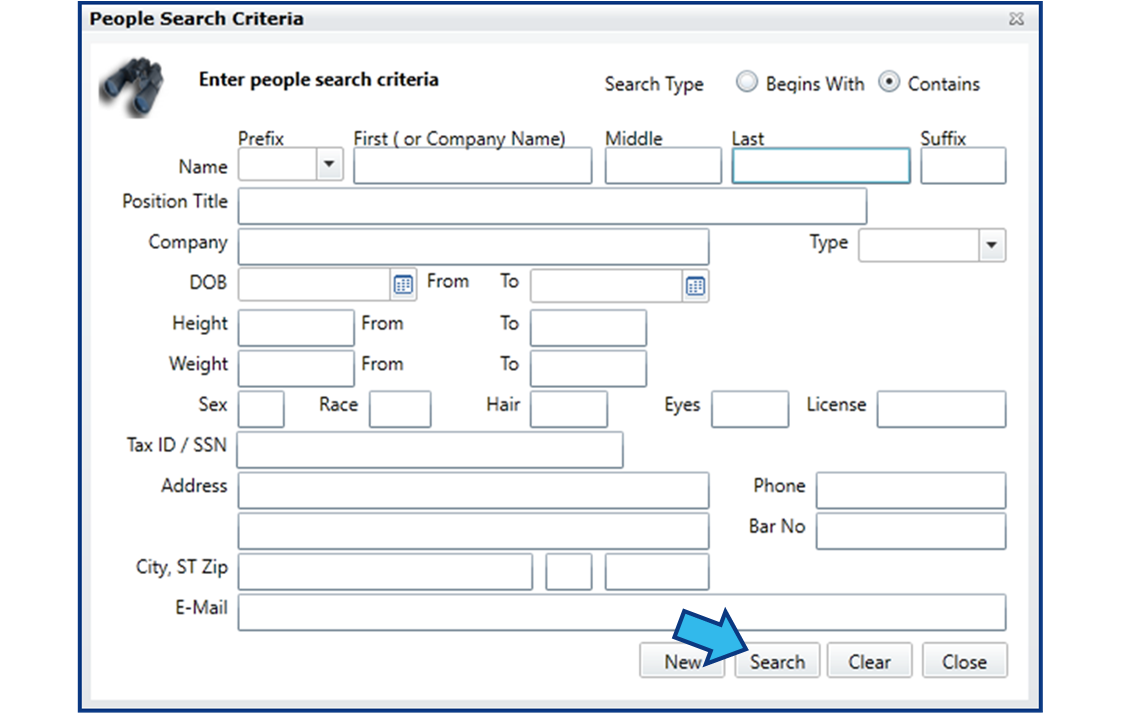
The People Search Criteria window can be accessed numerous ways. Most directly, select the Find People icon on the Global Toolbar.

Step 2. Search for Contact
CLW Best Practices states to always search for a contact first, before creating a new one. Consider in your search that the contact’s information may have been entered differently, or even incorrectly. Perhaps a nickname has been used, or perhaps the last name was misspelled. Enter the contact’s name and/or other information to search for the contact and then select Search. Once you are satisfied a record does not already exist for the new contact, move to Step 3. Remember that multiple contacts may share the same name and you may need to consider other information to confirm a contact’s identity.
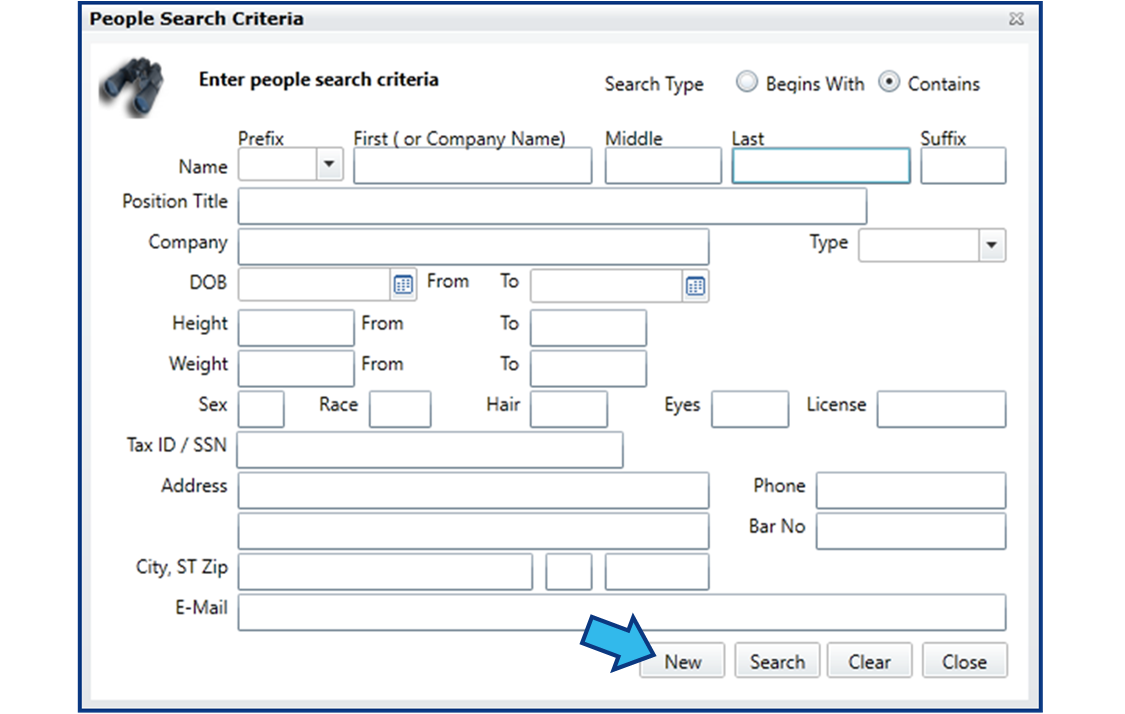
Step 3. Select New
Once you are sure the contact needs to be added, select New.
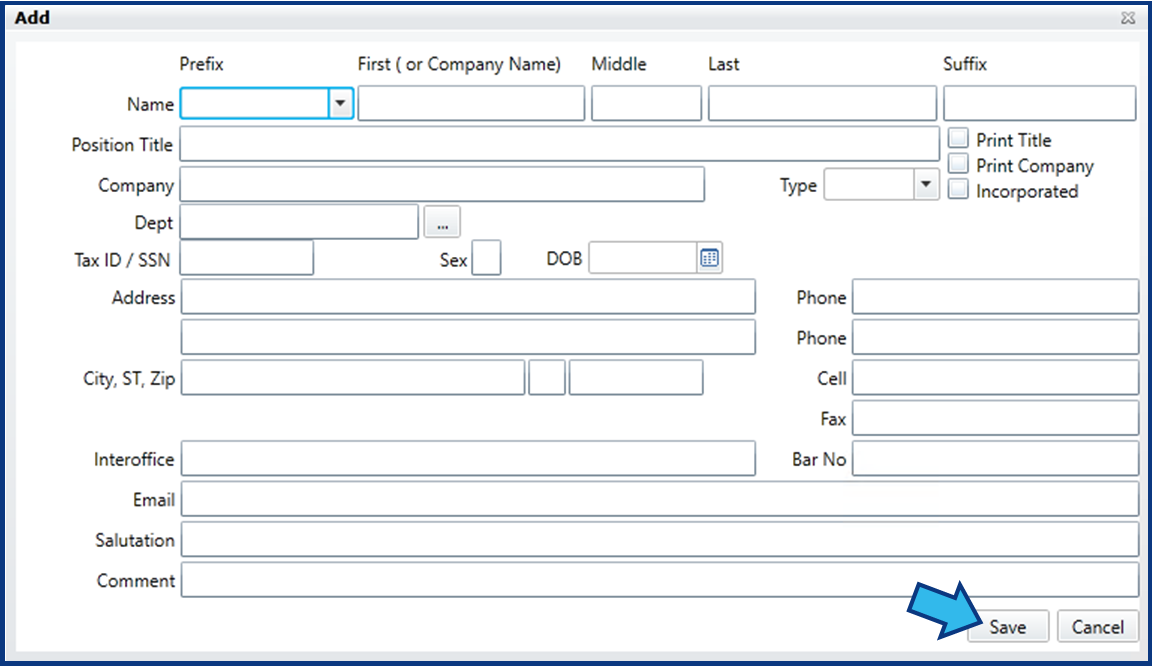
Step 4. Enter Contact Details and Save
In the Add window, enter the known information for the contact and select Save. Now the contact can be selected from a Find a Person window or found through a People Search Criteria search.
Edit Contact
There are four steps to complete this task:
-
Open People Search Criteria
-
Search for Contact and Highlight
-
Select Edit
-
Edit Contact Details and Save
Step 1. Open People Search Criteria
The People Search Criteria window can be accessed numerous ways. Most directly, select the Find People icon on the Global Toolbar.
Step 2. Search for Contact and Highlight
Consider in your search that the contact’s information may have been entered differently, or even incorrectly. Perhaps a nickname has been used, or perhaps the last name was misspelled. Enter the contact’s name and/or other information to search for the contact and then select Search. Remember that multiple contacts may share the same name and you may need to consider other information to confirm a contact’s identity.
Once you have found the contact, select them by single left-clicking their name in the list.
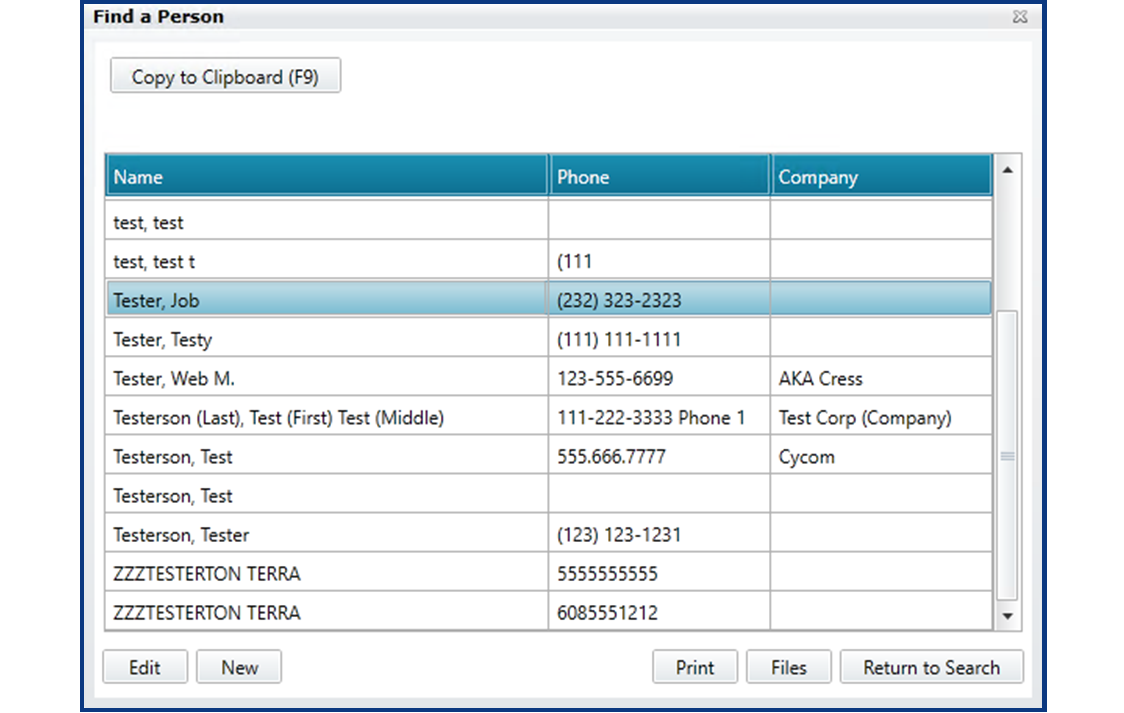
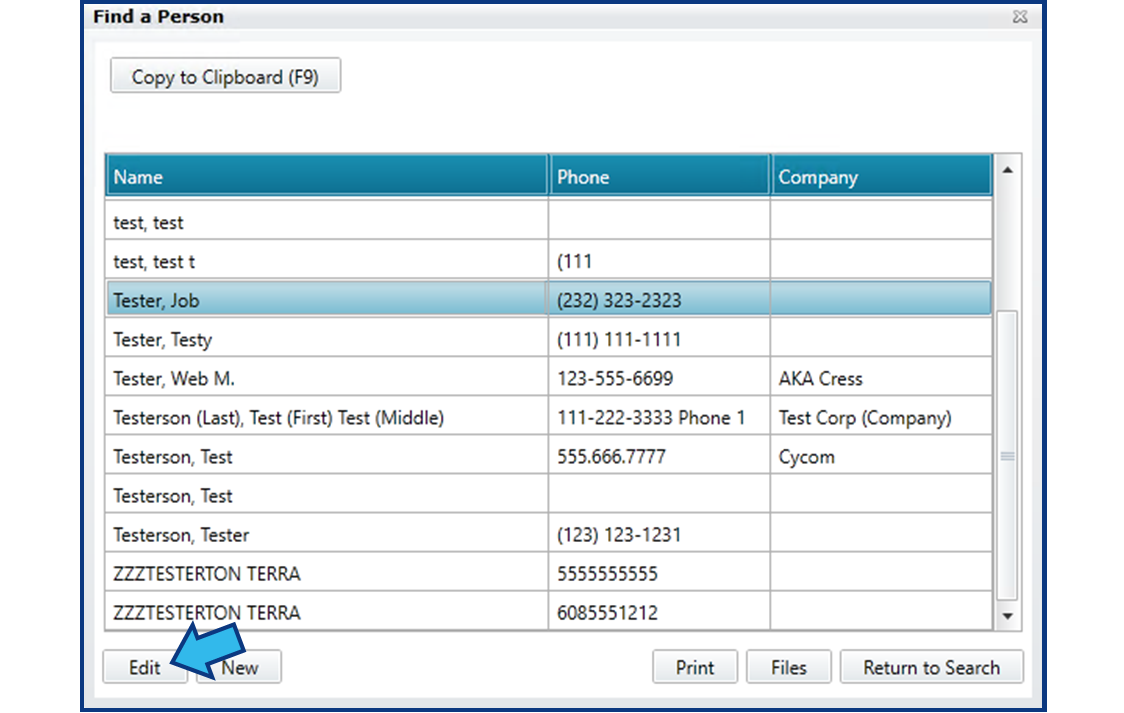
Step 3. Select Edit
Select Edit to open the Edit Party window.
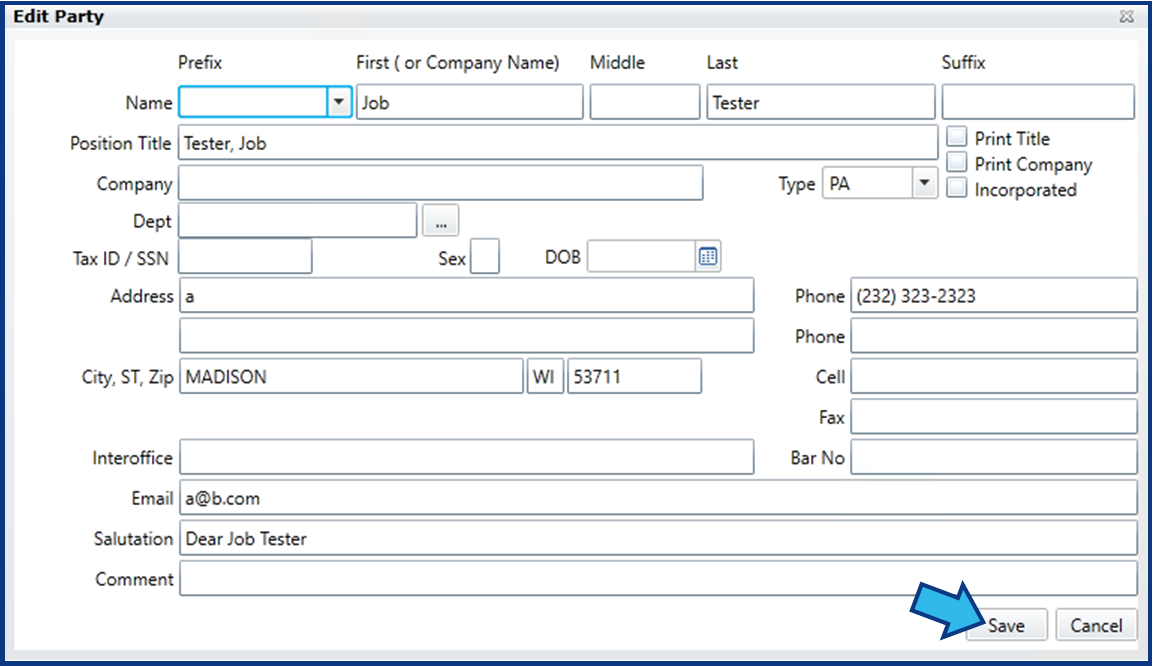
Step 4. Edit Contact Details and Save
Edit any of the fields needed in the Edit Party window and when finished, select Save to save your edits.
Delete Contact
There are five steps to complete this task:
-
Open System Management
-
Select People
-
Search for Contact and Highlight
-
Review Contact's Associated Files
-
Select Delete and Confirm
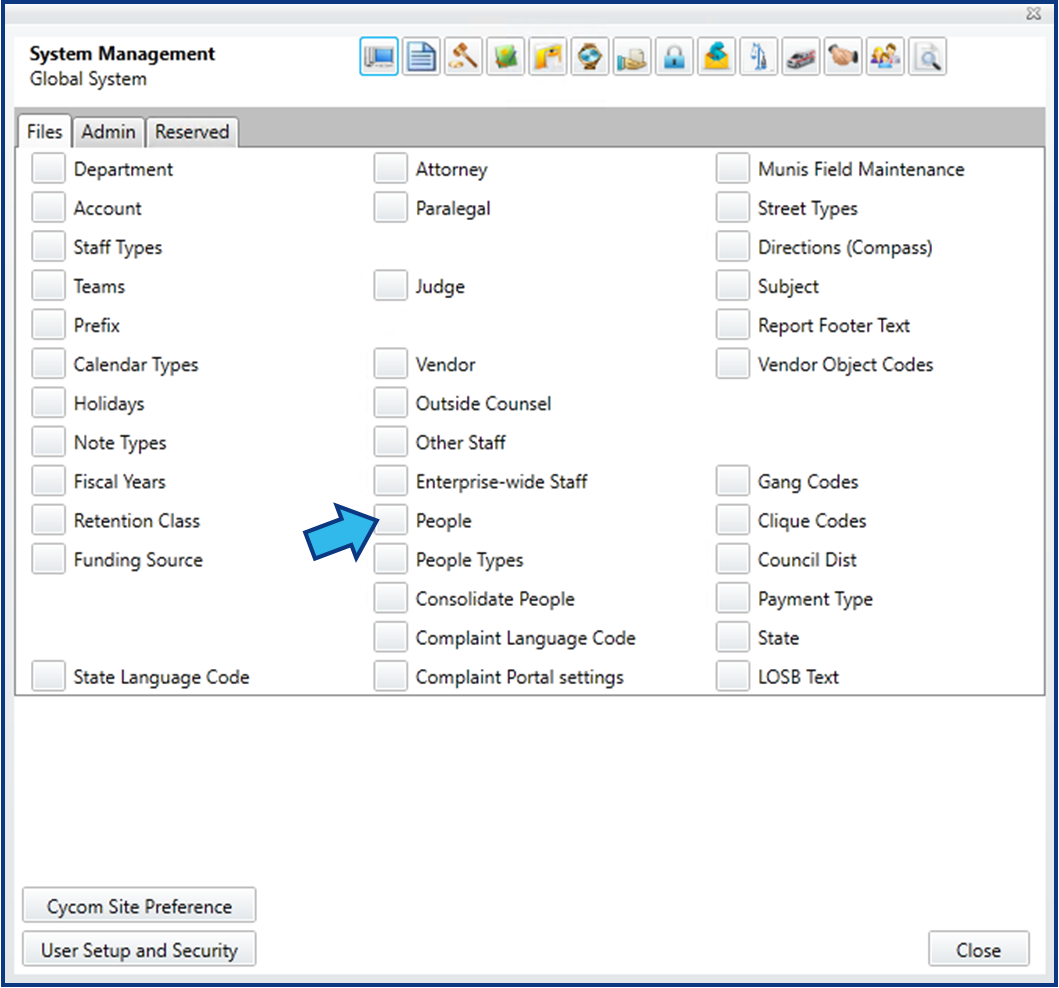
Step 1. Open System Management
Select the System Management icon from the Global Toolbar.
![]()
Step 2. Select People
On the Files tab of the Global System view, which should be the default view, select People from the center column.
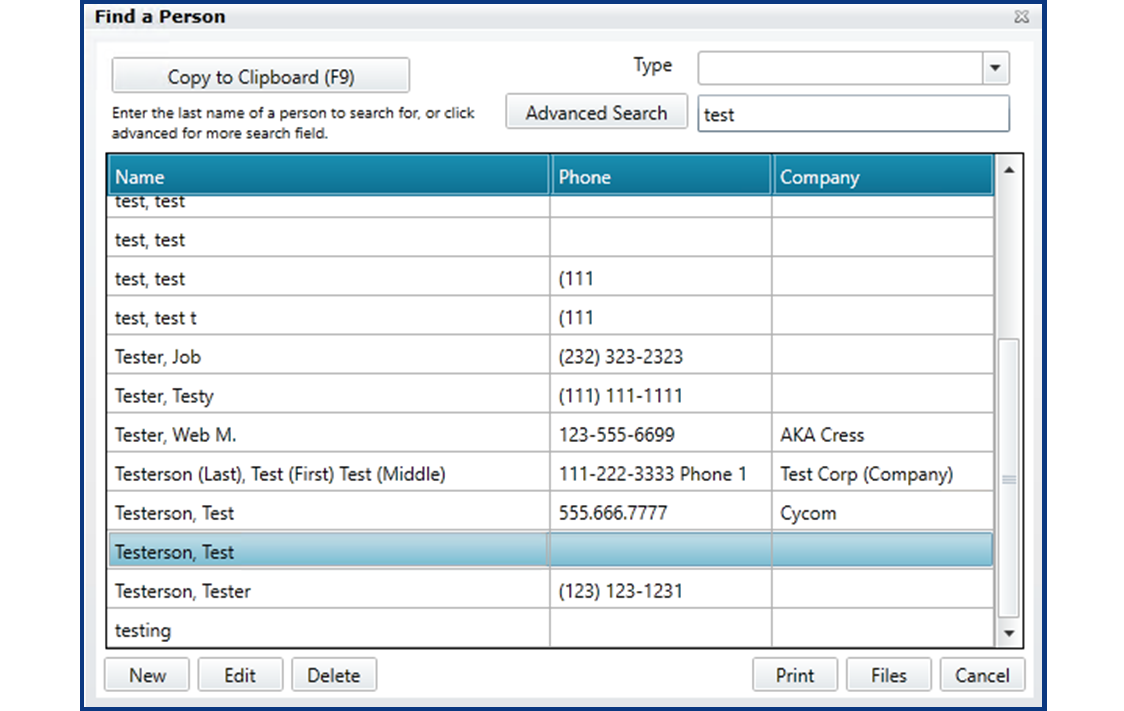
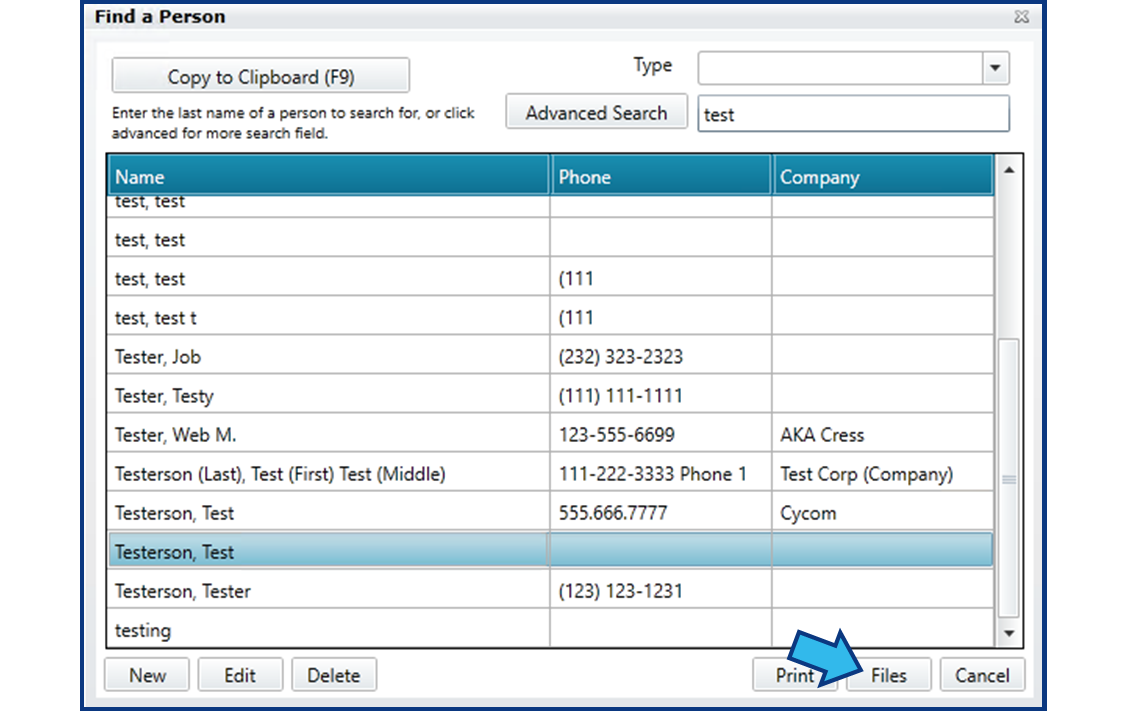
Step 3. Search for Contact and Highlight
Enter the contact name in the Search field, find the contact, and then highlight them by single left-clicking the name in the list.
Step 4. Review Contact's Associated Files
CLW Best Practices states to never delete a contact that is associated with one or more files. Doing so can create problems in the database. To ensure the contact you are about to delete is not associated with any matters, select Files.
If the contact is associated with any matters, a list of those matters will appear. DO NOT delete this contact.
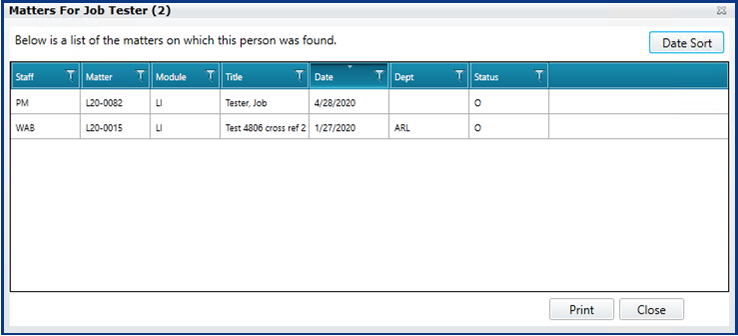
Otherwise, you will be prompted that no records were found. If you receive this prompt, it is safe to delete the contact.

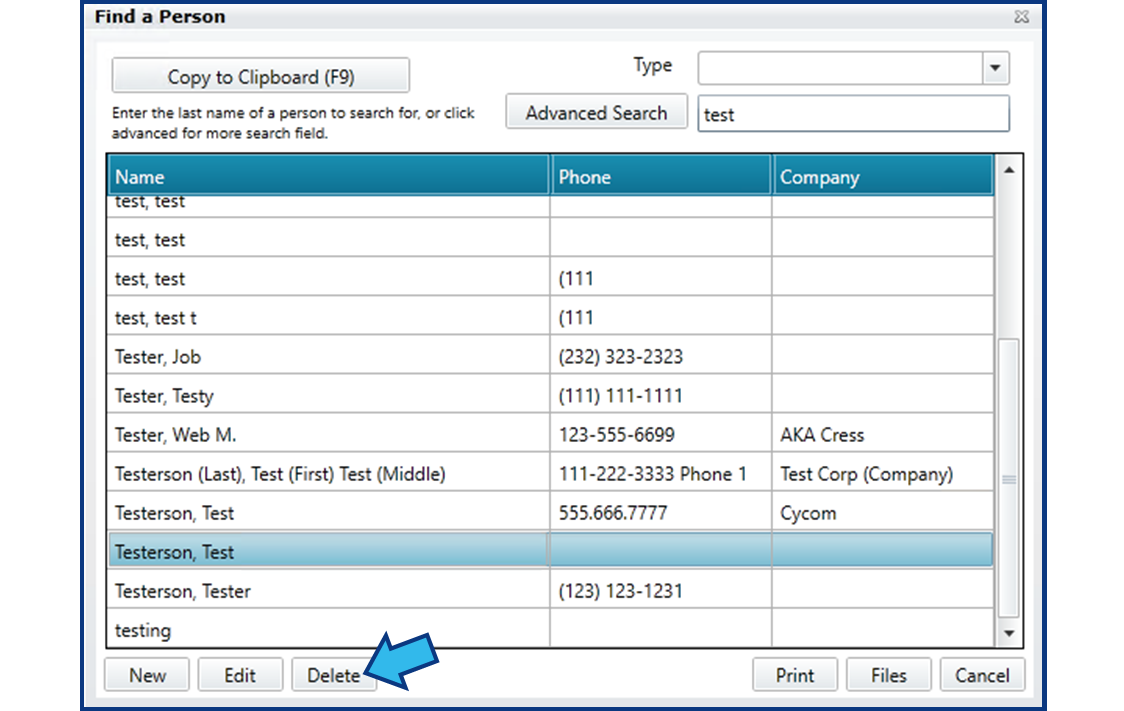
Step 5. Select Delete and Confirm
Only proceed with this step once you have confirmed from Step 4 that the contact is not associated with any matters. Select Delete and then select Yes to confirm you wish to delete the contact.

Comments
0 comments
Please sign in to leave a comment.