Need a printable version of this article? Download the Article (PDF Version).
Parties, Witnesses, Contacts, and Captions are managed in the Parties view of a matter. The Parties view is not available for all modules. The Parties view is accessed from the Module Toolbar using the Parties icon.

Contents:
Parties Tab
Contents:
- Add Primary Party
- Add Related Party
- Edit Primary or Related Party
- Delete Primary or Related Party
- Email Primary or Related Party
- Add or Edit Remark for Primary or Related Party
- Modify Primary or Related Party Type
Add Primary Party
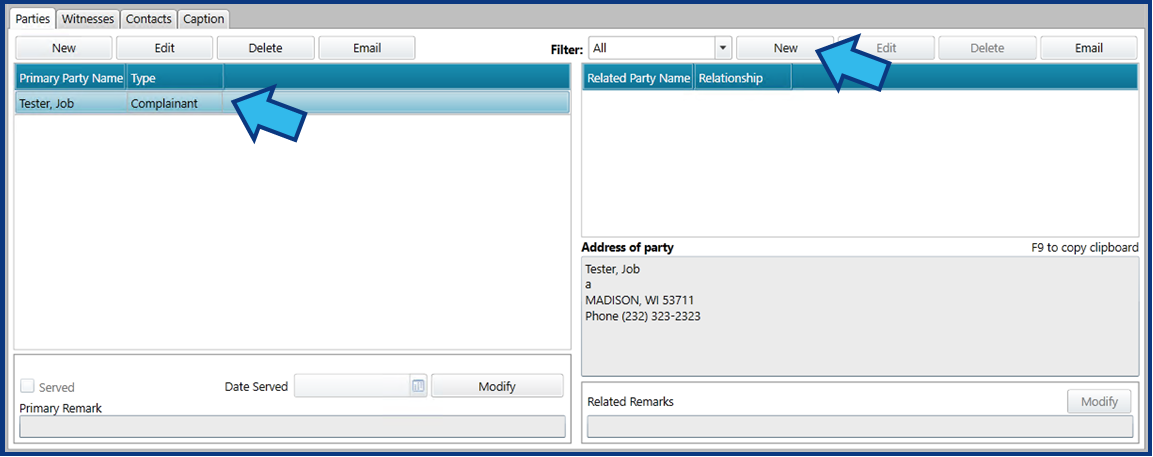
To add a new primary party to a matter, select New on the left side of the Parties tab.

Locate the person in the Find a Person window that appears. Enter the person’s last name in the search field to the right of the Advanced Search button.
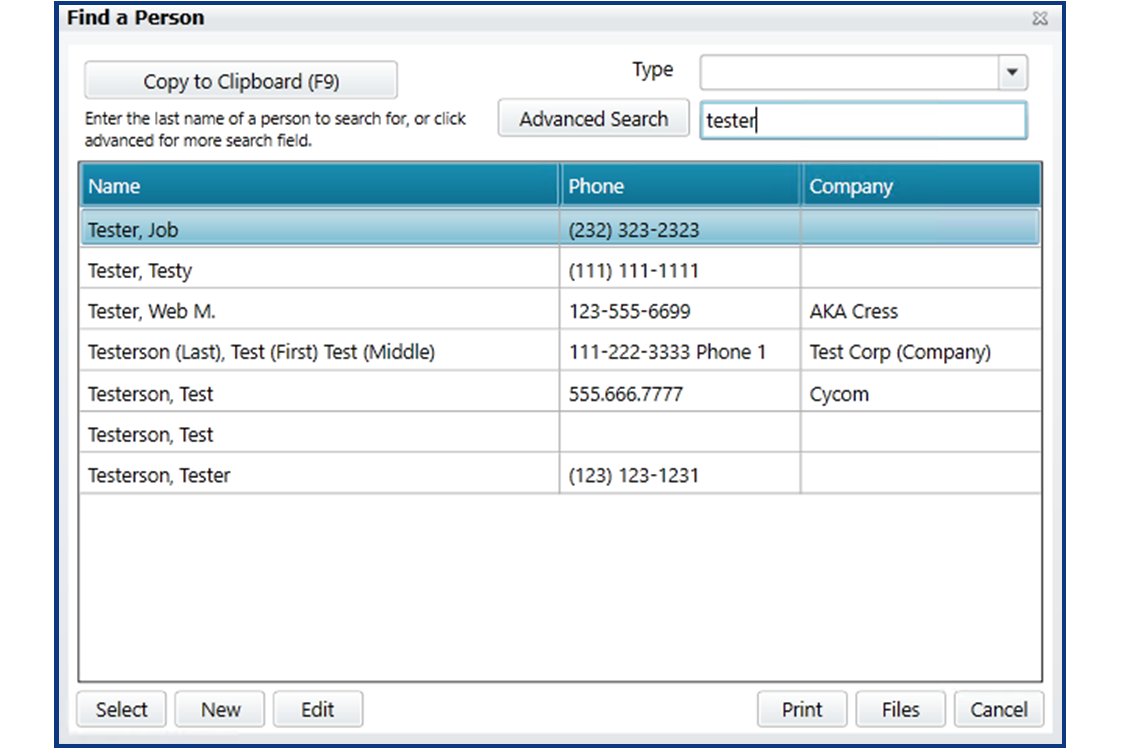
If a search reveals the person is not already identified in CLW, you will need to add them. To add a person, select New in the bottom left corner. This will open an Add window. Enter the known information for the person and then select Save. Now the person will appear in the search list in the Find a Person window.
Once you have found the person, highlight their name in the list and press Select.
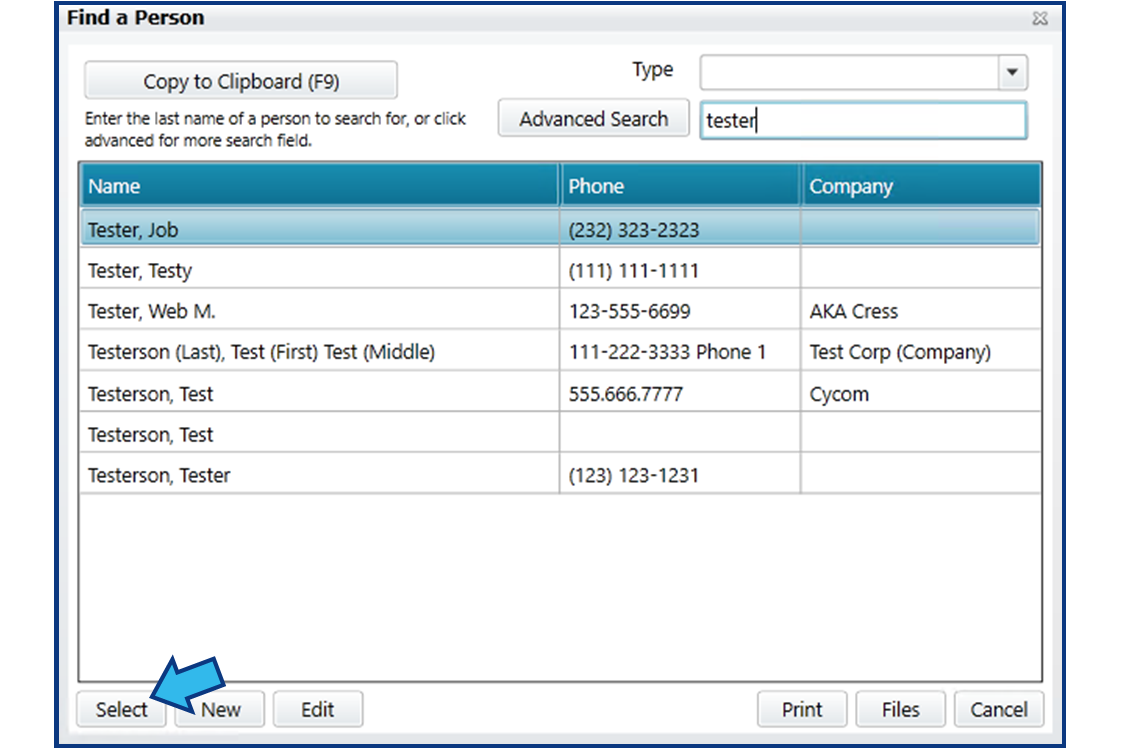
A Select Party window will appear. Select the type of party using the drop-down list of Party Type options and then select Ok.

Add Related Party
To add a new related party to a matter, first select the primary party on the left to which the related party is associated. Next, select New on the right side of the Parties tab.
Locate the person in the Find a Person window that appears. Enter the person’s last name in the search field to the right of the Advanced Search button. If a search reveals the person is not already identified in CLW, you will need to add them. To add a person, select New in the bottom left corner. Enter the known information for the person and then select Save. Now the person will appear in the search list.
Once you have found the person, highlight their name in the list and press Select.
A Select Relationship window will appear. Select the type of relationship using the drop-down list of Relationship options and then select Ok.

Edit Primary or Related Party
To edit a primary or related party’s contact record, first select the individual so that it appears highlighted in blue. Next, select the appropriate Edit button. To edit a primary party, select the Edit button on the left side.
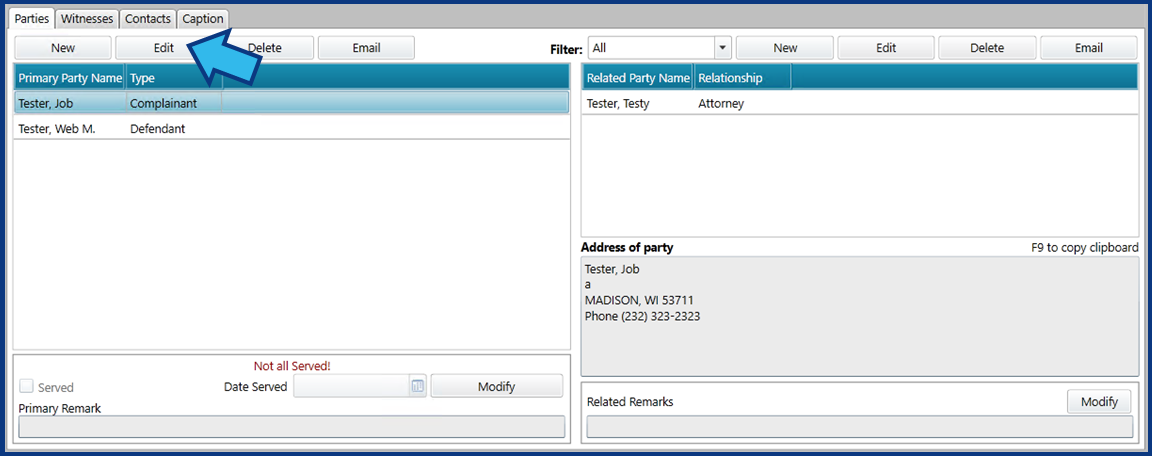
To edit a related party, select the Edit button on the right side.
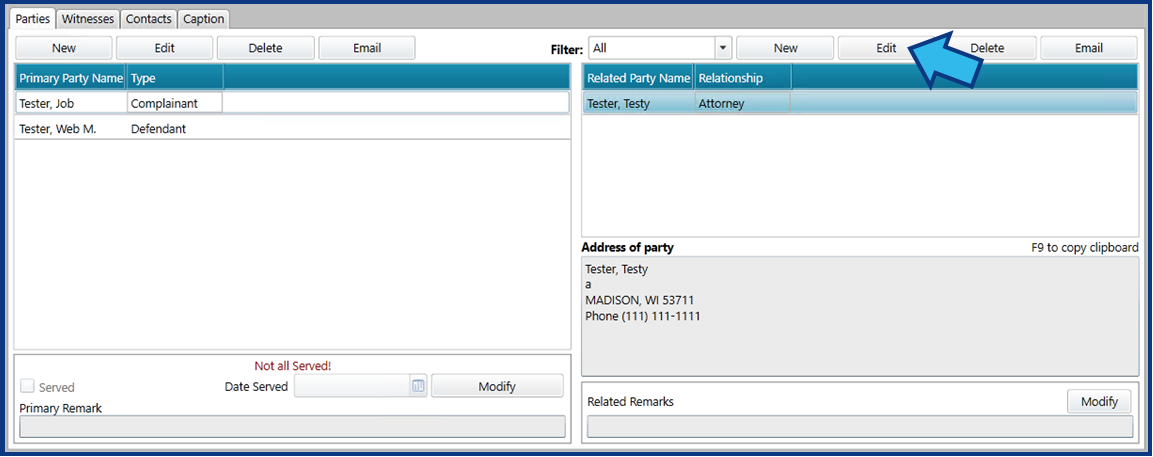
Edit the desired fields in the contact record and then select Save.
Delete Primary or Related Party
Delete Primary or Related Party
To delete a primary or related party from a matter, first select the individual so that it appears highlighted in blue. Next, select the appropriate Delete button. To delete a primary party, select the Delete button on the left side.
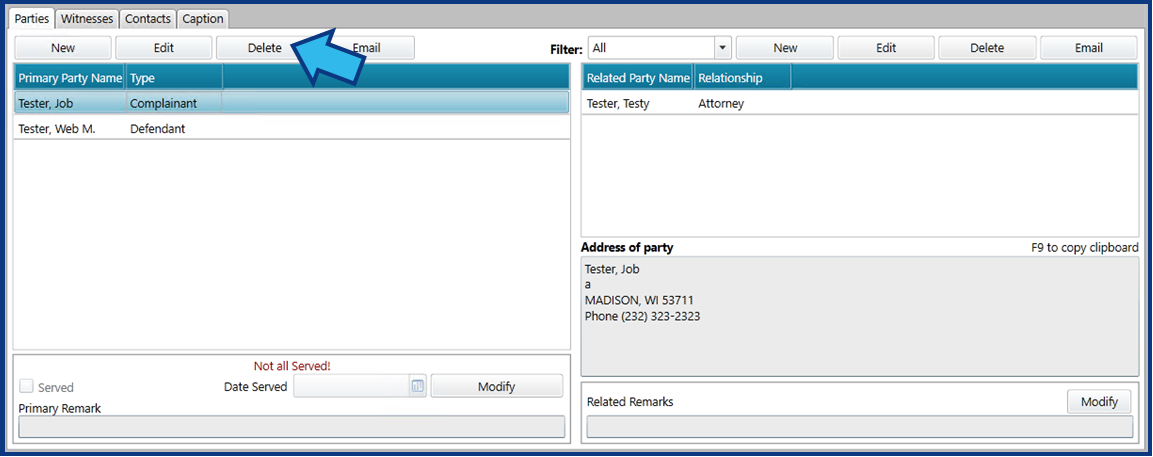
To delete a related party, select the Delete button on the right side.
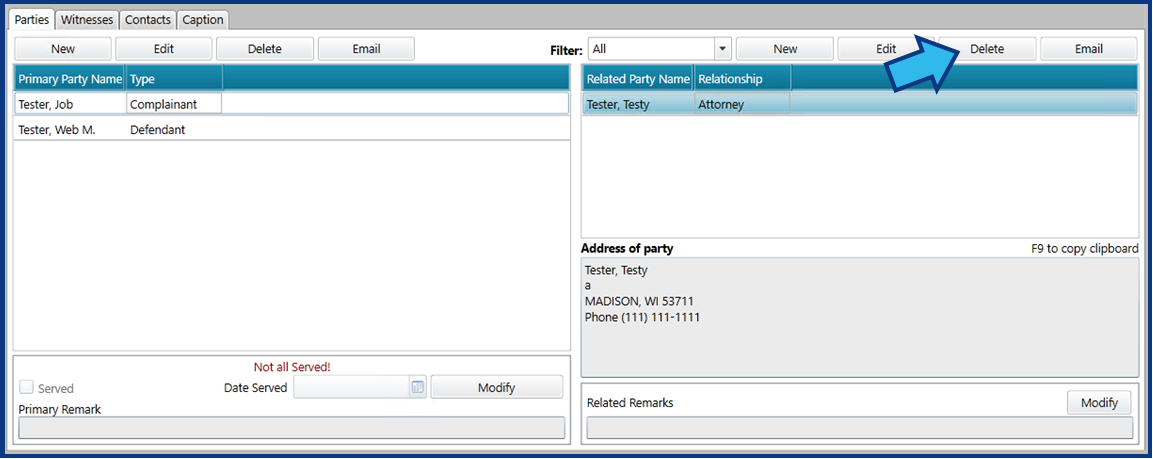
A Confirm window will appear. Select Yes to delete the individual from the matter. NOTE: Deleting an individual this way does not delete the contact record in CLW. It only removes their association to this matter.

Email Primary or Related Party
To email a primary or related party, first select the individual so that it appears highlighted in blue. Next, select the appropriate Email button. To email a primary party, select the Email button on the left side.
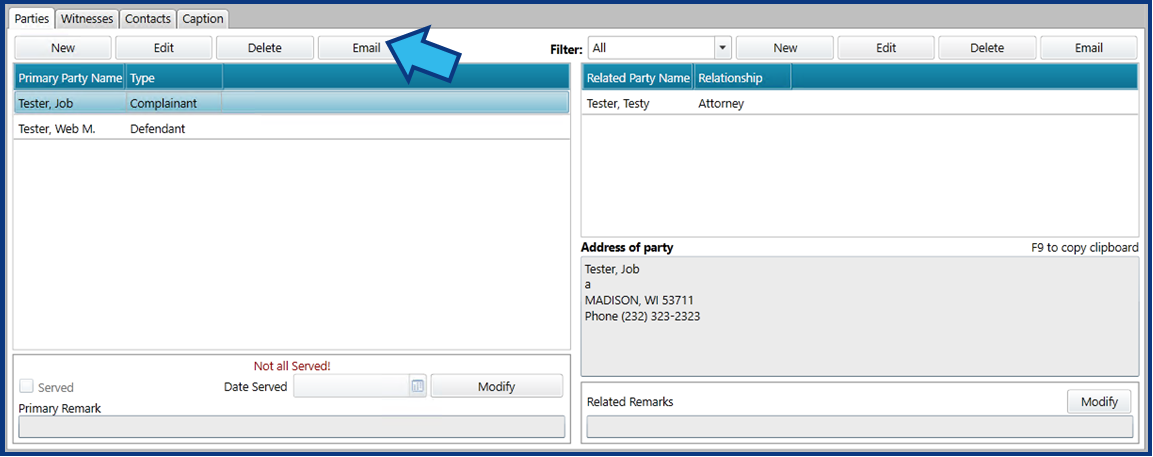
To email a related party, select the Email button on the right side.
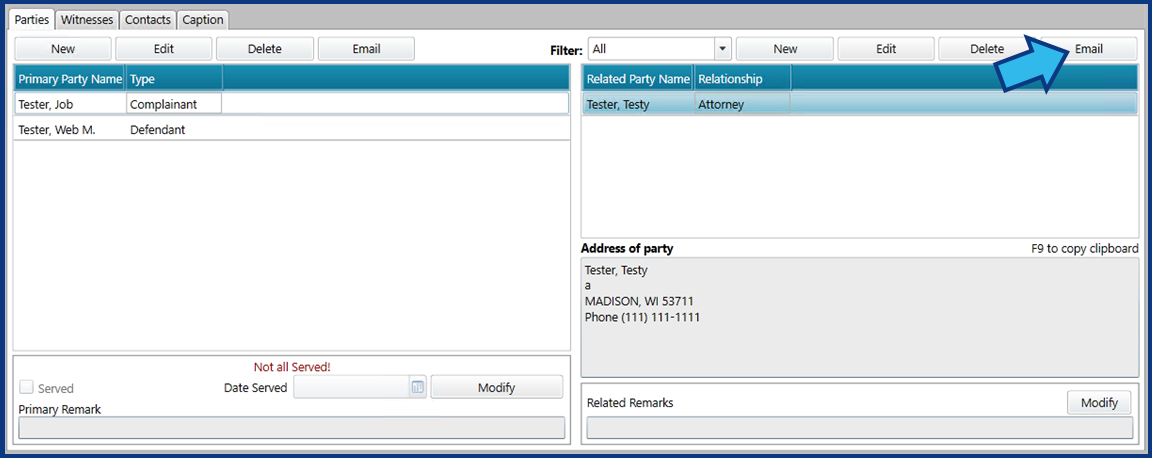
Your default email client will open a new email for you to edit as desired. The subject line will be pre-populated with matter information. If the person’s contact record lists an email address, the To field will be pre-populated with their email address. When you are finished editing the email, select Send. A record of any emails sent in this way will be maintained in the Documents tab of the Attachments view for the matter.
Add or Edit Remark for Primary or Related Party
To add or edit the remark for a primary or related party, first select the individual so that it appears highlighted in blue. Next, select the appropriate Modify button near the bottom. For a primary party, select the Modify button on the left side.
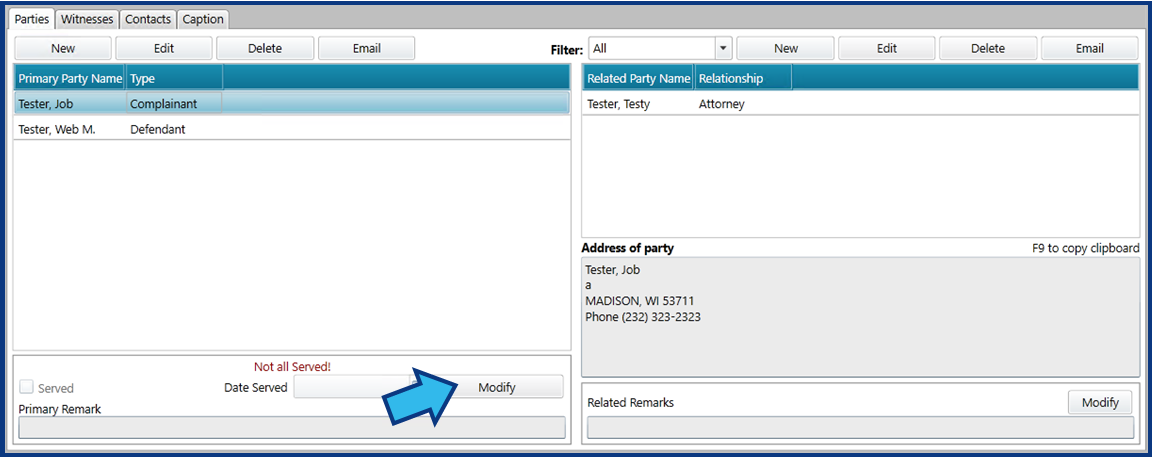
For a related party, select the Modify button on the right side.
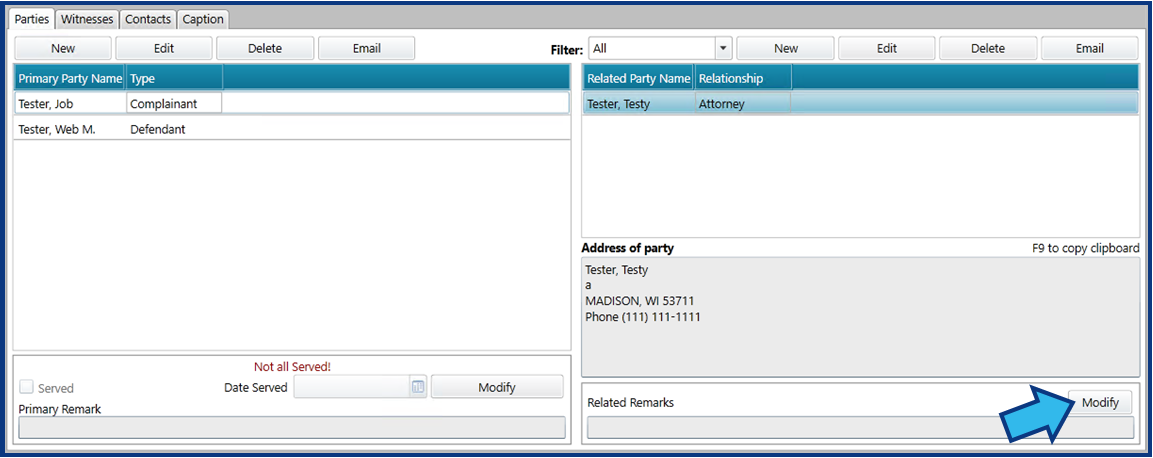
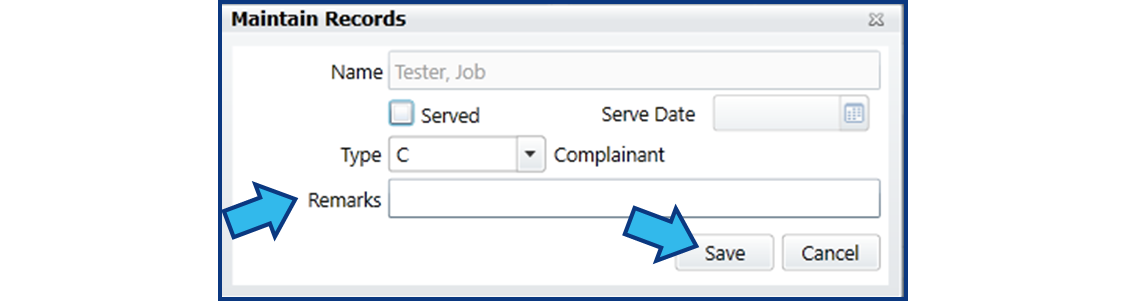
In the Maintain Records window that appears, enter or edit the Remarks field and then select Save.
Modify Primary or Related Party Type
To modify the primary party type or related party relationship type, first select the individual so that it appears highlighted in blue. Next, select the appropriate Modify button near the bottom. For a primary party, select the Modify button on the left side.
For a related party, select the Modify button on the right side.
In the Maintain Records window that appears, select the correct party or relationship type from the Type drop-down and then select Save.

Witnesses Tab
Contents:
- Add Witness
- Edit Witness
- Modify Witness Type
- Delete Witness
- Email Witness
- Add or Edit Remark for Witness
Add Witness
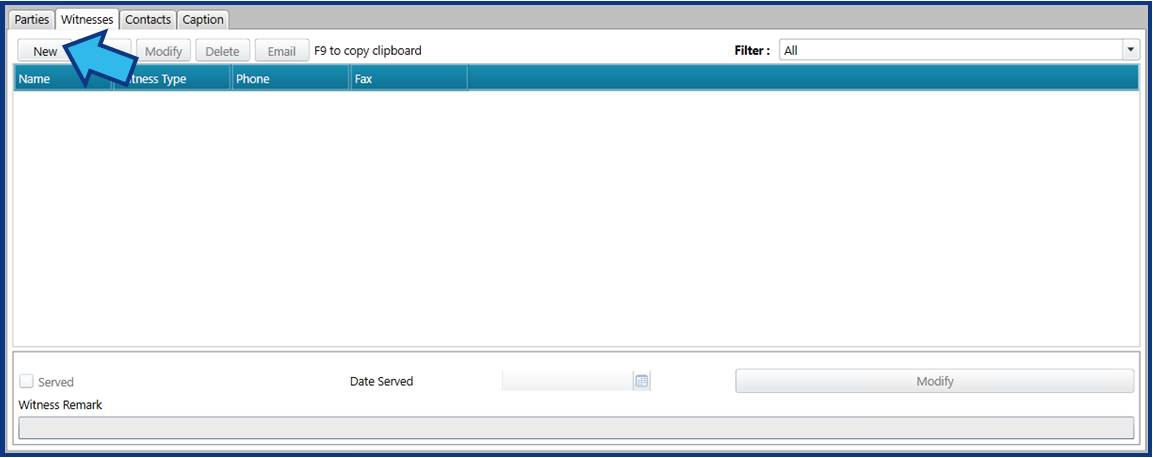
To add a new witness to a matter, select New on the Witnesses tab.
Locate the person in the Find a Person window that appears. Enter the person’s last name in the search field to the right of the Advanced Search button. If a search reveals the person is not already identified in CLW, you will need to add them. To add a person, select New in the bottom left corner. Enter the known information for the person and then select Save. Now the person will appear in the search list.
Once you have found the person, highlight their name in the list and press Select.
A Select Witness Type window will appear. Select the type of witness using the drop-down list of Witness Type options and then select Ok.

Edit Witness
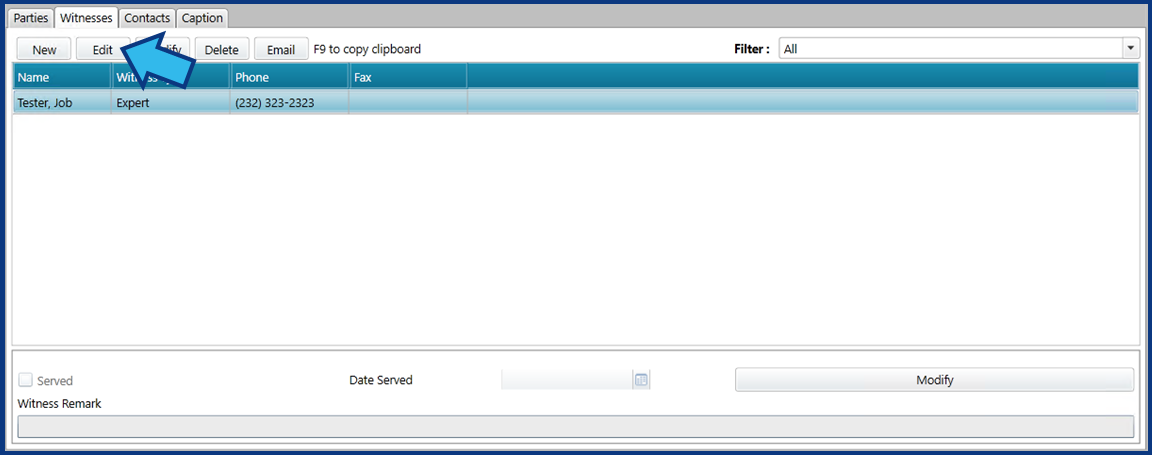
To edit a witness’s contact record, first select the individual so that it appears highlighted in blue. Next, select the Edit button.
Edit the desired fields in the contact record and then select Save.
Modify Witness Type
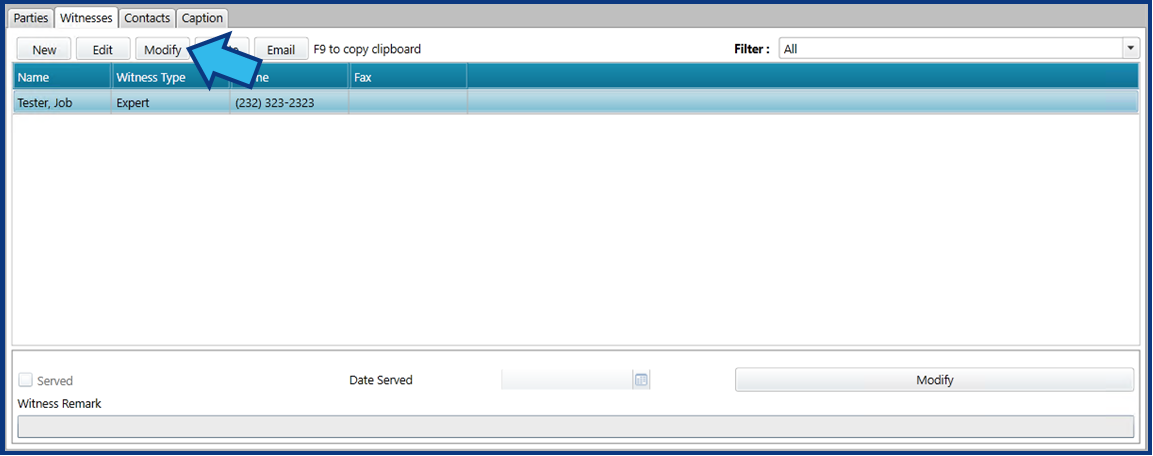
To modify a witness’s type, first select the individual so that it appears highlighted in blue. Next, select the Modify button.
In the Modify Witness Type window that appears, select the correct type from the Witness Type drop-down and then select Ok. NOTE: Your drop-down options may vary from those shown below.

Delete Witness
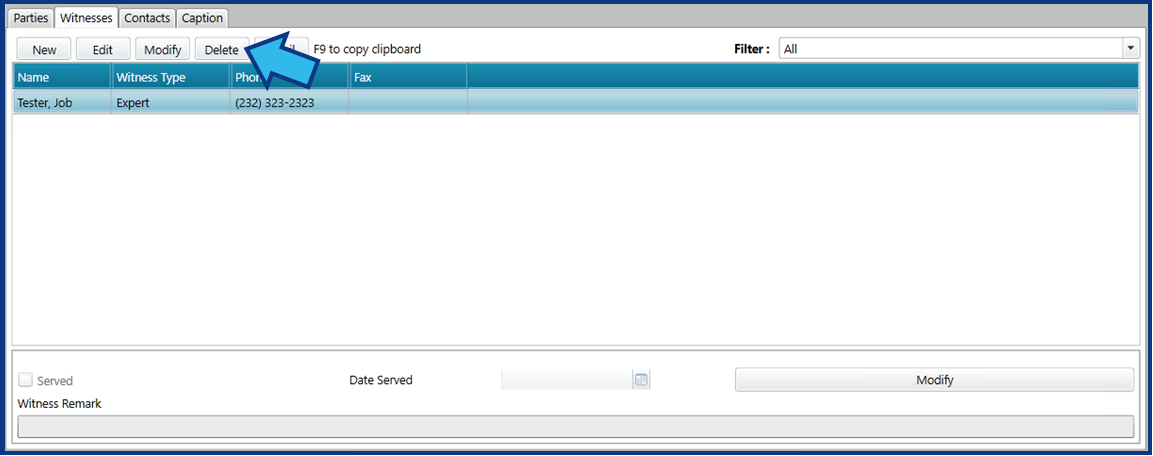
To delete a witness from a matter, first select the individual so that it appears highlighted in blue. Next, select the Delete button.
A Confirm window will appear. Select Yes to delete the individual from the matter. NOTE: Deleting an individual this way does not delete the contact record in CLW. It only removes their association to this matter.
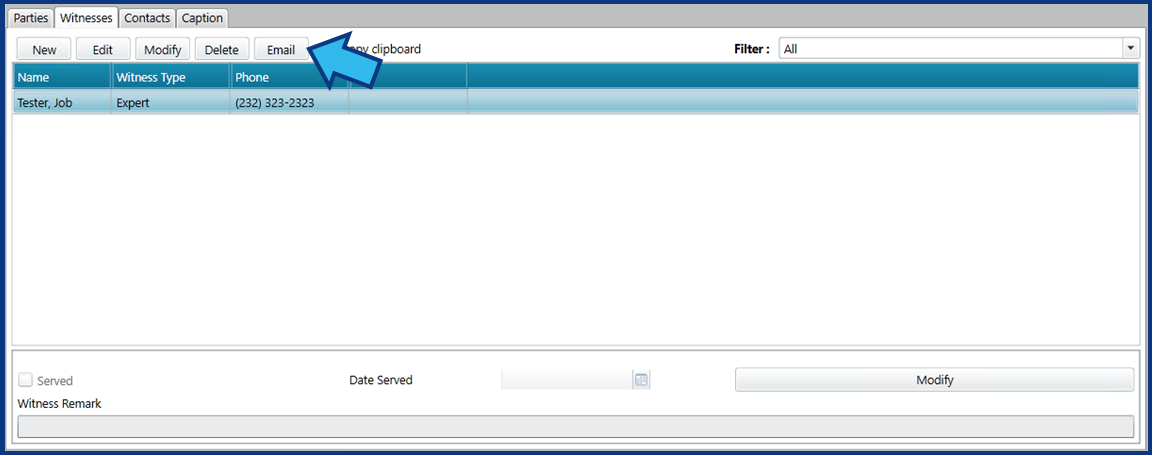
Email Witness
To email a witness, first select the individual so that it appears highlighted in blue. Next, select the Email button.
Your default email client will open a new email for you to edit as desired. The subject line will be pre-populated with matter information. If the person’s contact record lists an email address, the To field will be pre-populated with their email address. When you are finished editing the email, select Send. A record of any emails sent in this way will be maintained in the Documents tab of the Attachments view for the matter.
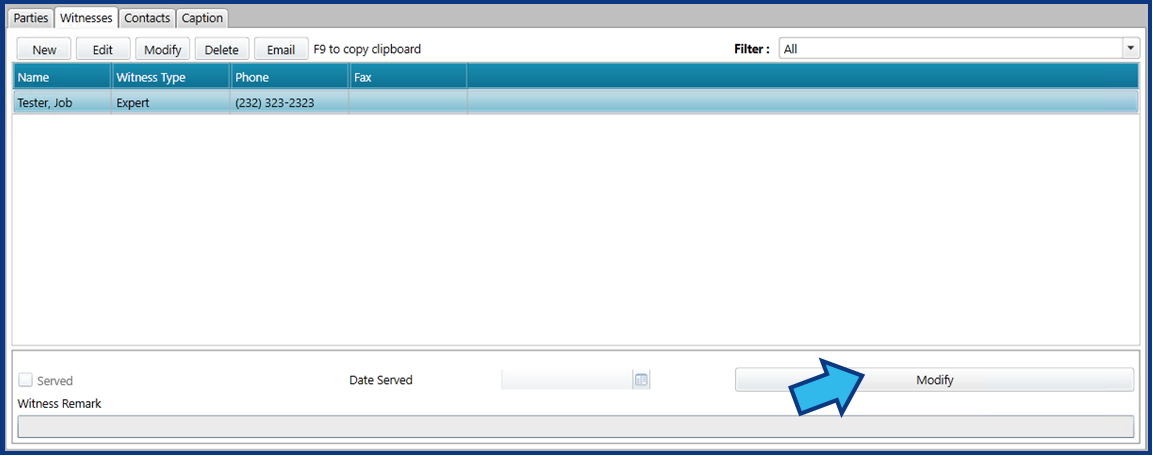
Add or Edit Remark for Witness
To add or edit the remark for a witness, first select the individual so that it appears highlighted in blue. Next, select the Modify button near the bottom.
In the Maintain Records window that appears, enter or edit the Remarks field and then select Save.

Contacts Tab
Contents:
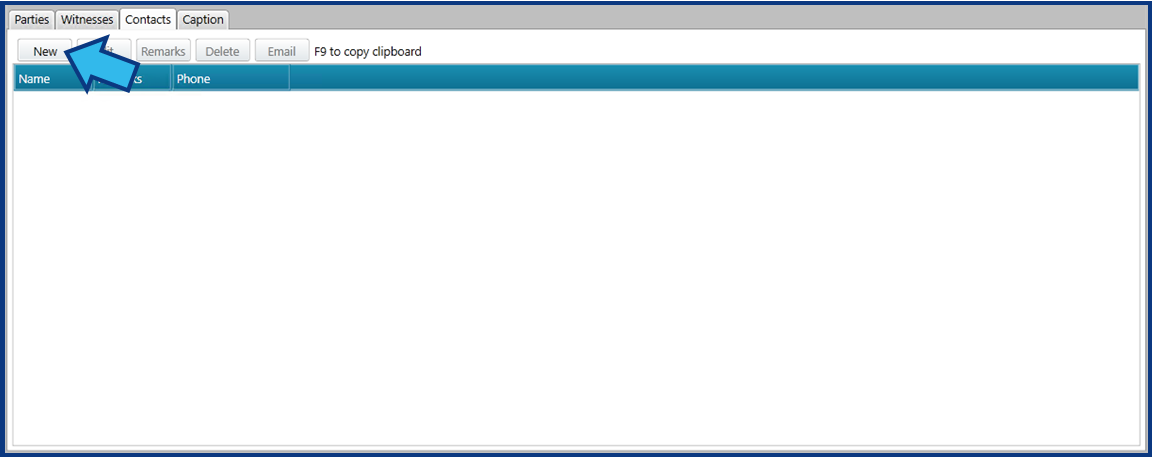
Add Contact
To add a new contact to a matter, select New on the Contacts tab.
Locate the person in the Find a Person window that appears. Enter the person’s last name in the search field to the right of the Advanced Search button. If a search reveals the person is not already identified in CLW, you will need to add them. To add a person, select New in the bottom left corner. Enter the known information for the person and then select Save. Now the person will appear in the search list.
Once you have found the person, highlight their name in the list and press Select.
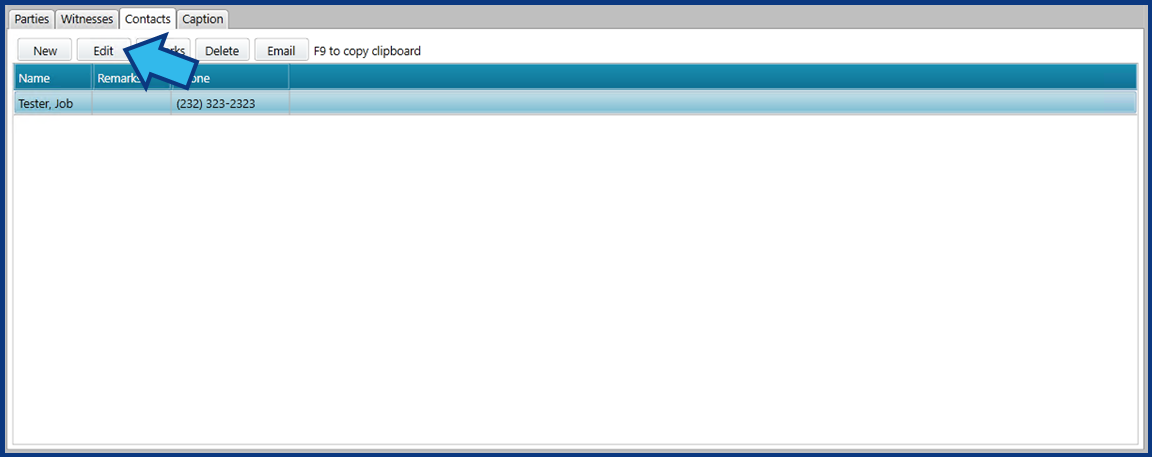
Edit Contact
To edit a contact’s contact record, first select the individual so that it appears highlighted in blue. Next, select the Edit button.
Edit the desired fields in the contact record and then select Save.
Add or Edit Remark for Contact
To add or edit the remark for a contact, first select the individual so that it appears highlighted in blue. Next, select the Remarks button.
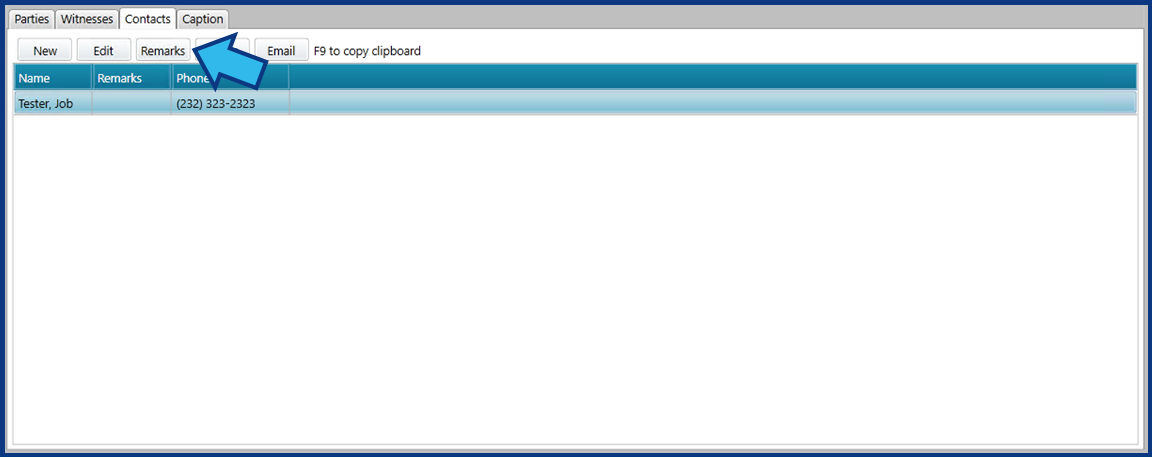
In the Remarks window that appears, enter or edit the Remarks field and then select Ok.

Delete Contact
To delete a contact from a matter, first select the individual so that it appears highlighted in blue. Next, select the Delete button.
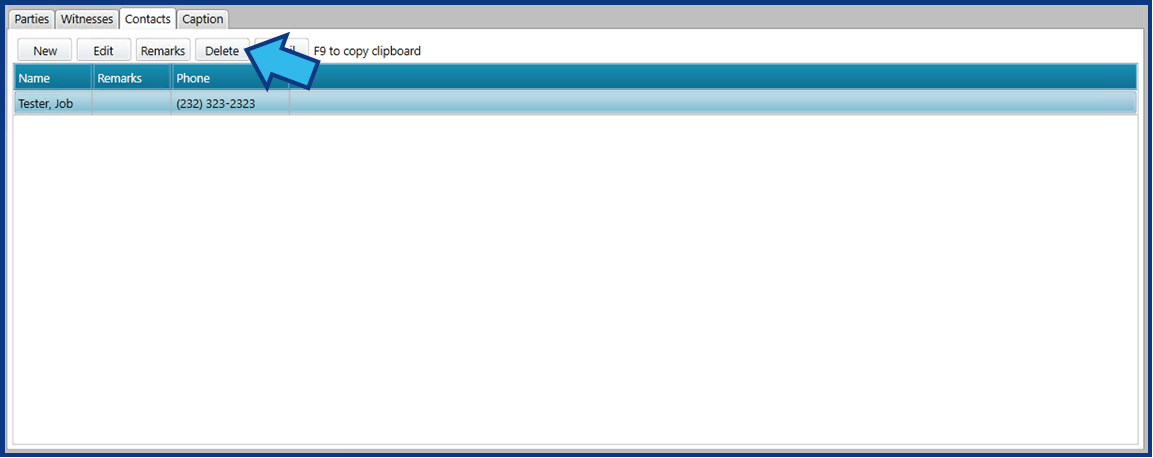
A Confirm window will appear. Select Yes to delete the individual from the matter. NOTE: Deleting an individual this way does not delete the contact record in CLW. It only removes their association to this matter.
Email Contact
To email a contact, first select the individual so that it appears highlighted in blue. Next, select the Email button.

Your default email client will open a new email for you to edit as desired. The subject line will be pre-populated with matter information. If the person’s contact record lists an email address, the To field will be pre-populated with their email address. When you are finished editing the email, select Send. A record of any emails sent in this way will be maintained in the Documents tab of the Attachments view for the matter.
Caption Tab
Contents:
Add Captions
Caption for Pleadings and Full Case Caption are unlimited text fields in which you can directly enter or edit text. These fields can be used as a quick way to find and copy text to be pasted into other documents or emails.

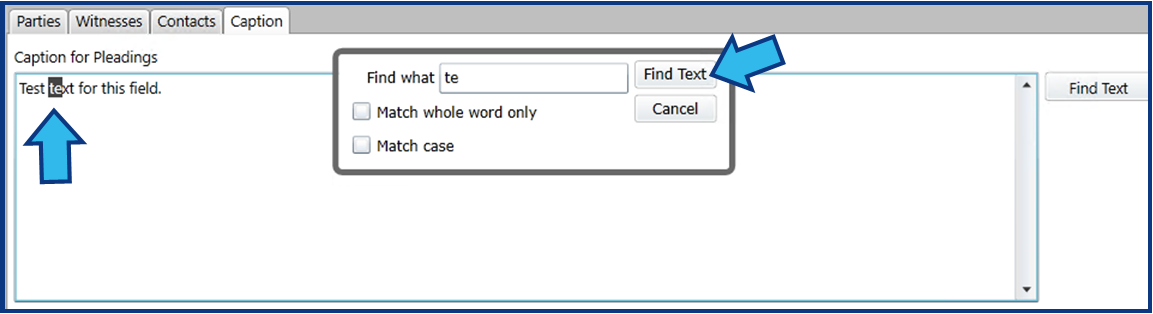
Search Caption Text
To quickly search the caption text in either the Caption for Pleadings or Full Case Caption fields, select the appropriate Find Text button to the right of the field you want to search.
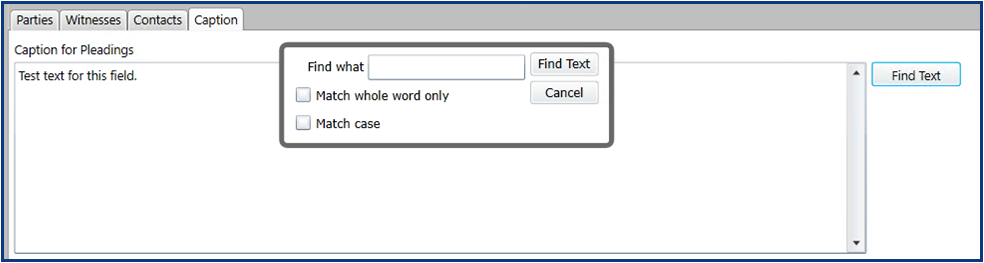
In the window that appears, enter the text for which you are searching in the Find what text field.

If you want to only find whole words, place a check in the box beside Match whole word only. If you want to only find text that matches the case you have typed in the Find what field, place a check in the box beside Match case.
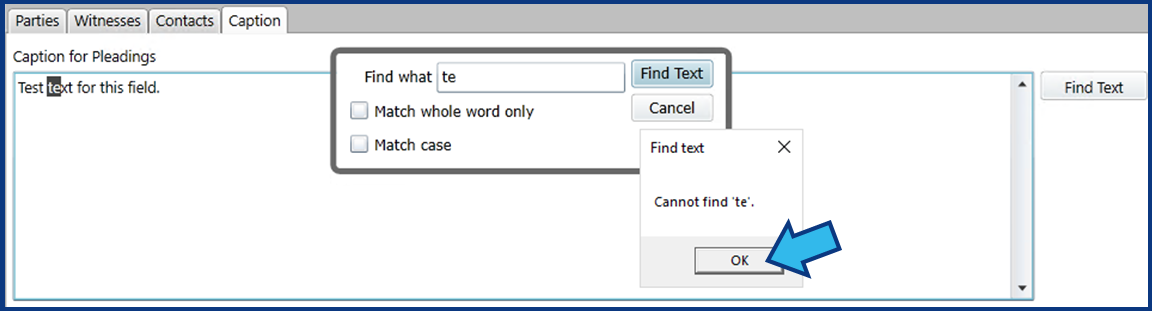
Select the Find Text button. If the text you entered is found, the first occurrence will be highlighted in the caption field.
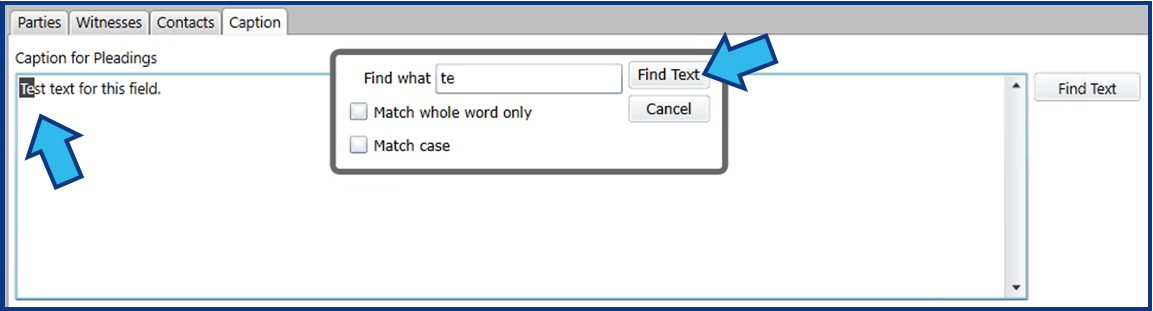
If you want to see the next occurrence, select the Find Text button in the Find Text window again.
If there are no further occurrences or the text you are searching for is not found at all, you will be prompted with a Find text window alerting you nothing was found. Select OK to dismiss the Find text window.
Comments
0 comments
Please sign in to leave a comment.