
Need a printable version of this article? Download the Article (PDF Version).
There are 4 methods for importing email into CLW.
Methods 1, 2, and 3 work for any email client. Method 4 works for Microsoft Outlook emails when the optional Cycom Email Exporter Add-In is installed and configured properly.
Need a reminder? Use the Quick Reference Guides below:
- Import Files Button
- CyImportFile Desktop Icon
- CyImportFile Send To Menu
- Cycom Email Exporter Add-In Option
Need more details? Use the Standard Guides below:
- Import Files Button
- CyImportFile Desktop Icon
- CyImportFile Send To Menu
- Cycom Email Exporter Add-In Option
Import Files Button Quick Reference Guide
There are 6 steps to complete this task:
-
Save your email to your PC.
-
Open the Attachments view of the matter.
-
Select Import Files.
-
Select the email file.
-
Adjust document name and settings as desired.
-
Select Save.
Import Files Button Standard Guide
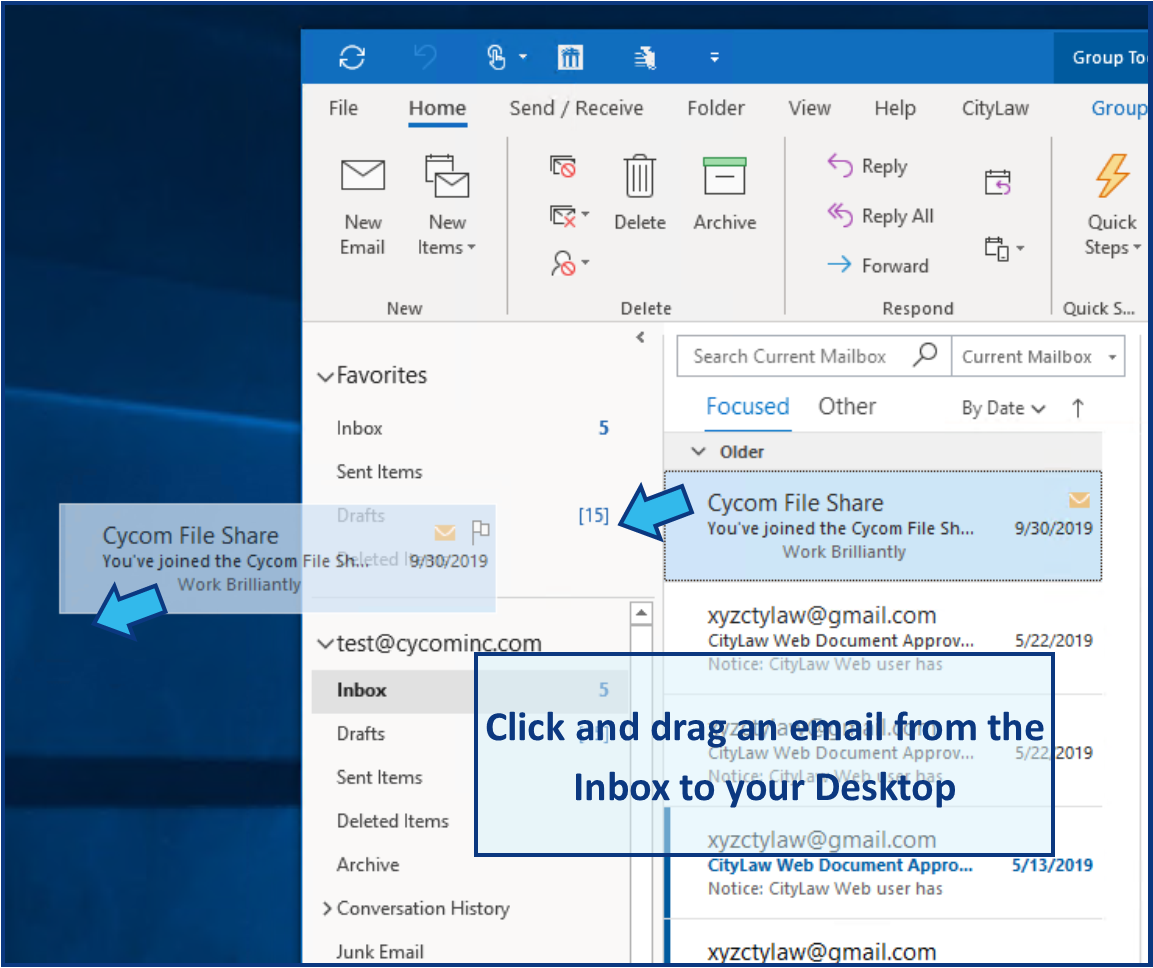
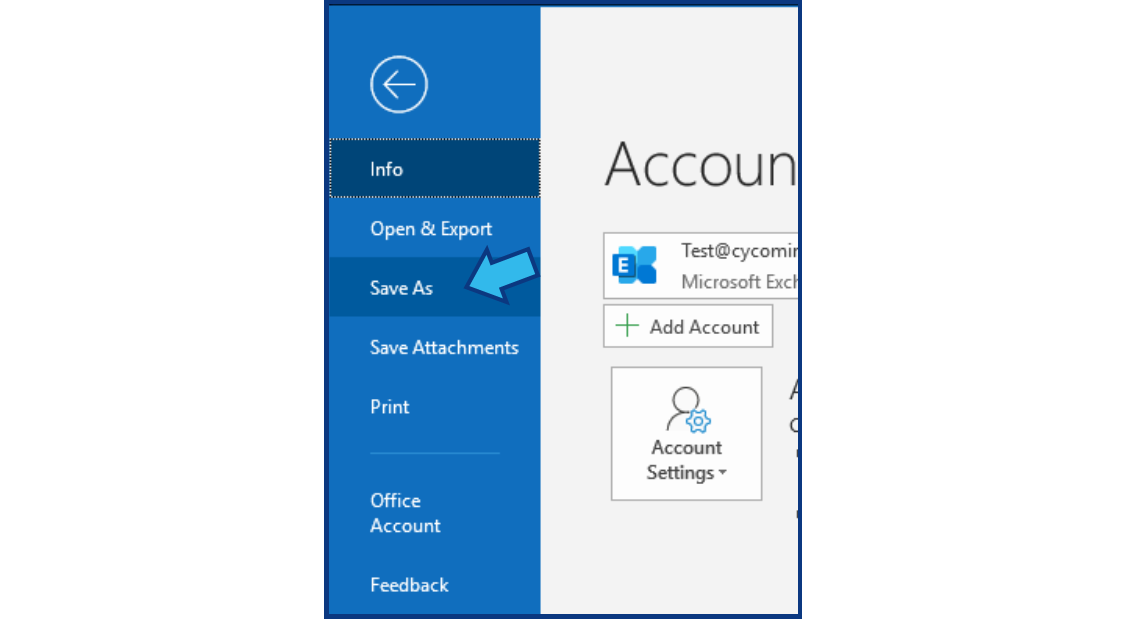
Step 1. Save your email to your PC.
In some email applications, such as Microsoft Outlook, you can drag the email from the inbox list directly onto your Desktop to save it to your PC.
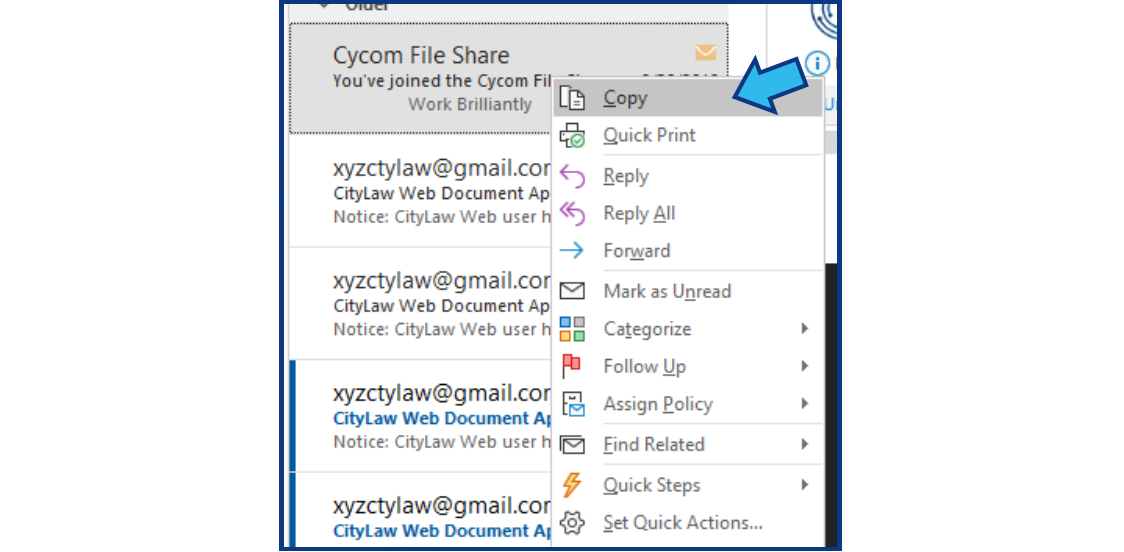
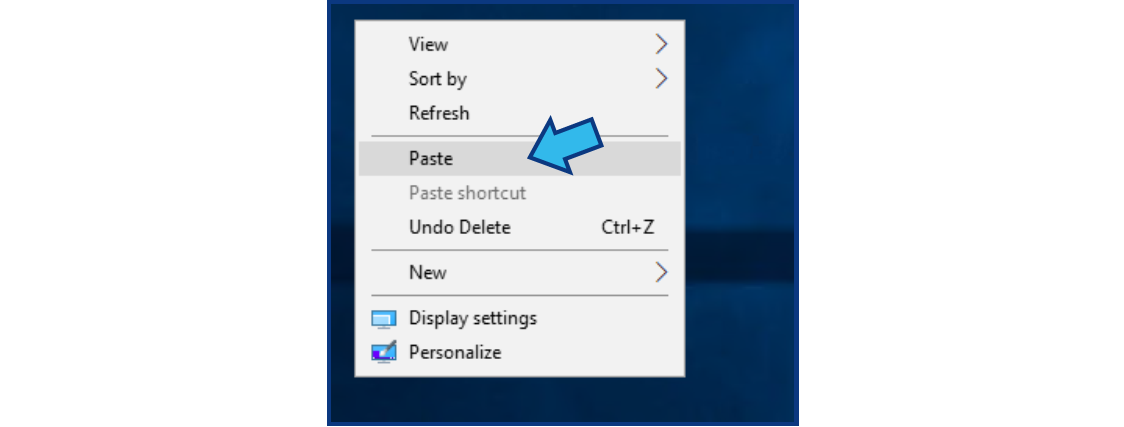
You can also right-click on an email to create a copy and right-click your Desktop or inside any folder in File Explorer to paste the email there.
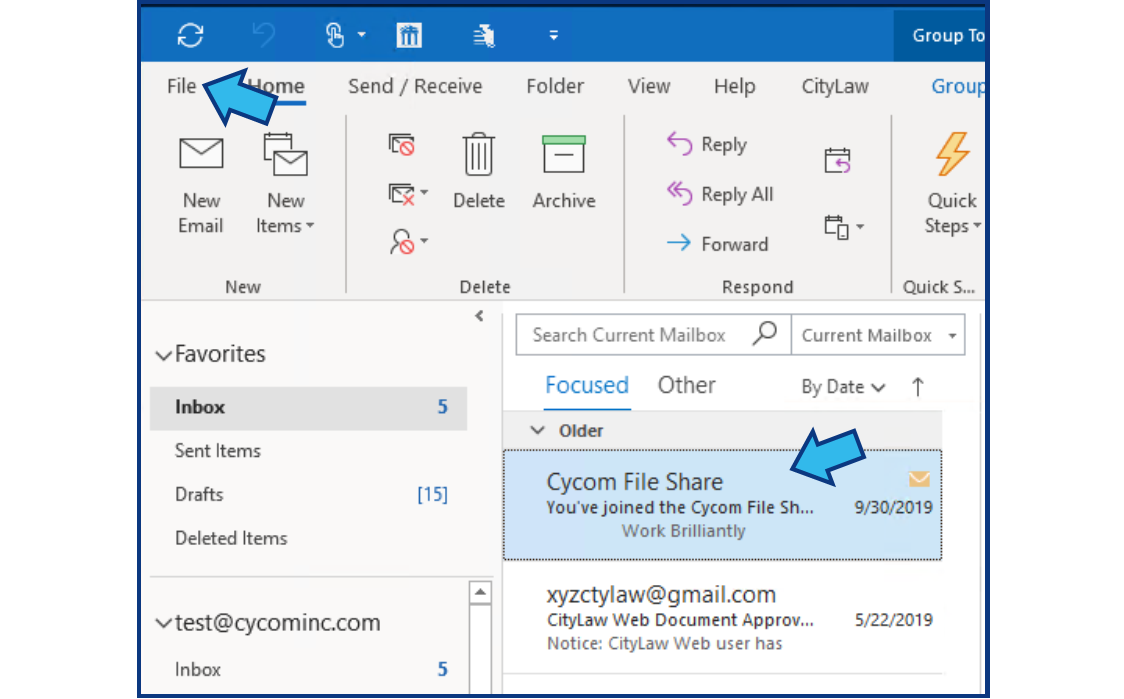
Finally, you can select an email and then select File and Save As to save the message in the folder you wish. If your email client does not have any of these options you may need to refer to their documentation to learn how to save a copy of an email to your PC.
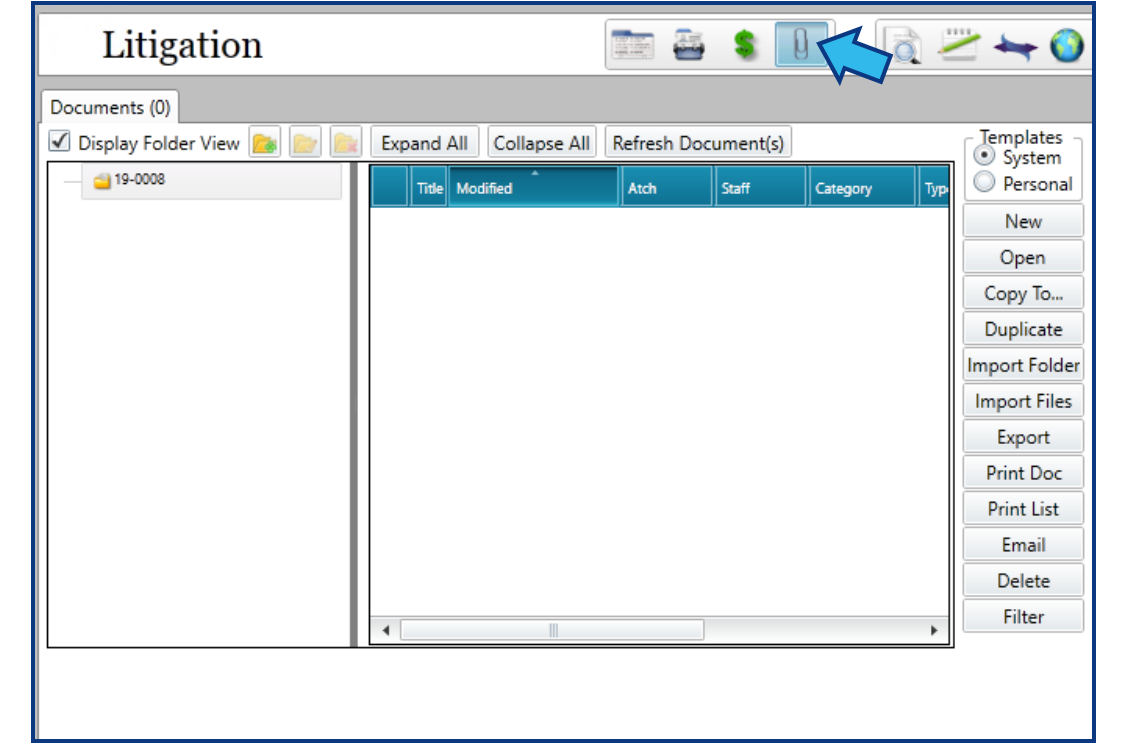
Step 2. Open the Attachments view of the matter.
Open the matter to which you want to import the email. Select the Attachments view in the Module Toolbar (the paperclip icon).
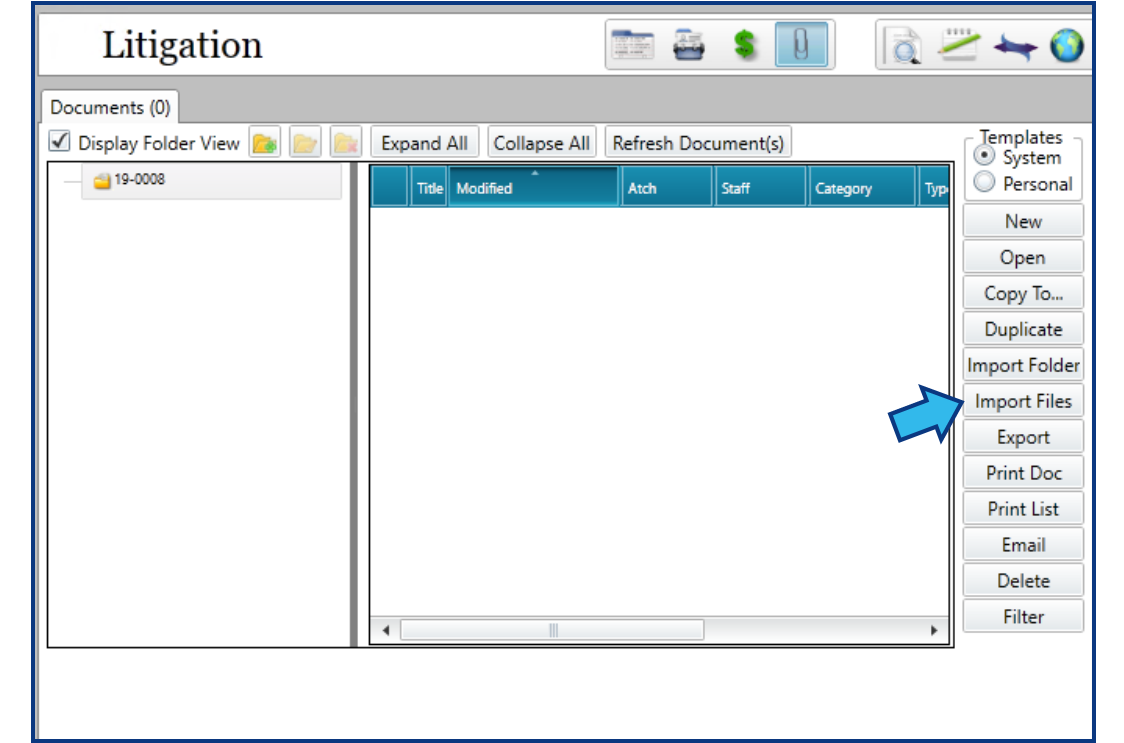
Step 3. Select Import Files.
On the Documents tab, select Import Files from the column of buttons on the right.
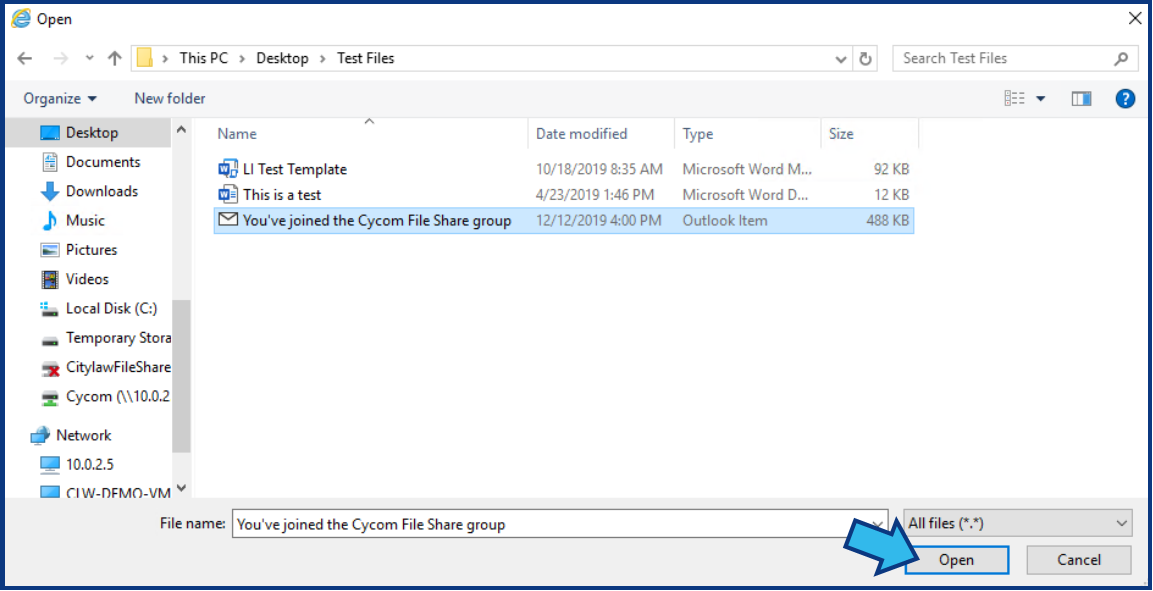
Step 4. Select the email file.
Navigate to the location where the email was saved from Step 1. Select Open.
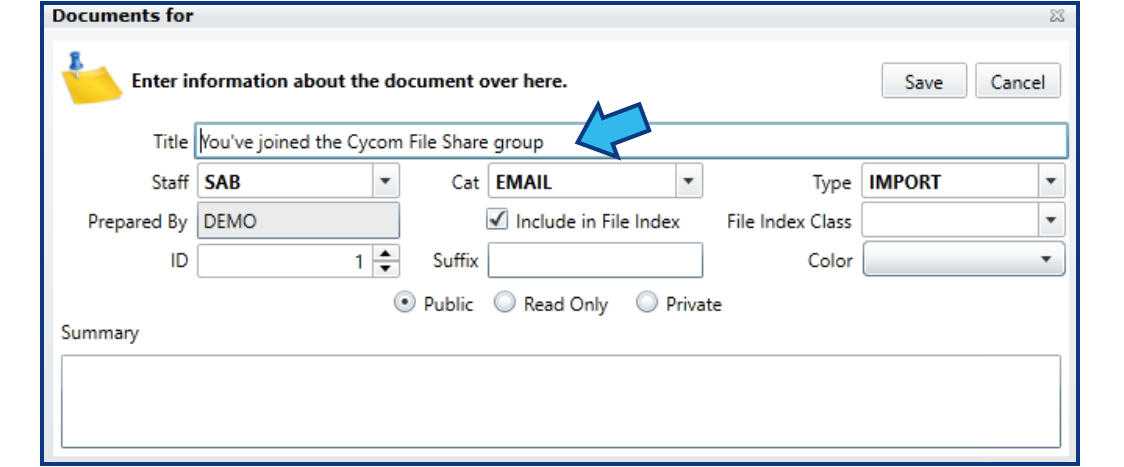
Step 5. Adjust document name and settings as desired.
In the Documents settings box, enter or adjust the settings for this message. You can provide a more appropriate title, if desired. Fill in the remaining fields as appropriate.
Step 6. Select Save.
To import the email to CLW, press Save. A confirmation dialog will appear confirming the message was imported successfully.

CyImportFile Desktop Icon Quick Reference Guide
There are 3 steps to complete this task:
CyImportFile Desktop Icon Standard Guide
Step 1. Save your email to your PC.
In some email applications, such as Microsoft Outlook, you can drag the email from the inbox list directly onto your Desktop to save it to your PC.
You can also right-click on an email to create a copy and right-click your Desktop or inside any folder in File Explorer to paste the email there.
Finally, you can select an email and then select File and Save As to save the message in the folder you wish. If your email client does not have any of these options you may need to refer to their documentation to learn how to save a copy of an email to your PC.
Step 2. Drag saved email onto CyImportFile Desktop Icon.
Locate the file on the Desktop or in File Explorer. Select the file, and while holding down the left mouse button, drag the file over the CyImportFile Desktop icon. Release the left mouse button when "+ Open with File Import Utility" appears when the mouse is hovered over the CyImportFile Desktop icon.

NOTE: If you do not have the CyImportFile Desktop icon, refer to this article for instructions for adding it to your Desktop: Add CyImportFile Icon to Desktop
Step 3. Select a matter.
When a file is successfully dragged and released onto the CyImportFile Desktop icon, a Select a Matter window will appear. You can rename the Document Title at this point, if desired.
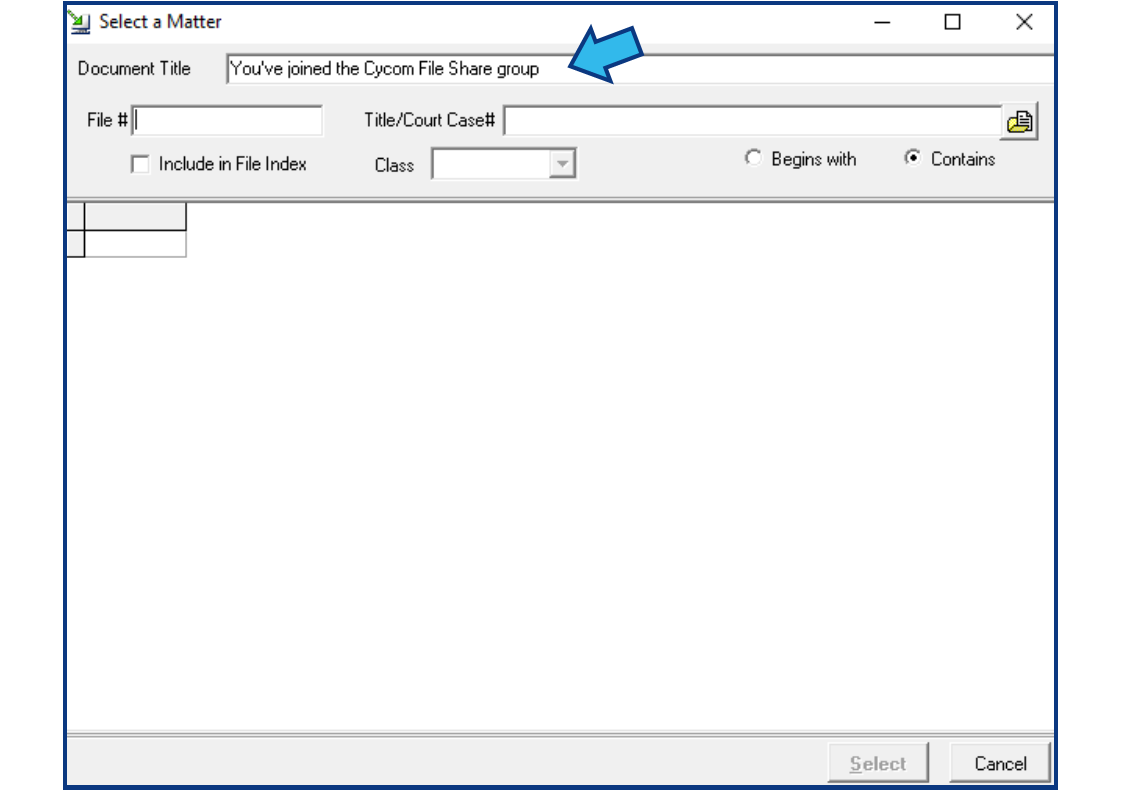
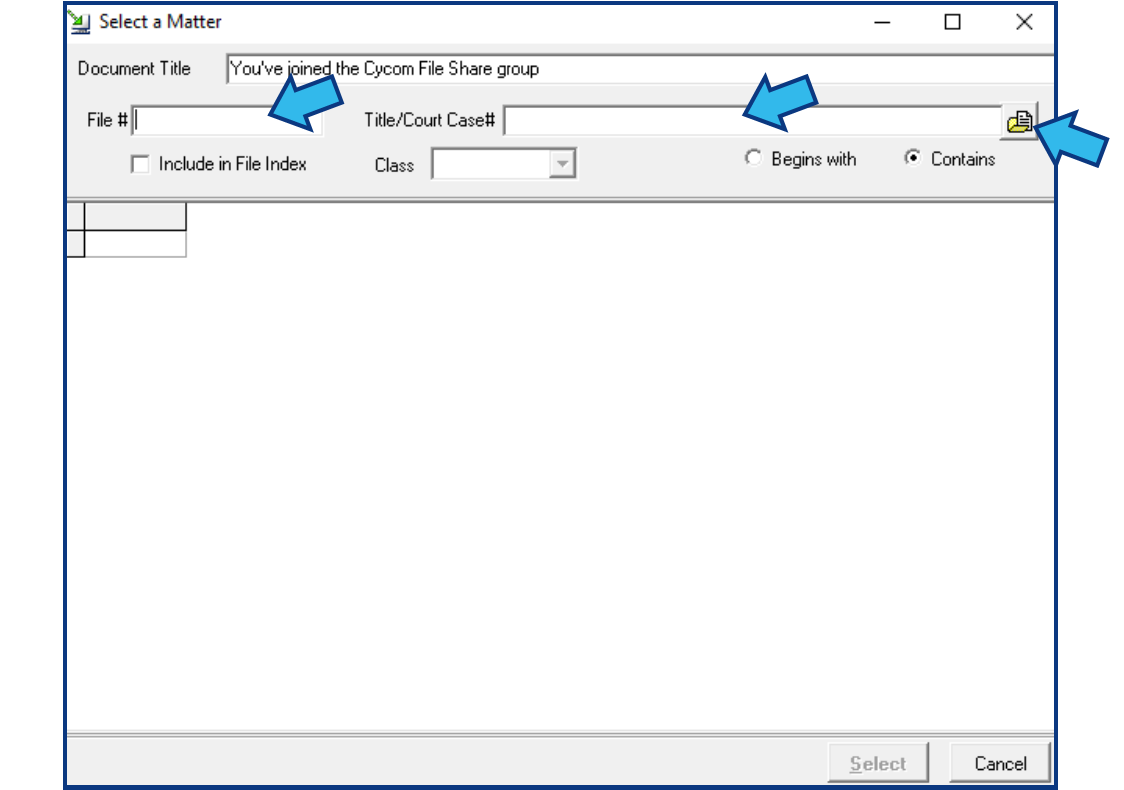
Enter all or part of the File Number or Title of the matter to which you wish to import this email in the appropriate field and press Enter on the keyboard or select the open file button at the right of the Title field.
A list of matters with the provided details will appear. Highlight the matter and press Select.
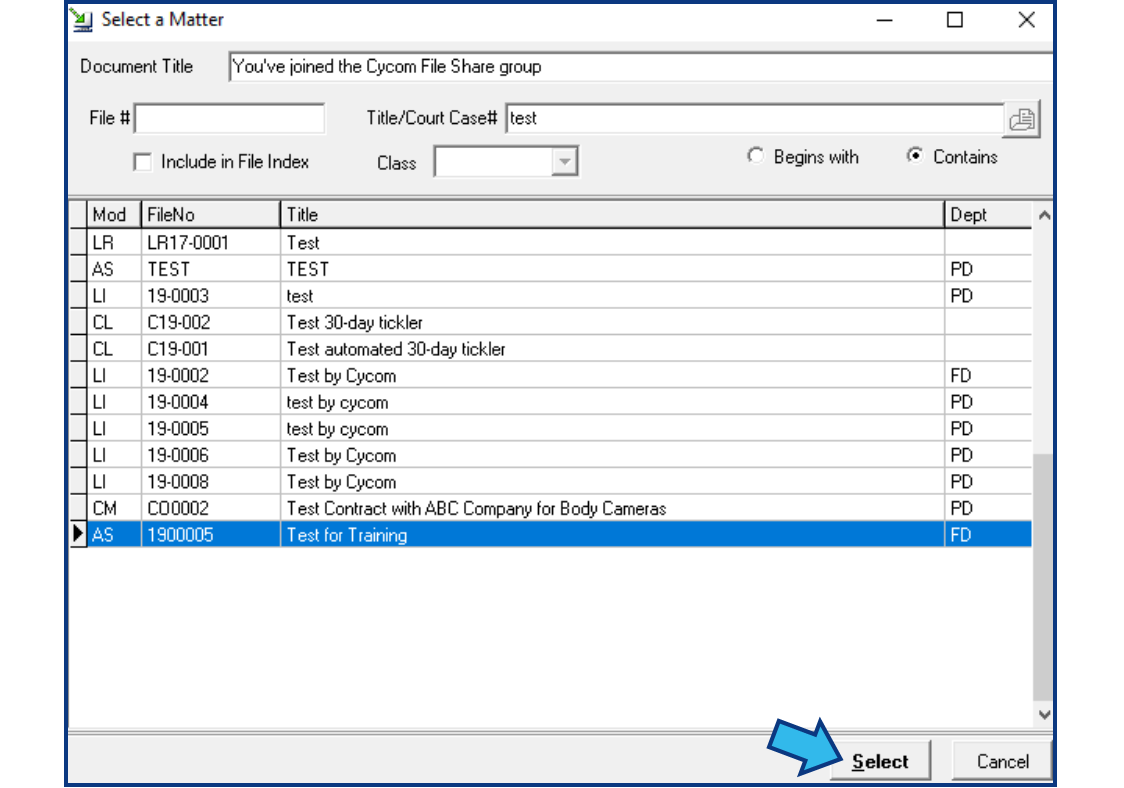
NOTE: You can select multiple matters by holding down the SHIFT or the CTRL button while using the mouse to select the matters. SHIFT selects all matters between the first and last selected. CTRL selects matters individually.
A confirmation dialog will appear confirming the message was imported successfully.

CyImportFile Send To Menu Quick Reference Guide
There are 3 steps to complete this task:
CyImportFile Send To Menu Standard Guide
Step 1. Save your email to your PC.
In some email applications, such as Microsoft Outlook, you can drag the email from the inbox list directly onto your Desktop to save it to your PC.
You can also right-click on an email to create a copy and right-click your Desktop or inside any folder in File Explorer to paste the email there.
Finally, you can select an email and then select File and Save As to save the message in the folder you wish. If your email client does not have any of these options you may need to refer to their documentation to learn how to save a copy of an email to your PC.
Step 2. Select the Send To CyImportFile option.
Locate the file on your Desktop or inside File Explorer. Right-click on the file and select Send To. In the list that appears, select the CyImportFile option.
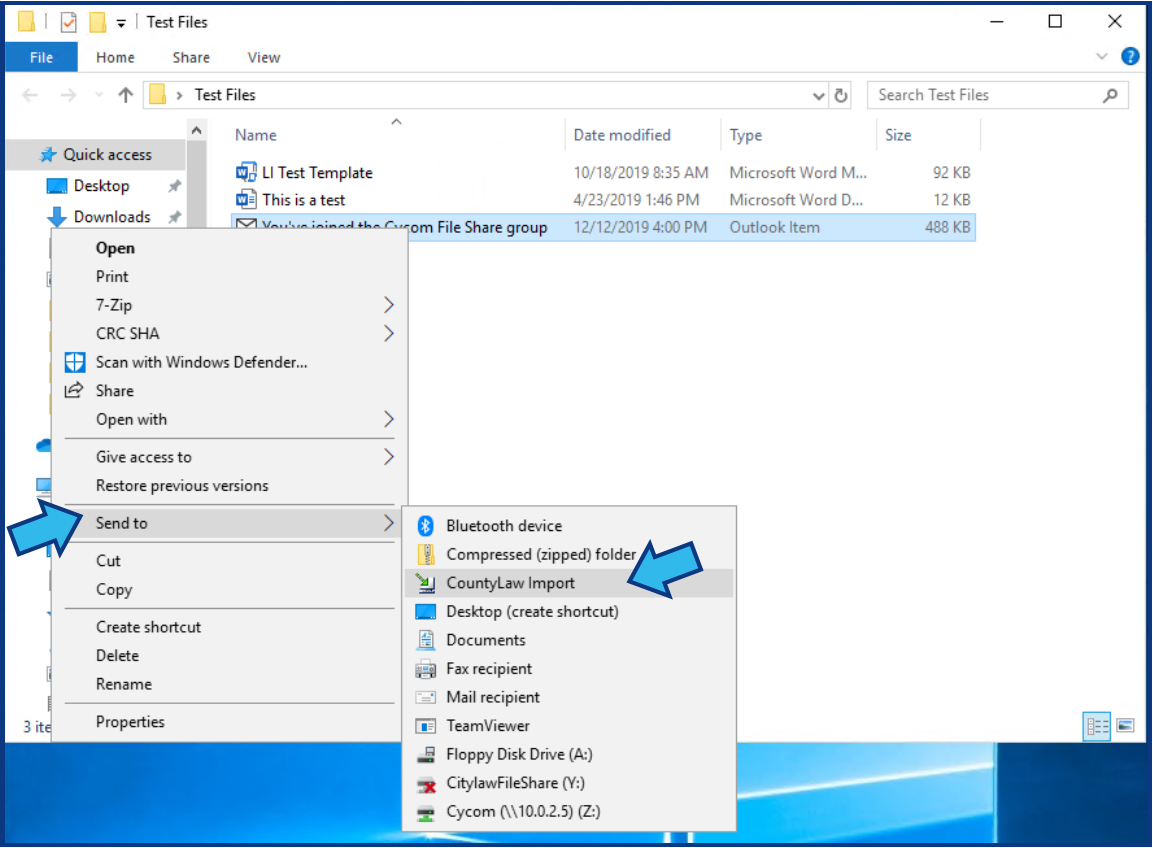
NOTE: Your option may be labeled as CityLaw / CountyLaw Import or something similar. If you do not see an option beginning with CyImport, Cycom, CityLaw, or CountyLaw, your Send To Menu option may not be set up. Refer to the article for instructions to set up the Send To Menu option: Add CityLaw / CountyLaw to Send To Menu
Step 3. Select a matter.
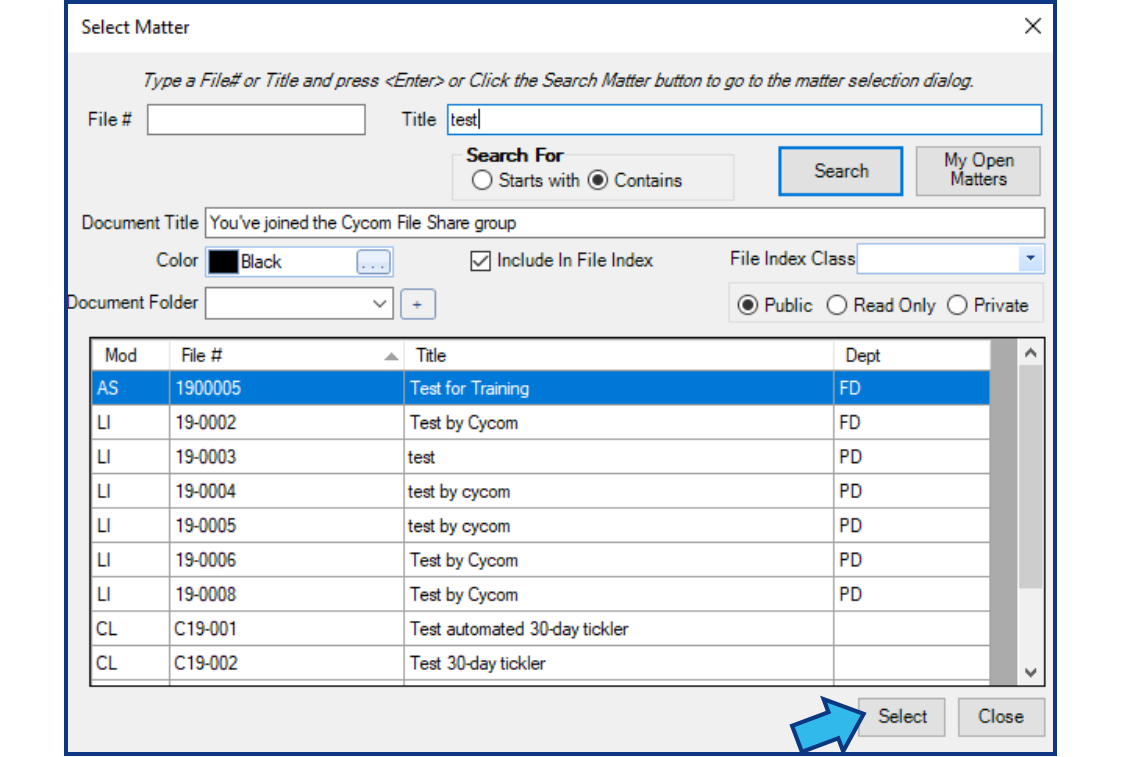
A Select a Matter window will appear. You can rename the Document Title at this point, if desired.
Enter all or part of the File Number or Title of the matter to which you wish to import this email in the appropriate field and press Enter on the keyboard or select the open file button at the right of the Title field.
A list of matters with the provided details will appear. Highlight the matter and press Select.
NOTE: You can select multiple matters by holding down the SHIFT or the CTRL button while using the mouse to select the matters. SHIFT selects all matters between the first and last selected. CTRL selects matters individually.
A confirmation dialog will appear confirming the message was imported successfully.
Cycom Email Exporter Add-In Option Quick Reference Guide
There are 3 steps to complete this task:
Cycom Email Exporter Add-In Option Standard Guide
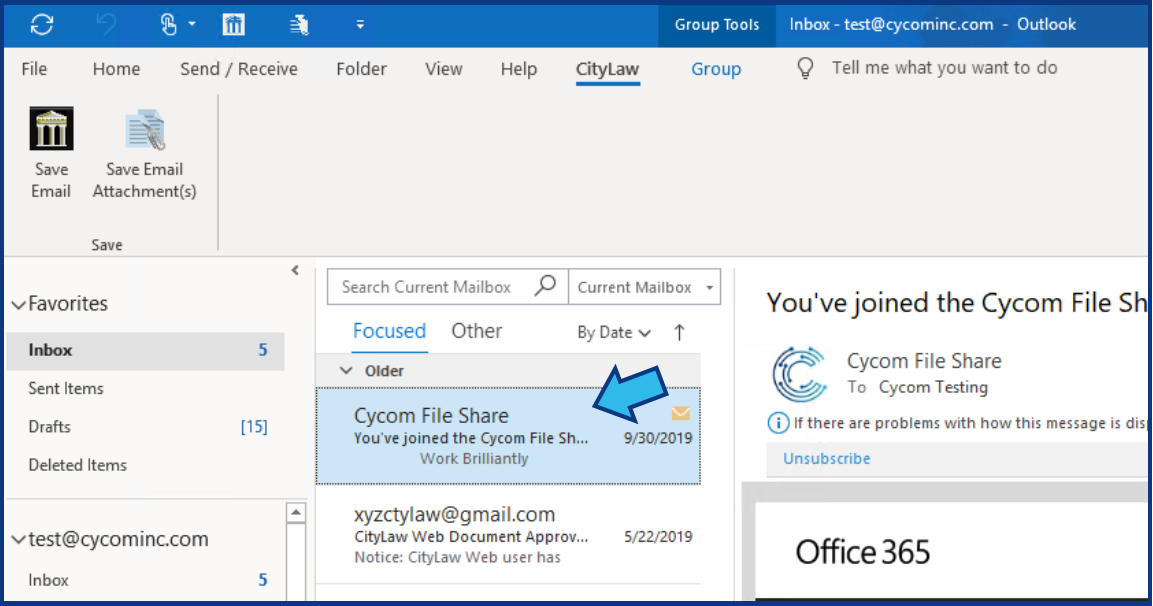
Step 1. Select the email in the Outlook inbox.
In Microsoft Outlook, locate and select the email in the inbox list.
NOTE: You can select multiple emails by holding down the SHIFT or the CTRL button while using the mouse to select the emails. SHIFT selects all emails between the first and last selected. CTRL selects emails individually.
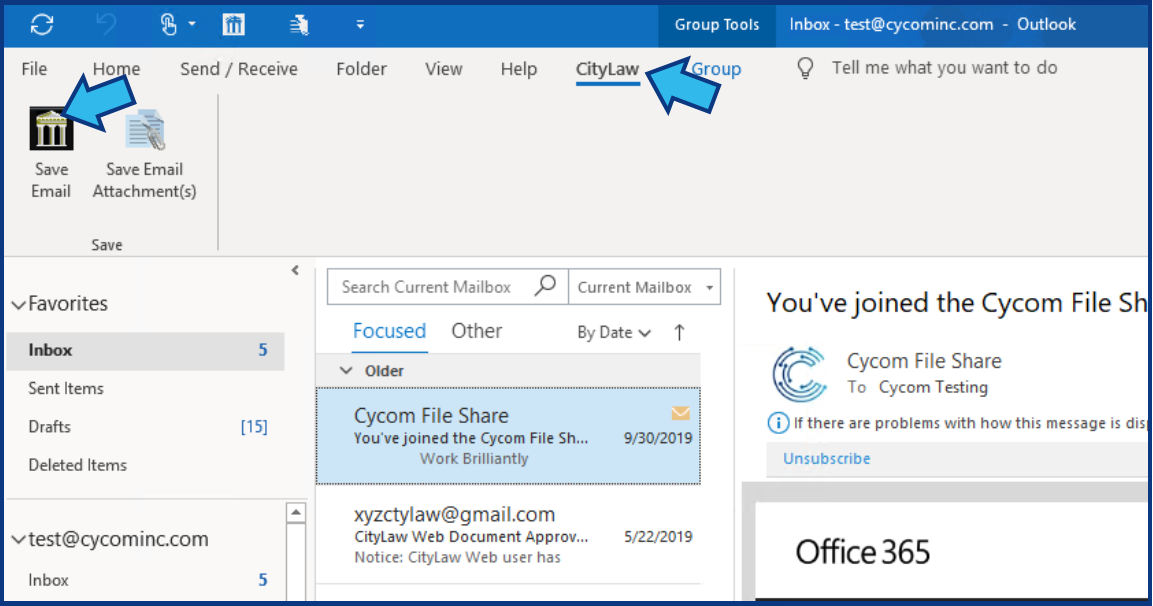
Step 2. Select the Save Email Option.
The Save Email option is located on the CityLaw / CountyLaw tab on the tab bar at the top of Outlook. If you don't see a CityLaw, CountyLaw, or Cycom tab in your Outlook, you may not have the optional Cycom Email Exporter Add-In, or it may be inactive. Refer to the following article if the add-in is inactive: Enable CityLaw / CountyLaw in Outlook
Step 3. Select a matter.
A Select a Matter window will appear. You can rename the Document Title at this point, if desired.
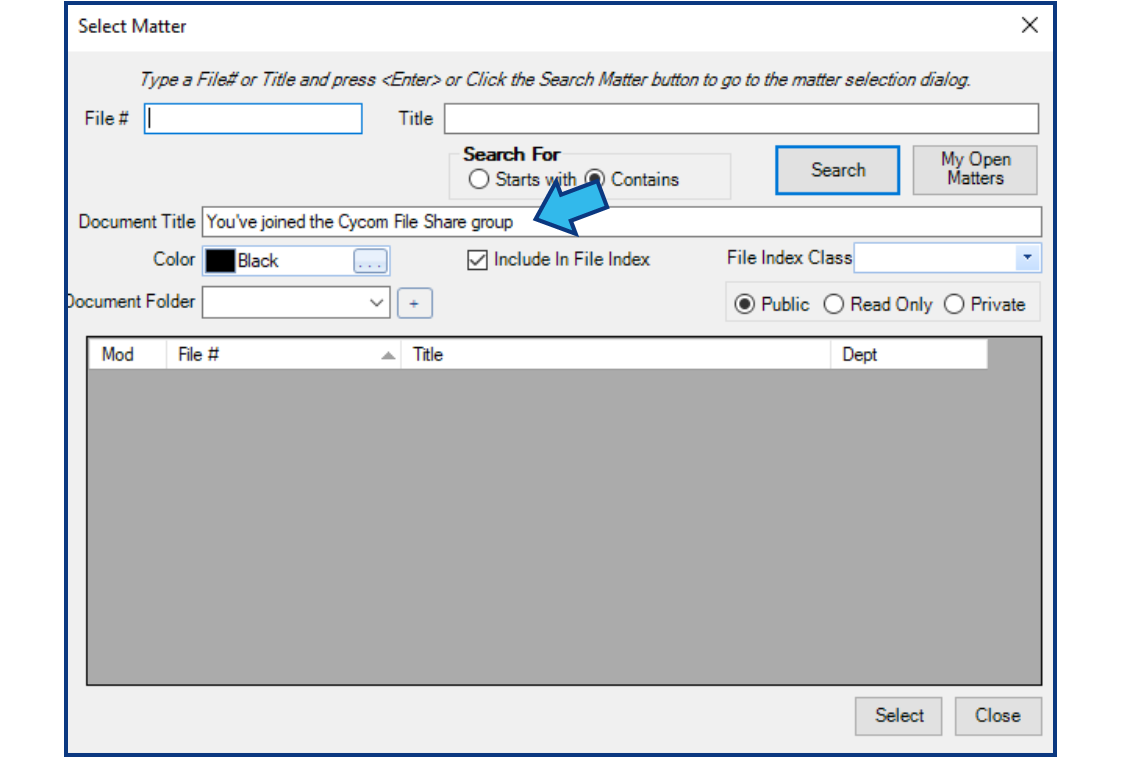
Enter all or part of the File Number or Title of the matter to which you wish to import this email in the appropriate field and press Enter on the keyboard or press Search.

A list of matters with the provided details will appear. Highlight the matter and press Select.
NOTE: You can select multiple matters by holding down the SHIFT or the CTRL button while using the mouse to select the matters. SHIFT selects all matters between the first and last selected. CTRL selects matters individually.
A confirmation dialog will appear confirming the message was imported successfully.

Comments
0 comments
Please sign in to leave a comment.