Need a printable version of this article? Download the Article (PDF Version).
Prerequisite:
Verify the matter on which you are working has a court or judge which has been associated with a CalendarRules jurisdiction. Jurisdiction associations must be created by your System Administrator or someone with access to the System Management module.
Contents:
- Create an Event with a Trigger
- Review Triggers
- Edit Triggers
- Delete Triggers
- Delete Events with Triggers
Create an Event with a Trigger
There are five steps to complete this task:
-
Open the Calendar for the Matter
-
Add an Appointment Event
-
Select a Trigger
-
Enter the Appointment Details and Save
-
Select Triggered Events to Add
Step 1. Open the Calendar for the Matter
With a matter open, select the "Calendar for this Matter" button in the Module Toolbar.
![]()
Step 2. Add an Appointment Event
In the matter calendar, select the Add Appt. button at the bottom-left of the screen.

Step 3. Select a Trigger
In the Appointment window, to create an event and the associated triggers, type a word in the Triggers field. In this example I have typed “demur”. As you type, you will see a drop-down list appear, and the available selections will automatically filter down to only those triggers containing the characters you have entered.
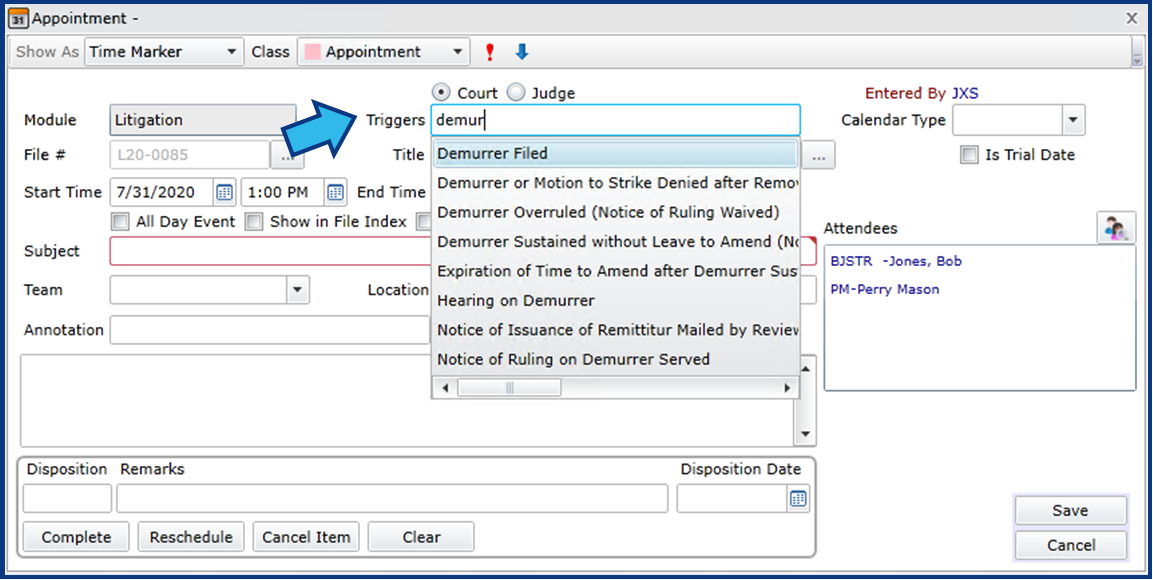
NOTE: If a CalendarRules jurisdiction is associated with the court on your matter, then the Triggers field will be visible, near the top-center of the dialog. If the Triggers entry field is not visible, then a CalendarRules jurisdiction has not been associated with the court selected for this matter. Please ask your System Administrator to create the association. The following article provides instructions: Associate a Court with a Jurisdiction
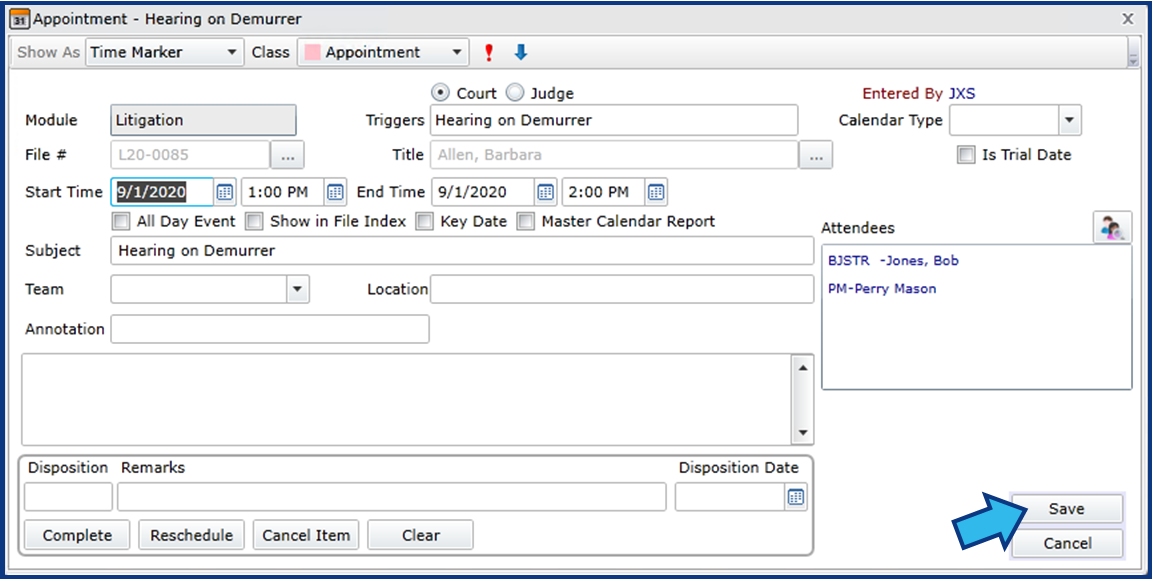
Step 4. Enter the Appointment Details and Save
Select the desired event from the list. Enter your event dates and times, the Attendees on the right-hand side of the Appointment entry window, and any other information for the event you wish. A Subject is required before you can save the event. When finished, press the Save button.
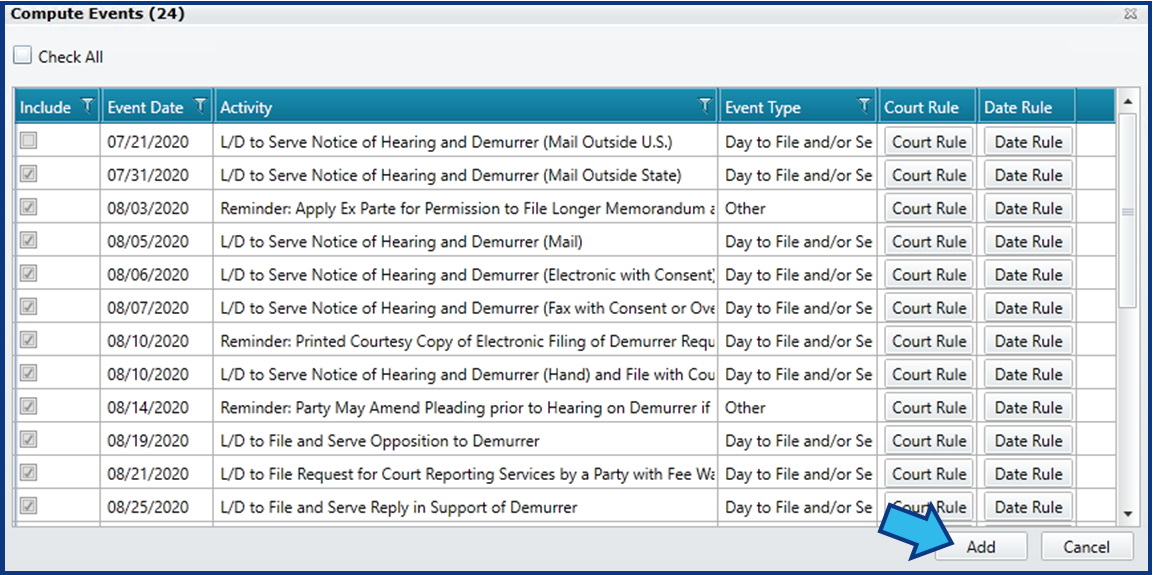
Step 5. Select Triggered Events to Add
The Compute Events window appears, containing a list of events which correspond to your selected Trigger. At this point you may uncheck any events which do not apply to your current matter’s situation, and they will not be created. If a computed event is triggered for a date which has already passed, that event will be unchecked by default in the list.
When you are finished reviewing the computed events, press the Add button in the lower right to create them.
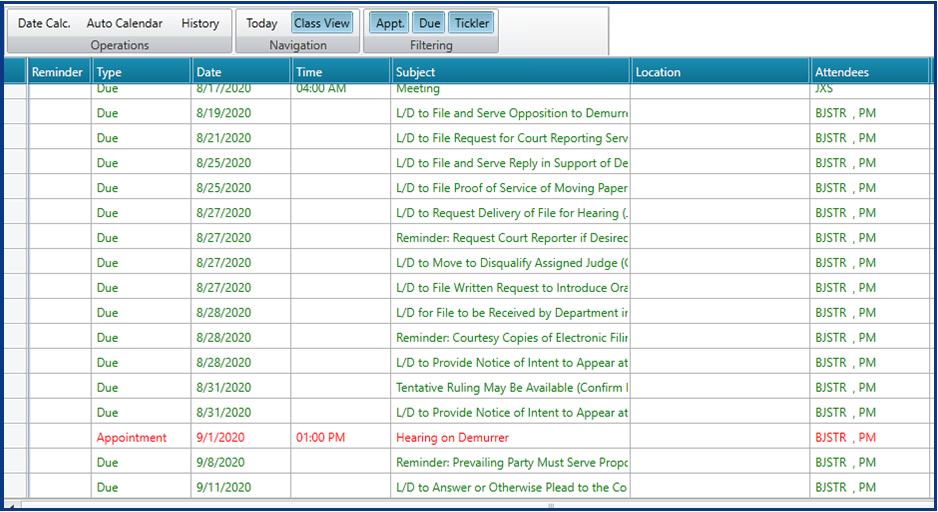
You should receive notification the events saved successfully. Select OK.

You will now see the Appointment you created listed with all the Due events that pertain to that Appointment.
Review Triggers
There are two steps to complete this task:
Step 1. Open the Calendar for the Matter
With a matter open, select the "Calendar for this Matter" button in the Module Toolbar.
![]()
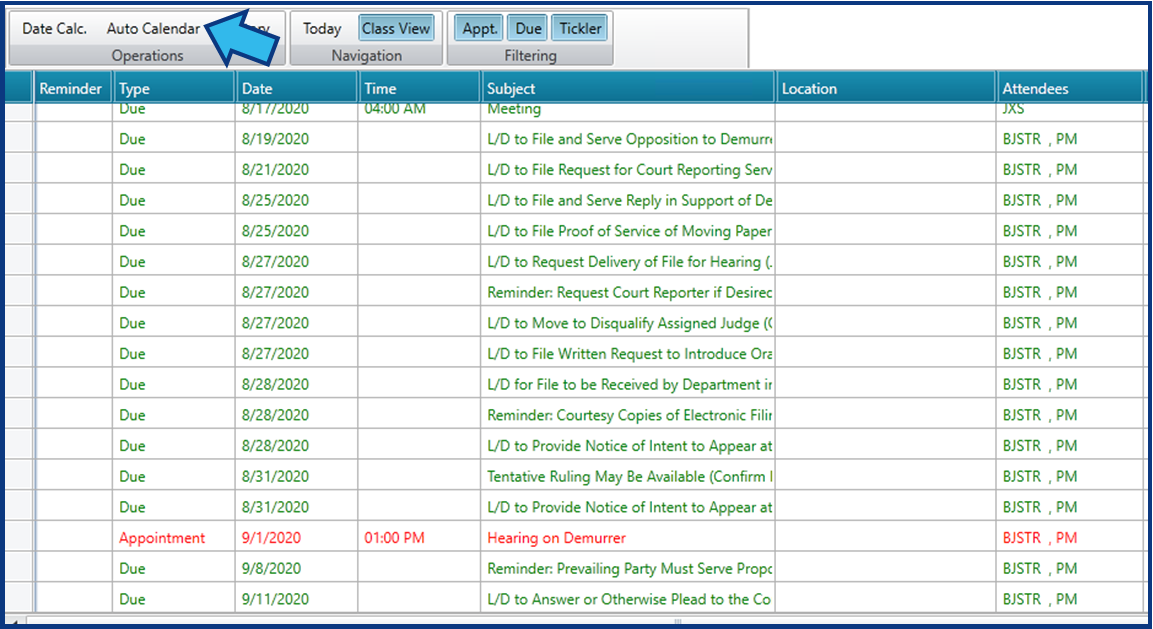
Step 2. Display the Auto Calendar View
In the Calendar, press the Auto Calendar button to see the Auto Calendar View, which shows Trigger details.
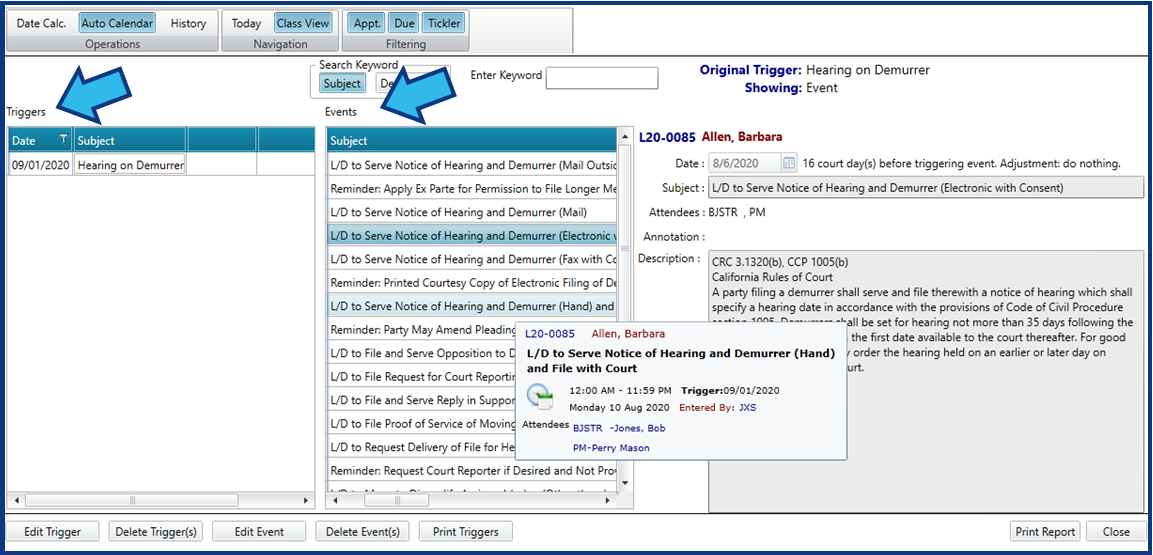
Triggers are listed on the left under the Triggers label. Events are listed on the right under the Events label. Details of an event can be seen by hovering your mouse over the event listing (shown in the image below with mouse hovered over event three rows below the highlighted event). Details about the court rules used to generate the highlighted event can be previewed on the far-right.
Edit Triggers
There are five steps to complete this task:
-
Open the Calendar for the Matter
-
Display the Auto Calendar View
-
Select Edit Trigger
-
Edit the Trigger and Calculate the Changes
-
Save the Recalculated Events
Step 1. Open the Calendar for the Matter
With a matter open, select the "Calendar for this Matter" button in the Module Toolbar.
![]()
Step 2. Display the Auto Calendar View
In the Calendar, press the Auto Calendar button to see the Auto Calendar View, which shows Trigger details.
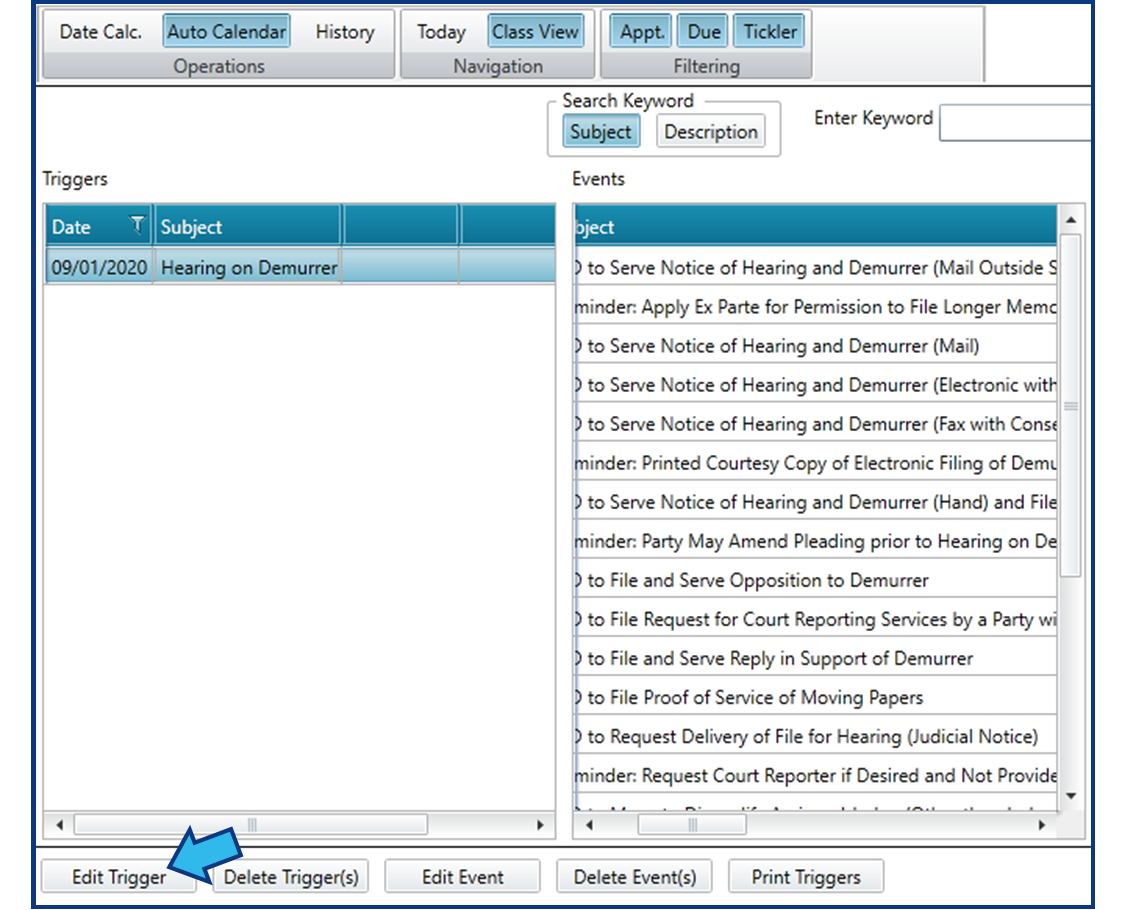
Step 3. Select Edit Trigger
In the Auto Calendar View, highlight a Trigger and select the Edit Trigger button at the bottom-left of the screen. The Appointment will open to allow you to edit the event date.
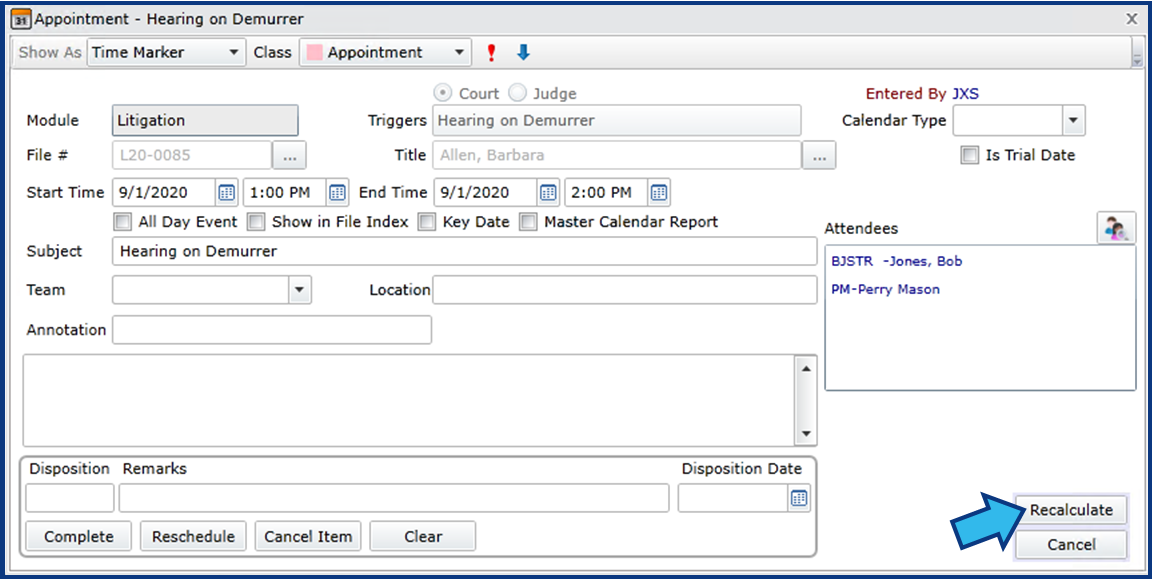
Step 4. Edit the Trigger and Calculate the Changes
Make the desired changes to the trigger date, then press the Recalculate button. The Compute Events window will open.
A Recalculation Options window will appear asking you to select to recalculate ALL dates or only future dates. Select the option you want and select Continue.

Step 5. Save the Recalculated Events
The Compute Events window shows all the recalculations which occurred as a result of the trigger edit. Review the recalculated triggers and press the Save button to accept the changes.
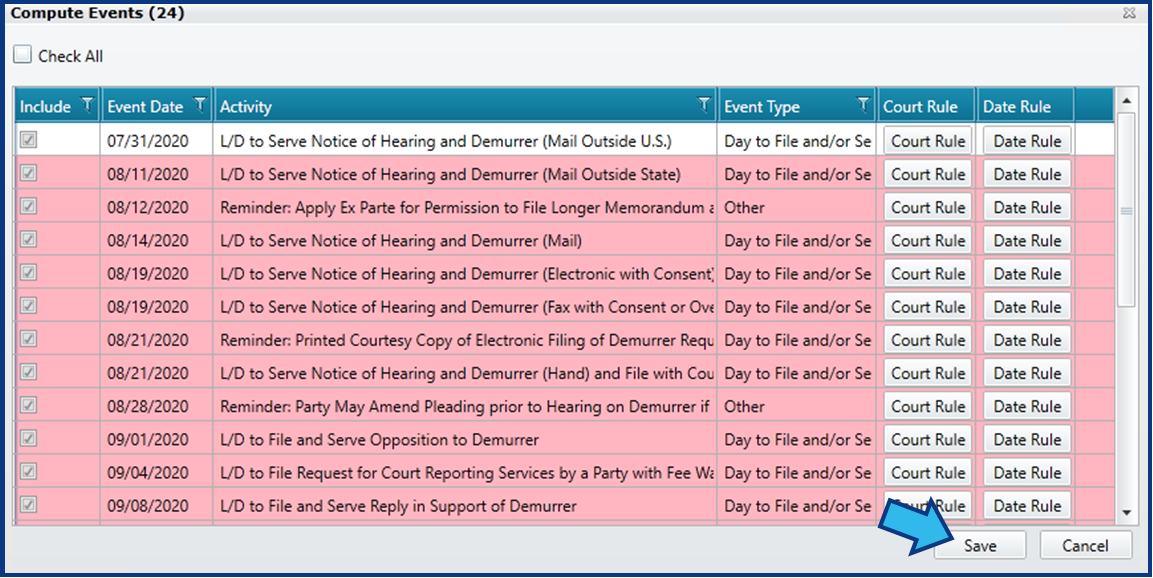
You should receive notification the events saved successfully. Select OK.
Delete Triggers
There are four steps to complete this task:
-
Open the Calendar for the Matter
-
Display the Auto Calendar View
-
Select the Trigger(s) to Delete
-
Select Delete Triggers and Confirm
Step 1. Open the Calendar for the Matter
With a matter open, select the "Calendar for this Matter" button in the Module Toolbar.
![]()
Step 2. Display the Auto Calendar View
In the Calendar, press the Auto Calendar button to see the Auto Calendar View, which shows Trigger details.
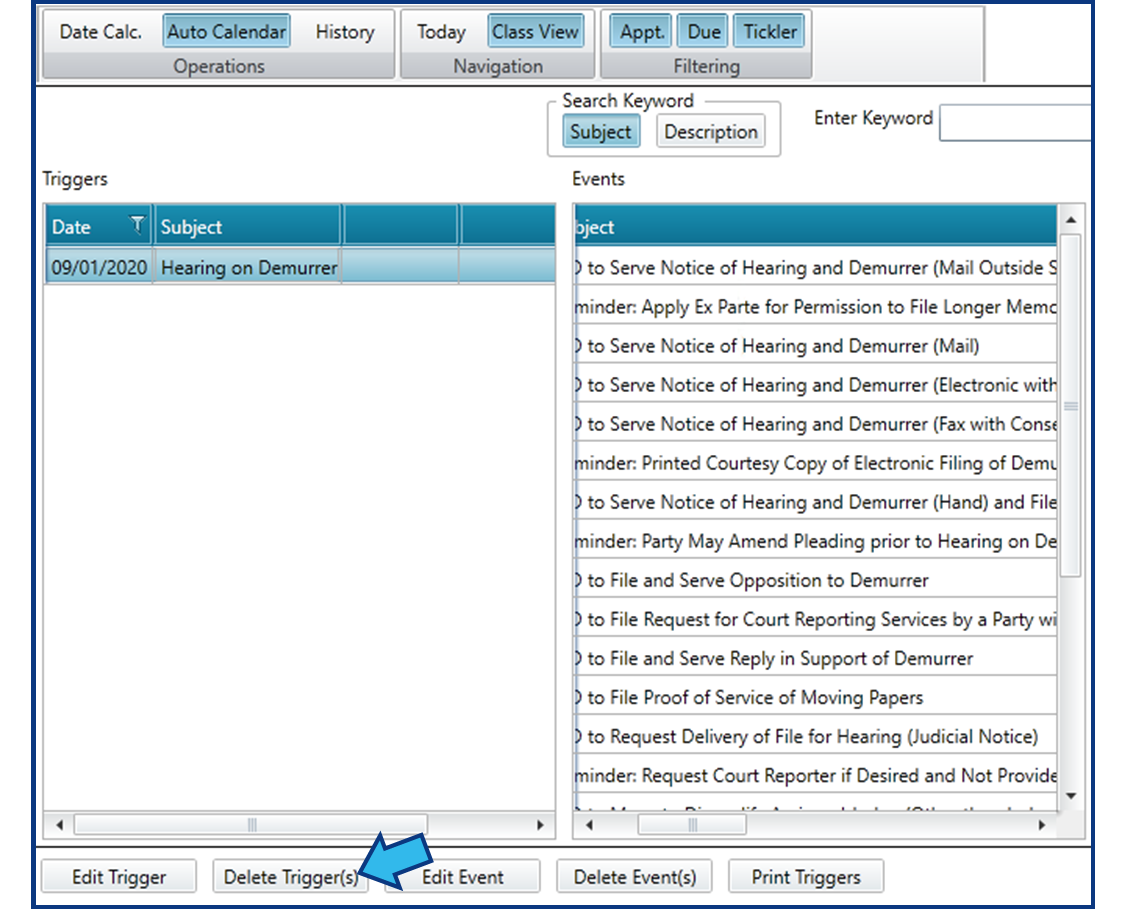
Step 3. Select the Trigger(s) to Delete
In the Auto Calendar View, highlight the Trigger(s) you wish to delete.
Step 4. Select Delete Triggers and Confirm
Press the Delete Trigger(s) button.
The Delete Triggers window appears, showing the affected Due events. Select the Delete button to delete the Trigger along with all the associated Due events.
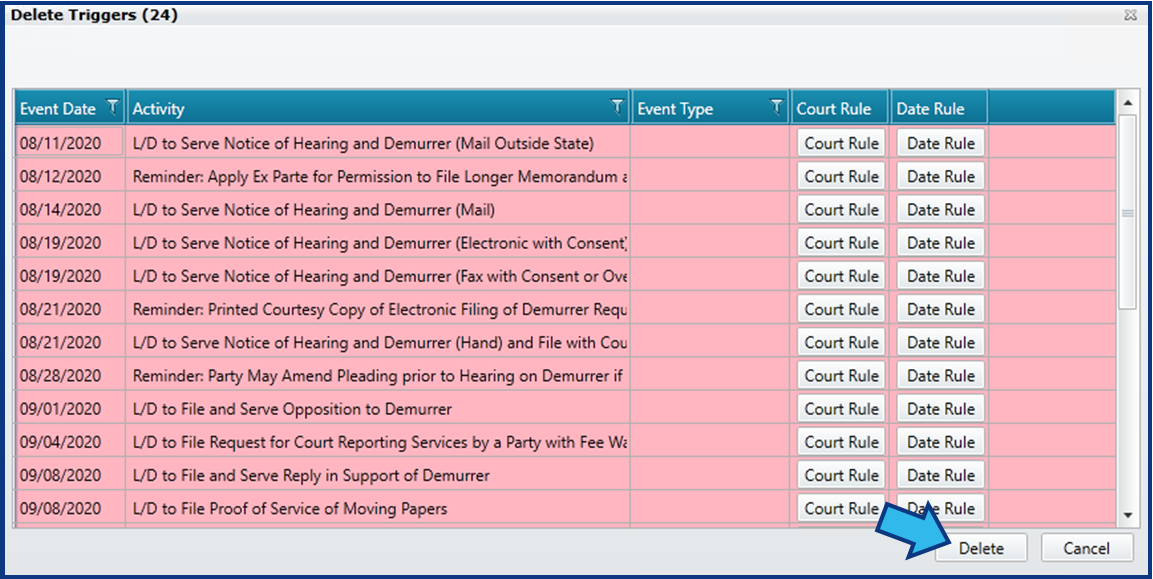
You will be prompted with a Confirmation window to confirm you wish to delete the Trigger and its Events. Select Yes.

Delete Events with Triggers
There are four steps to complete this task:
-
Open the Calendar for the Matter
-
Display the Auto Calendar View
-
Select the Event(s) to Delete
-
Select Delete Events and Confirm
Step 1. Open the Calendar for the Matter
With a matter open, select the "Calendar for this Matter" button in the Module Toolbar.
![]()
Step 2. Display the Auto Calendar View
In the Calendar, press the Auto Calendar button to see the Auto Calendar View, which shows Trigger details.
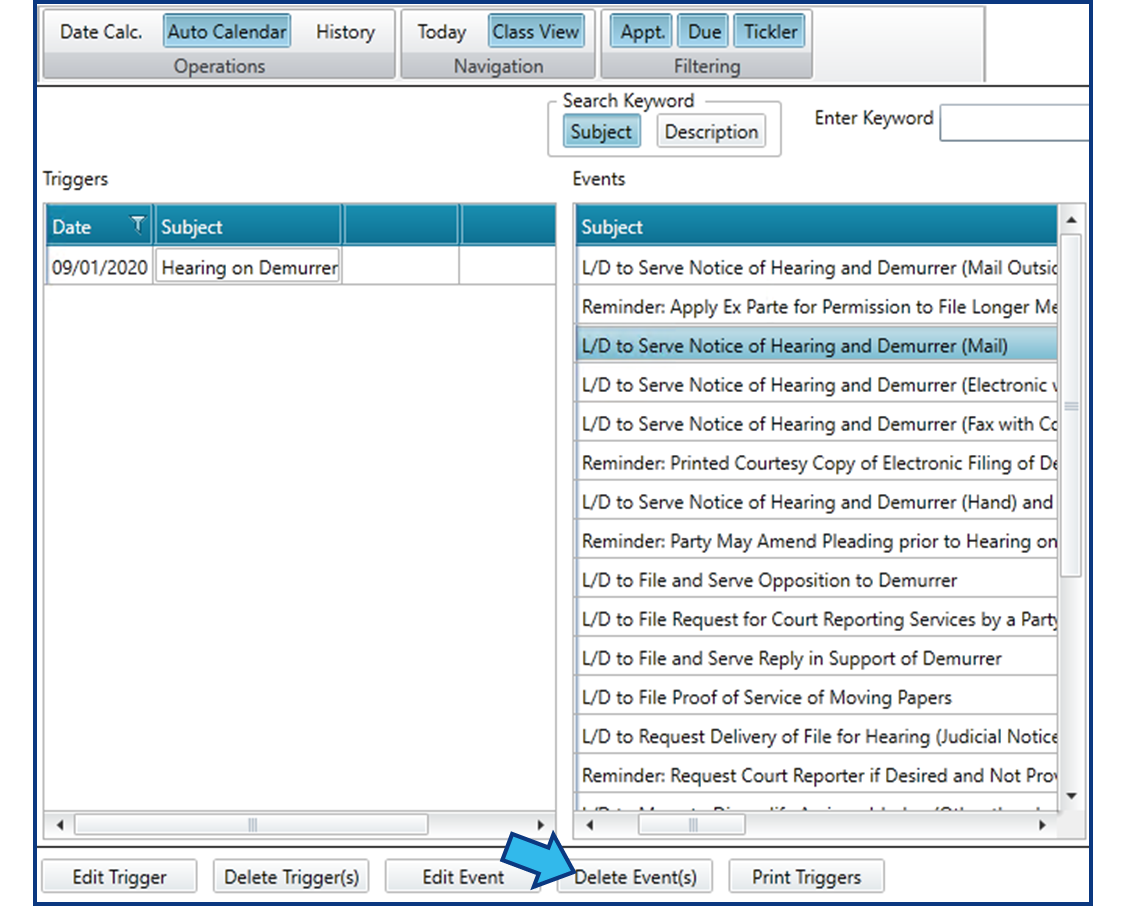
Step 3. Select the Event(s) to Delete
In the Auto Calendar View, highlight the Event(s) you wish to delete.
Step 4. Select Delete Events and Confirm
Select the Delete Events button.
You will be prompted with a Confirmation window to confirm you wish to delete the Events. Select Yes.
Comments
0 comments
Please sign in to leave a comment.