Initial configuration
Initial configuration is a two-step process:
- Set the AutoCal option in CySetup or Cycom Site Preferences.
- Add the CalendarRules encrypted token to the web.config file.
Production and Development Tokens
The CalendarRules.com web service maintains separate production and development URLs. For the purposes of this guide, the California Superior Court Los Angeles (CASPRLA) jurisdictions will be used.
Obtaining a CalendarRules Production Token
Clients will be issued a production token from CalendarRules after having signed the appropriate agreement, and having purchased their selected jurisdictions.
Importing Rules
After having completed the Initial Configuration, you must import data from CalendarRules.com. This is done in the System Management Module.
From the global toolbar, select the CalendarRules maintenance icon on the far right.

Enter your Calendar Rules password to view the Calendar Rules Preferences window.
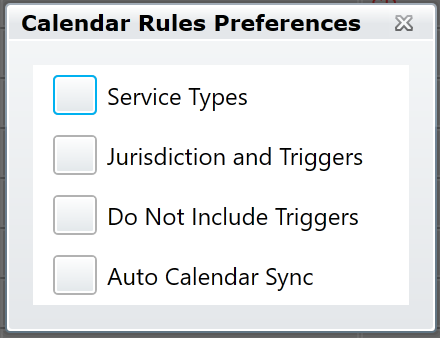
We are going to import Service Types and Jurisdictions and Triggers.
Importing Service Types
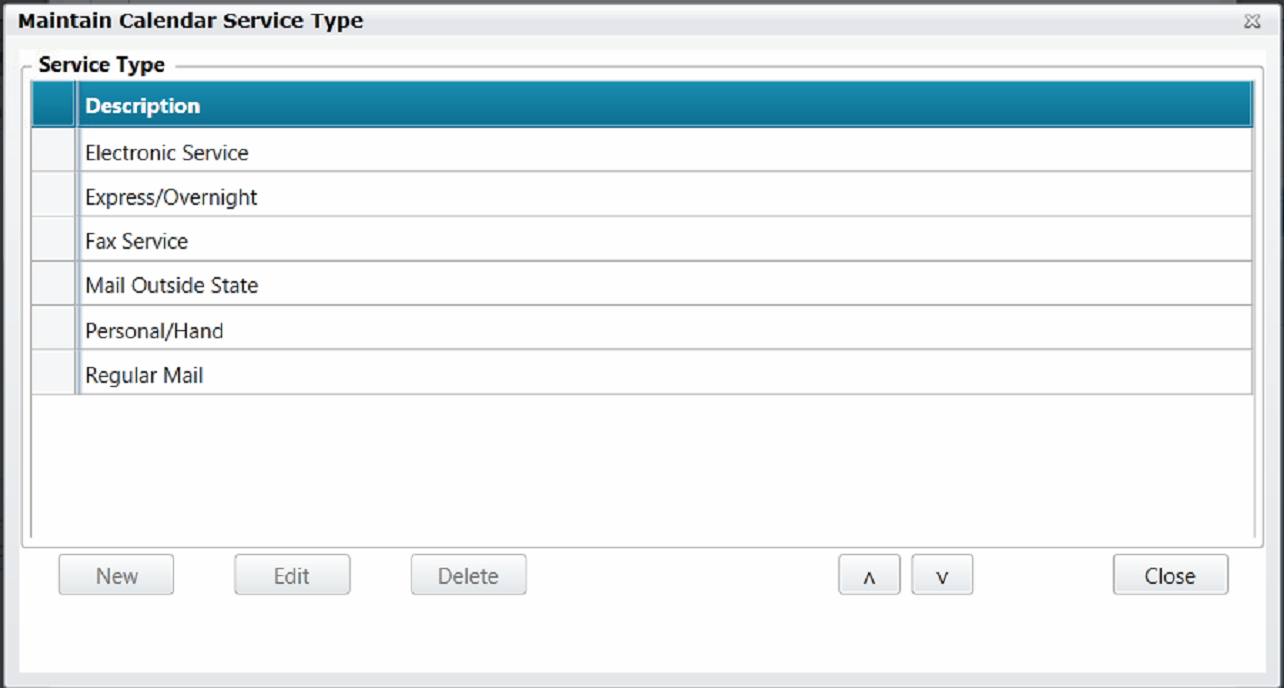
Press the Service Types button. The Maintain Calendar Service Type window will open. If the Service Type list is empty, press the New button and your available Service Types will load from the Calendar Rules Web Service. Delete any Service Types which don’t apply to your site, and press the Close button. This list should include not only the ways in which you may serve notice, but also those in which you receive notice.
Importing Jurisdictions and Triggers
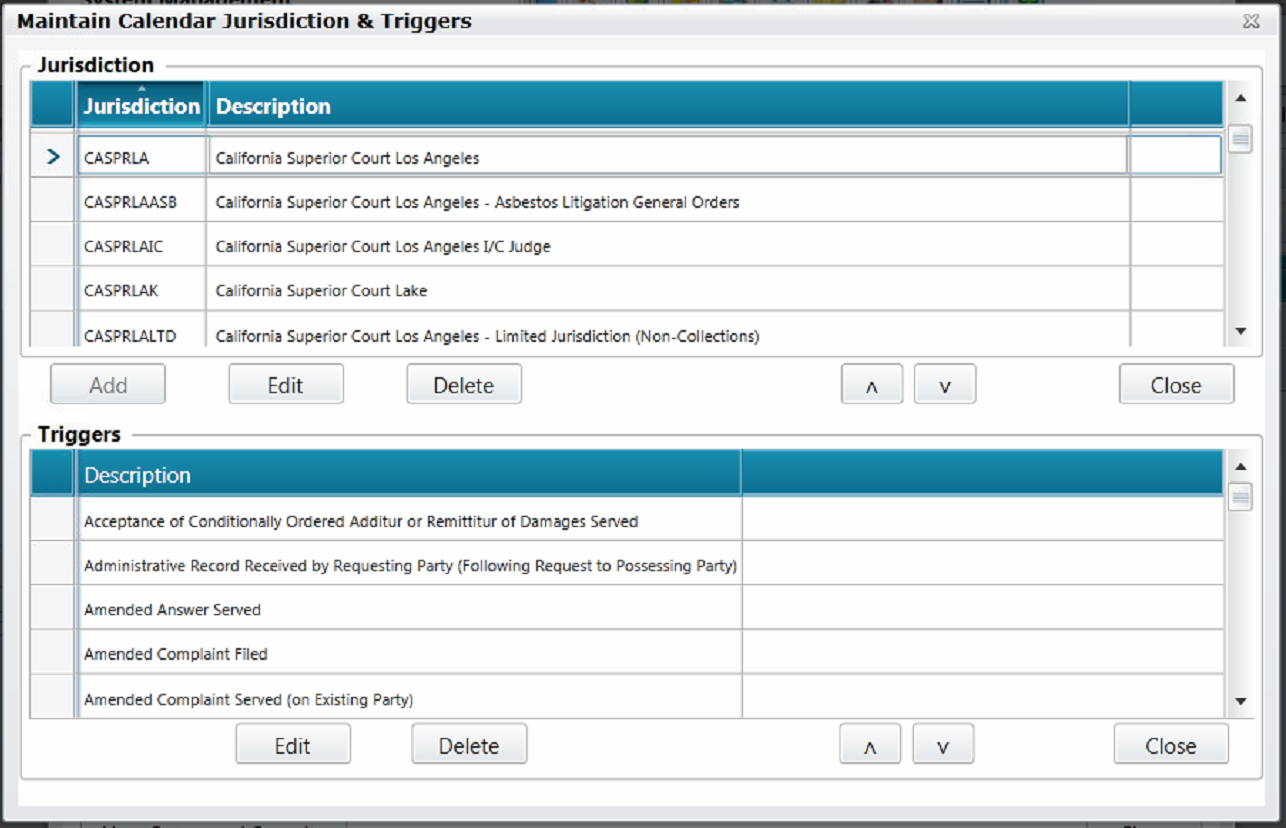
From the Calendar Rules Preferences window, press Jurisdictions and Triggers and then the Sync button. The Maintain Calendar Jurisdiction & Triggers window will appear. All jurisdictions available in your CalendarRules subscription will load, and a notification will appear stating whether any jurisdictions have been added, updated, or deleted from your list. Selecting a Jurisdiction will populate the Triggers list below. Press the Close button to close the window.
Excluding Triggers
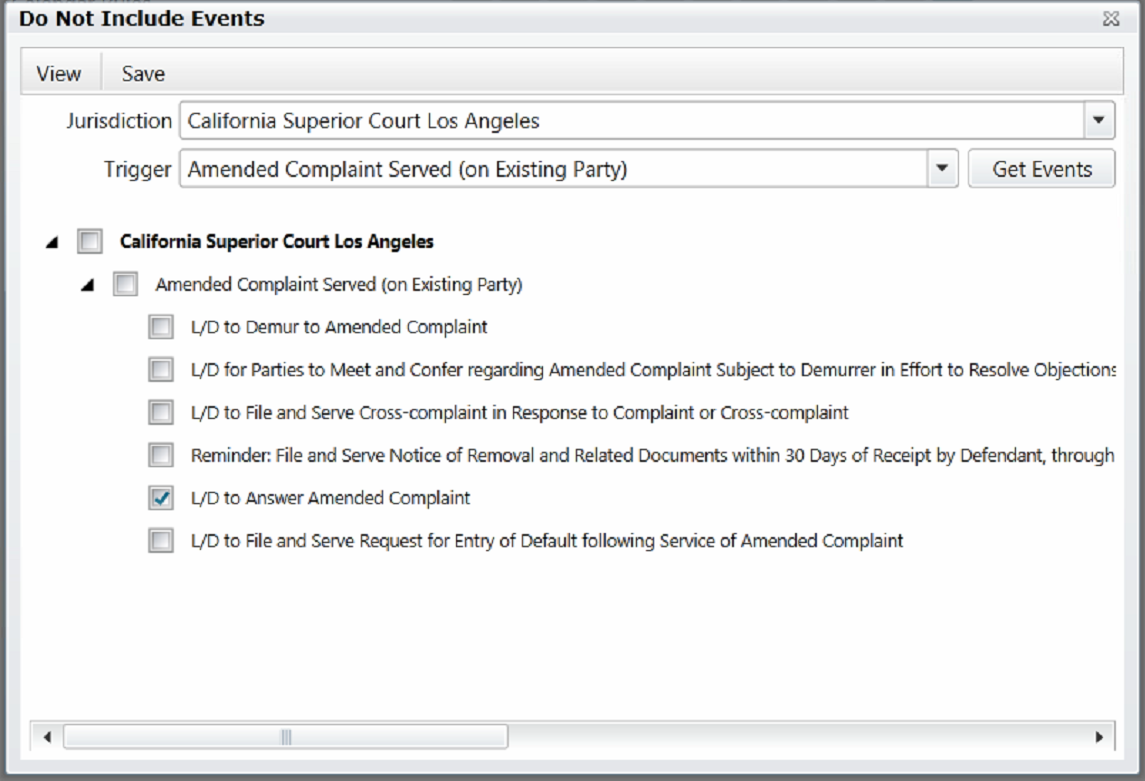
From the Calendar Rules Preferences window, press the Do Not Include Triggers button. The Do Not Include Events window will appear. You will see a list of events the system is set to ignore when generating events. If the list is empty, no events are being ignored during event generation.
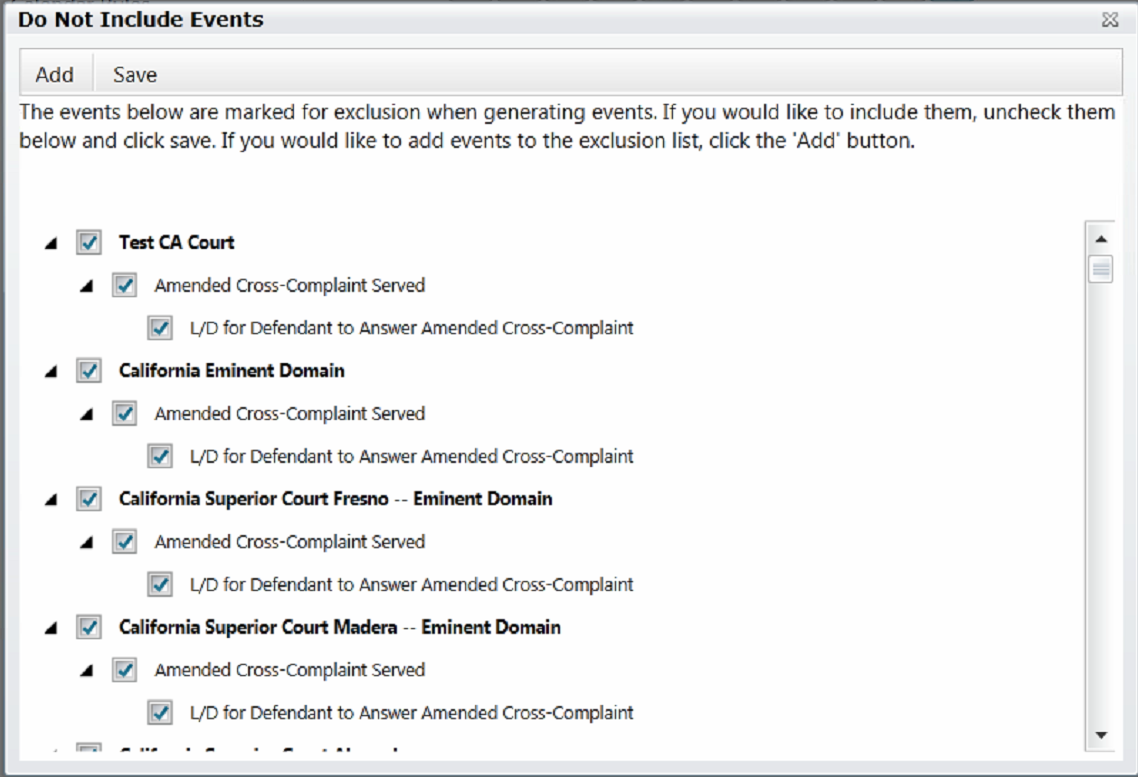
Press the Add button to add events which should be excluded when generating events. Enter or select a Jurisdiction, then select a Trigger. Next, press the Get Events button to retrieve a list of available events. The example below shows that “L/D to Answer Amended Complaint” is to be excluded from generated events.
Auto Calendar Sync
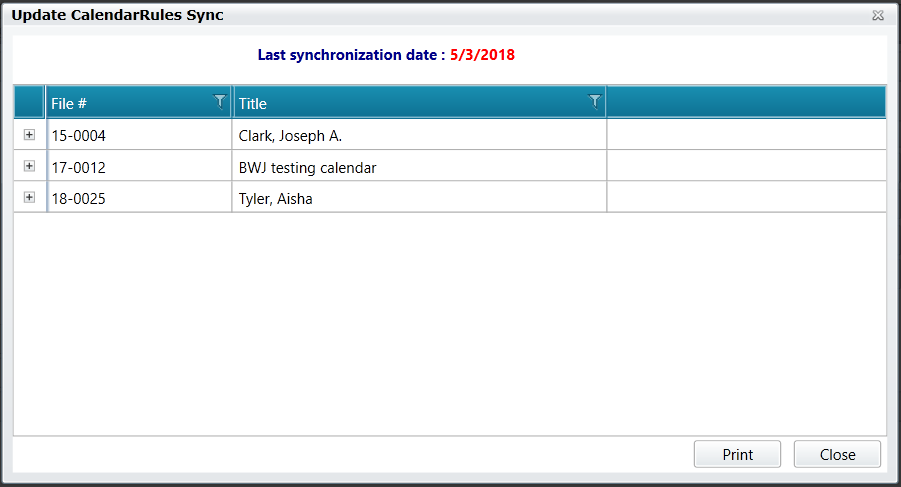
The final button, Auto Calendar Sync, is used to display the last rules synchronization date and the results of any rules changes. There is a Calendar Rules Sync Service program that should be running periodically (typically nightly) and is intended to notify you when any jurisdictions and/or triggers have been modified in your subscription, or have had a change in how rules events are calculated. This is usually as a result of the court modifying their rules (e.g., extending the last day to file a particular motion from 10 days to 14 days prior to the trigger event).
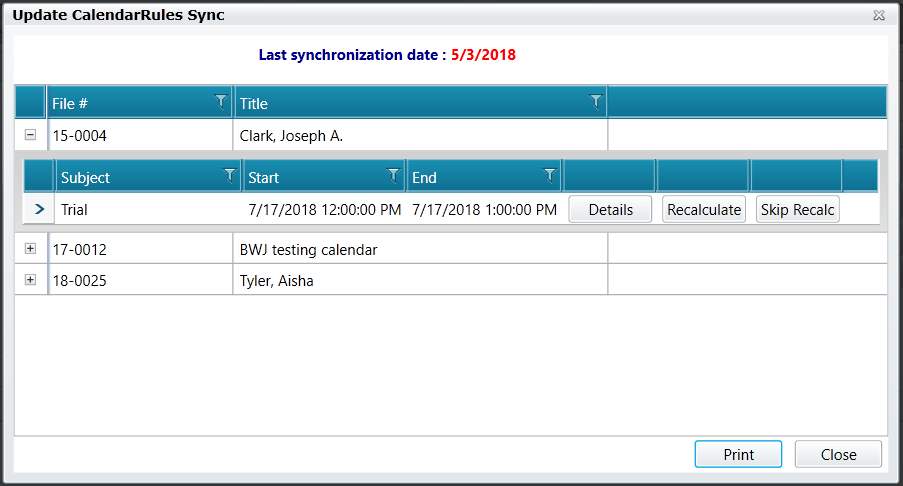
The image below is a sample of the type of information that will appear. Click the + sign to the left of the matter to see the details of the changes for that matter.
Below you see three buttons: Details, Recalculate, and Skip Recalc. Details shows what has changed. Recalculate allows you to recalculate the dates for this trigger. Skip Recalc allows you to decide to keep the originally calculated events and dates, assuming them to be "grandfathered" in, since it was calendared prior to the rule change.
Note: All trigger events will calculate according to the most up to date rules at the time they're calendared, regardless of whether you have synchronized your existing events. Scheduling a new event based on a trigger goes to the Calendar Rules LLC website in real time when scheduling.
The Print button on this dialog allows you to print out a list of all changes for each matter, and can be sorted by attorney. This allows the system administrator to distribute the list of changes to the respective attorneys for review of their cases. These same Details, Recalculate, and Skip Recalc buttons appear on each of the matters' Auto Calendar view in the case calendar screen. In this way, the user can make the appropriate updates to their matters without requiring access to the global Calendar Rules maintenance screen.
Comments
0 comments
Please sign in to leave a comment.