
Need a printable version of this article? Download the Article (PDF Version).
Contents:
About RMAT.
Add RMAT Code(s) to a Matter.
RMAT Color-Coded Display Options.
RMAT Report Options.
About RMAT
The Risk Management Assessment Tool, or RMAT, is a tool in CLW to manage an evaluation process to identify and report on lawsuits arising from dangerous conditions about which the City or County has become party to a lawsuit. The tool is used to address and report on steps to mitigate risk and utilize Corrective Action Reports (CARs).
CLW must be configured to enable use of the RMAT feature. Once enabled, RMAT codes and settings can be configured through the Litigation section of the System Management module.
Add RMAT Code(s) to a Matter
There are two steps to complete this task:
-
Create or open a Litigation matter.
-
Enter RMAT code(s) in the RMAT field. The drop-down for RMAT allows for selection of multiple codes.
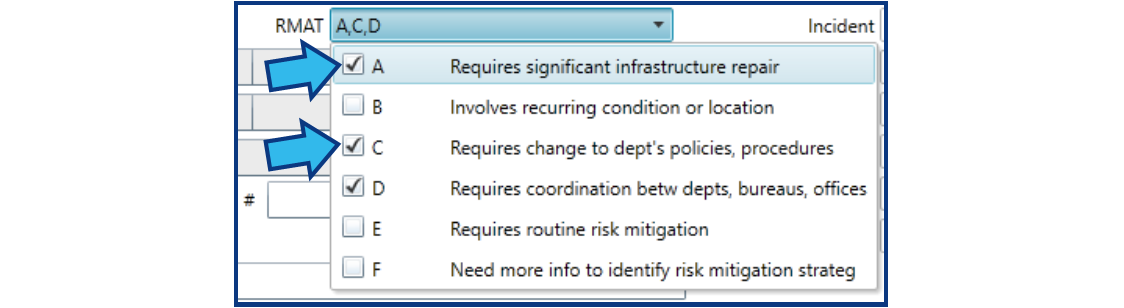
RMAT Color-Coded Display Options
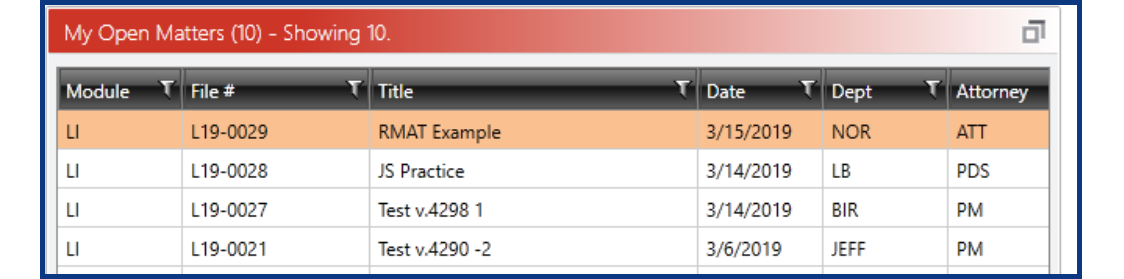
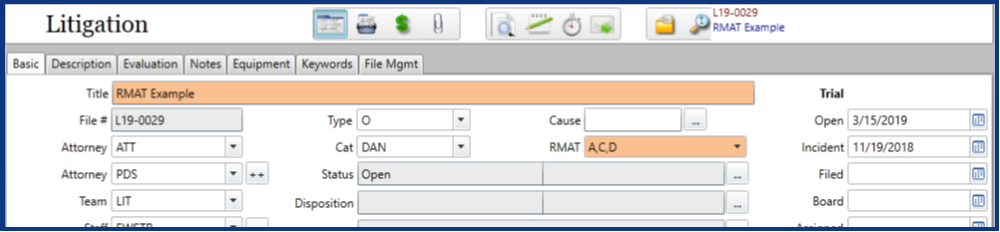
When a color option is set for a combination of RMAT codes, and those codes are selected for a matter, a background color is applied to the matter. This can be seen in the following: My Open Matters in Skyline and Main St. views; global and module Search Result windows; and the Title and RMAT fields of the Basic tab.
Example from Skyline view of My Open Matters:
Example from Basic tab of Litigation matter:
RMAT Report Options
RMAT Category Report
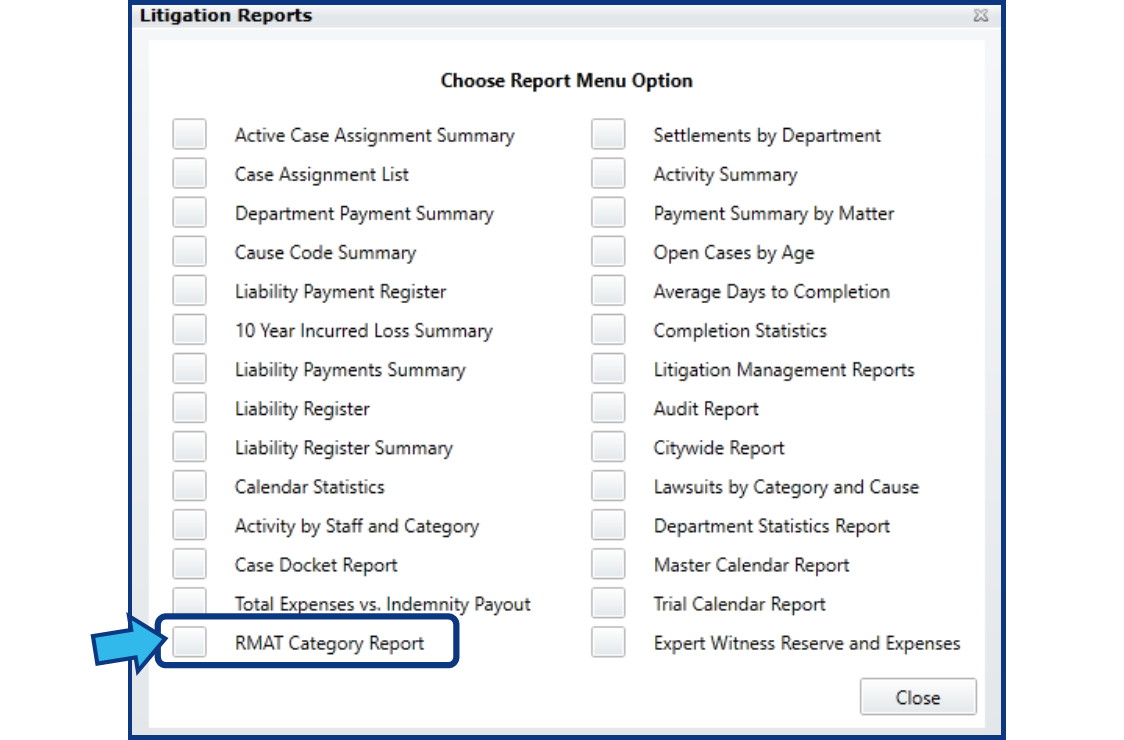
When the RMAT feature is enabled, an RMAT Category Report option is available in the Litigation Reports window. To access, press the Reports button at the bottom-left of the Litigation module.

Press the box to the left of RMAT Category Report to open the RMAT Category Report Criteria window.
Specify the Date Range (date searches by the Litigation Open Date). A Date Range is required for the report. Optionally, additional filters for Category, RMAT code(s), Staff, and Team may be added. The Report Title defaults to “Quarterly RMAT Report” and Status defaults to “Both”.
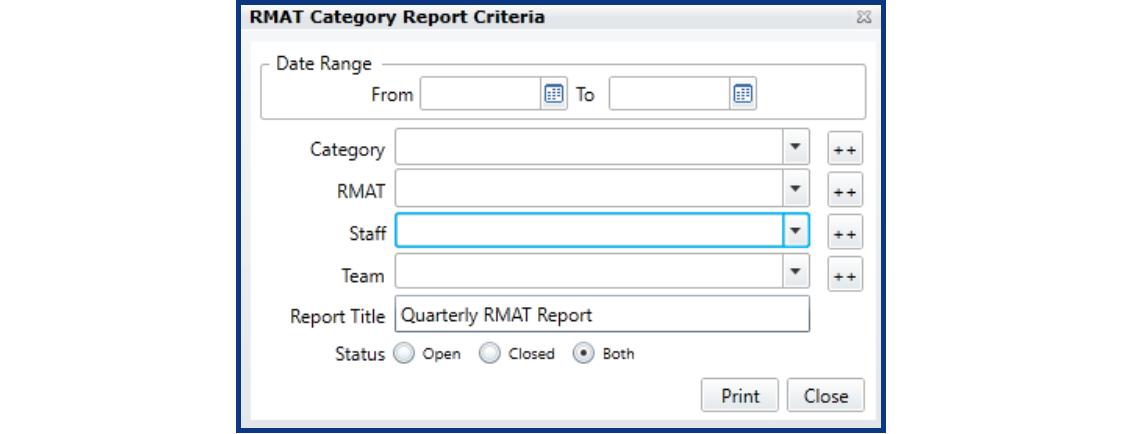
When printed, the report suffixes the Report Title with the selected Date Range. Press Print to view the report.

In this report:
-
Court # = matter’s court number
-
Title = matter title
-
Attorney = attorney code for first attorney on the case
-
Department = matter’s department name
-
RMAT Codes = matter’s RMAT codes
-
Open Date = matter’s open date
-
RMAT Date = date the RMAT code was first added
-
Interval Days = number of days between Open Date and RMAT Date
RMAT Custom List Report
Matters are searchable using the RMAT codes, and therefore can be used in conjunction with print options like the Custom List.
To create a Custom List Report, open the Litigation module.
![]()
Press Search. A Litigation Search Criteria window appears.

The Custom List is built from the matters identified in the Search Result list. Adjust the list by pressing Show Criteria to filter the Search Result list accordingly.

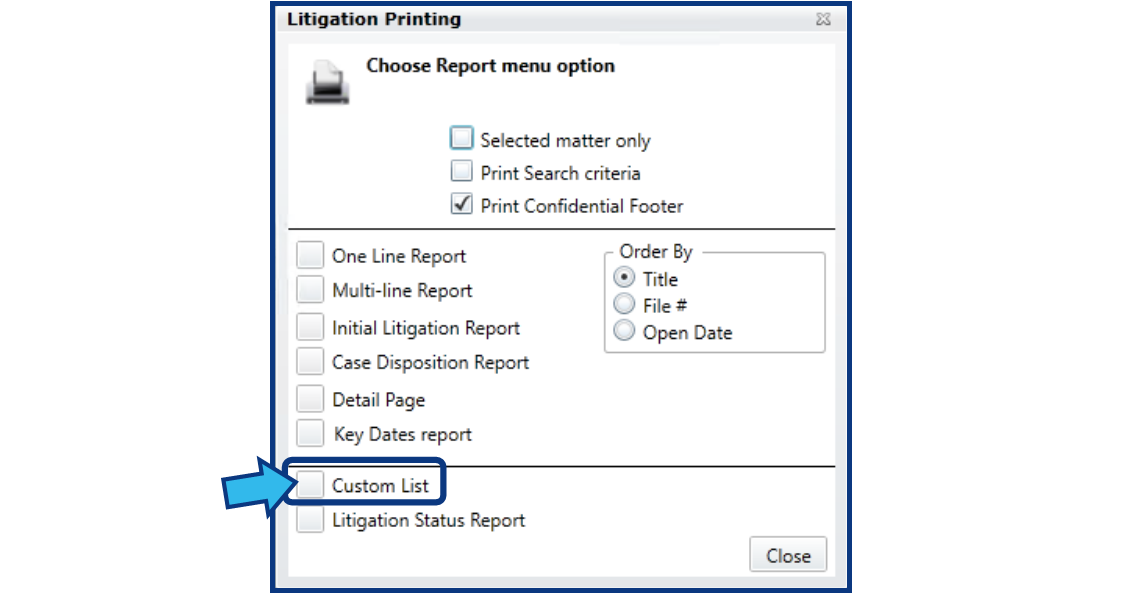
Press Print. A Litigation Printing window appears.

Select the box to the left of Custom List. A Custom Litigation List window appears.
Build the Custom List by selecting fields from the left column under the heading “Available Fields:” and move them to the right column by pressing the right arrow “>” key.
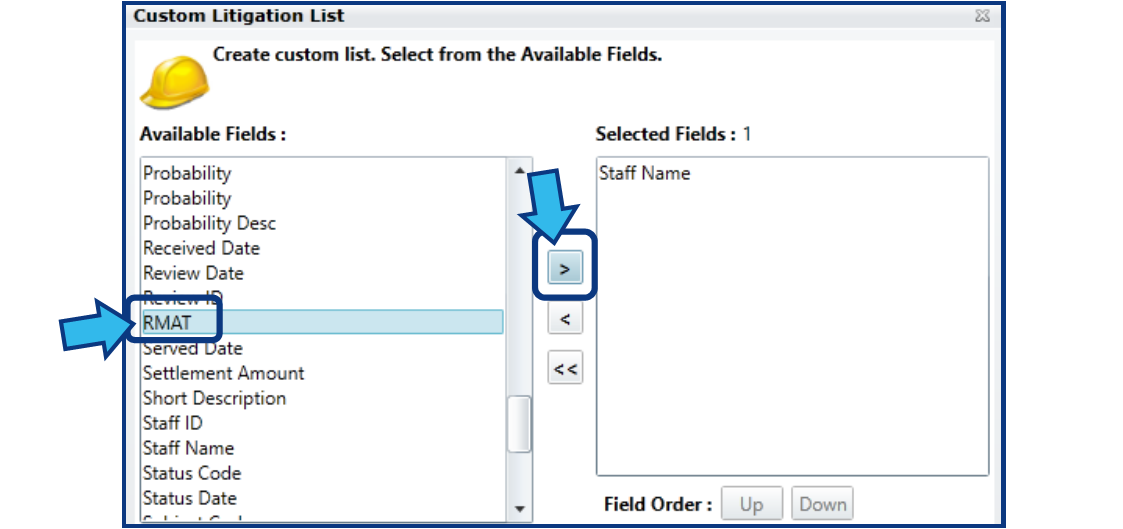
To adjust the order of the Selected Fields, highlight one of the fields to move and press Up or Down to move the field.
Provide a Report Title to appear as the heading. (Note that a Report Title is also necessary if you wish to add this to the Saved file).
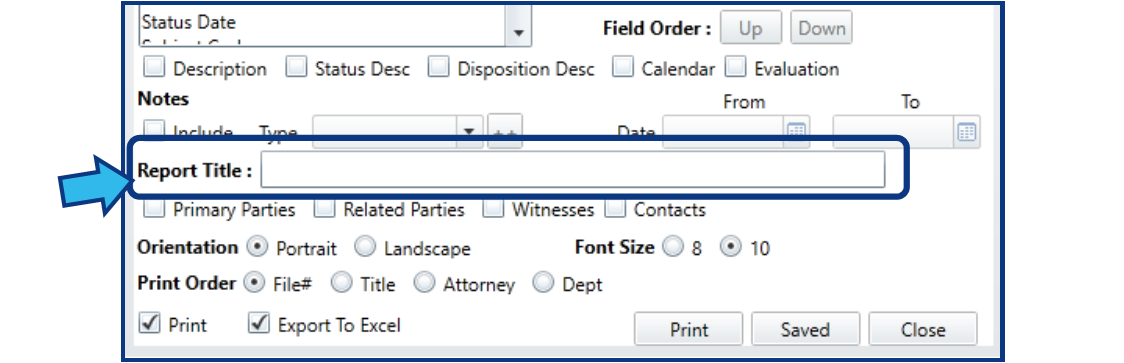
Once the list has been built in this fashion, and all other list options made, press Print to view, print, or export the Custom List.
Comments
0 comments
Please sign in to leave a comment.