
Need a printable version of this article? Download the Article (PDF Version).
Need a reminder? Use the Quick Reference Guide.
Need more details? Check out the Standard Guide.
Quick Reference Guide
There are 6 steps to complete this task:
-
Right-click desktop icon.
-
Select Properties.
-
Press Change Icon…
-
Locate a new icon.
-
Apply the changes.
-
Press OK.
Standard Guide
Step 1. Right-click desktop icon.
Right-click while hovering over the CLW desktop icon.

Step 2. Select Properties.
In the options menu that appears, select Properties.

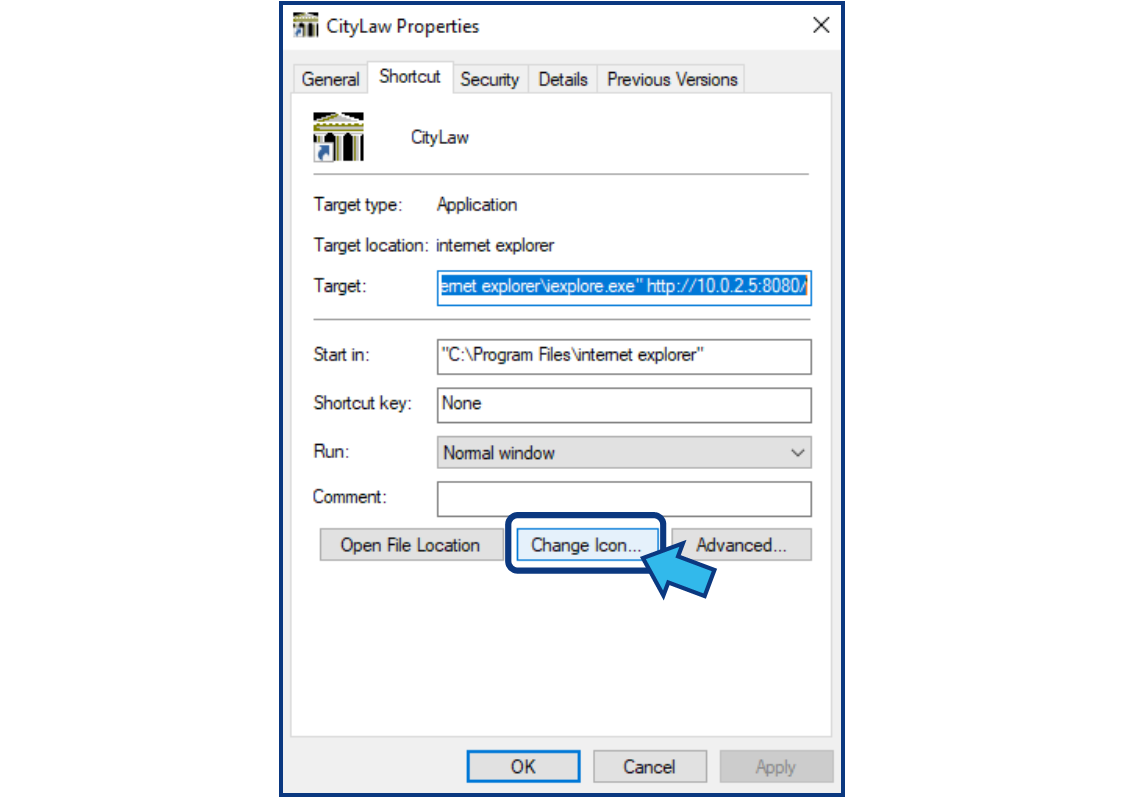
Step 3. Press Change Icon…
In the Properties window, press the Change Icon... button.
Step 4. Locate a new icon.
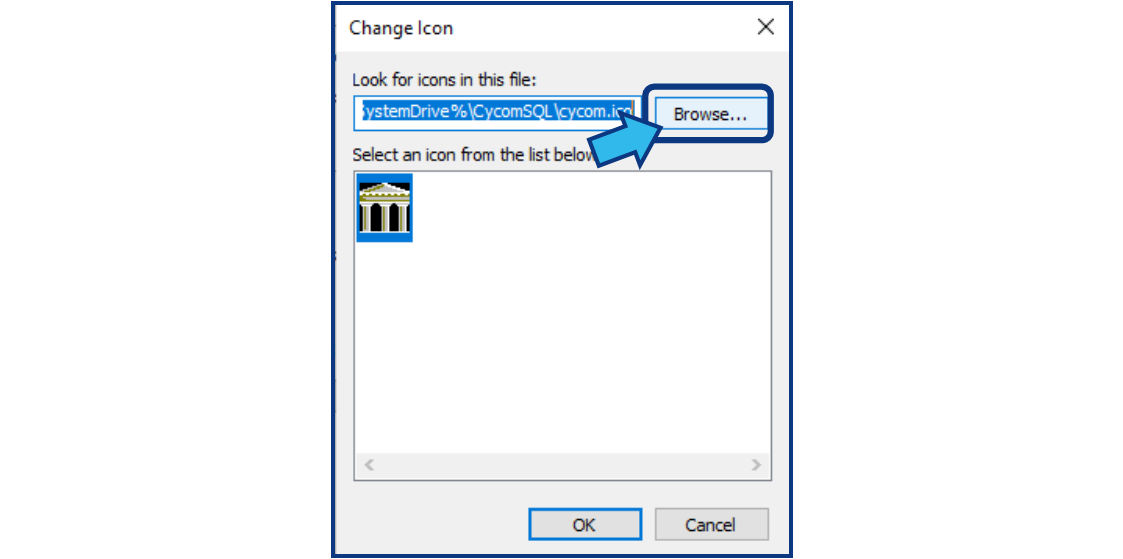
If the desired icon is displayed in the list, select and press OK. Otherwise, to locate an icon, press the Browse... button.
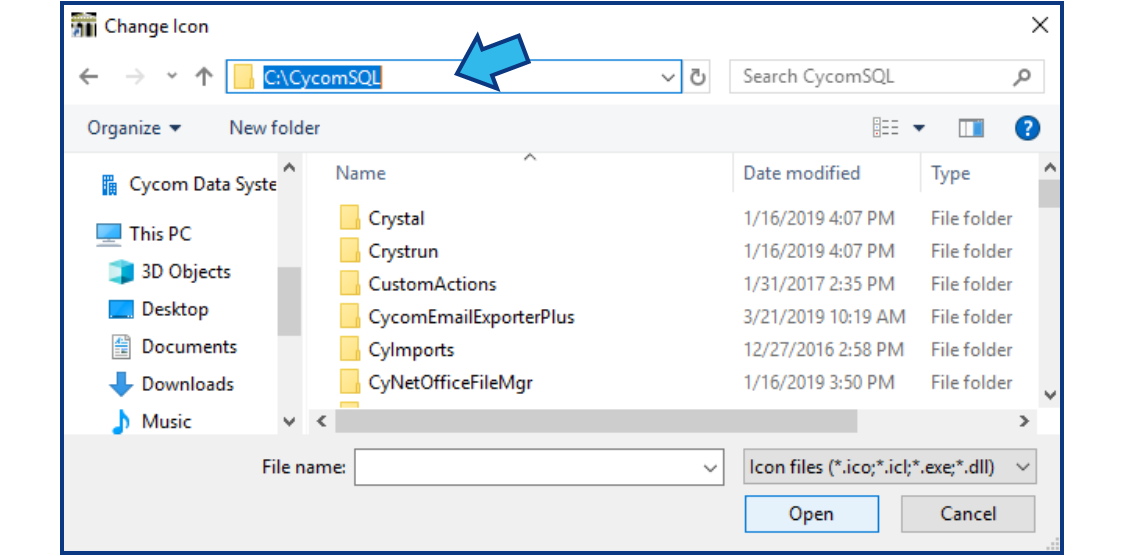
In the Change Icon explorer window, navigate to the CycomSQL folder by entering the address in the bar at the top, or selecting the appropriate path in the directory tree in the left pane.
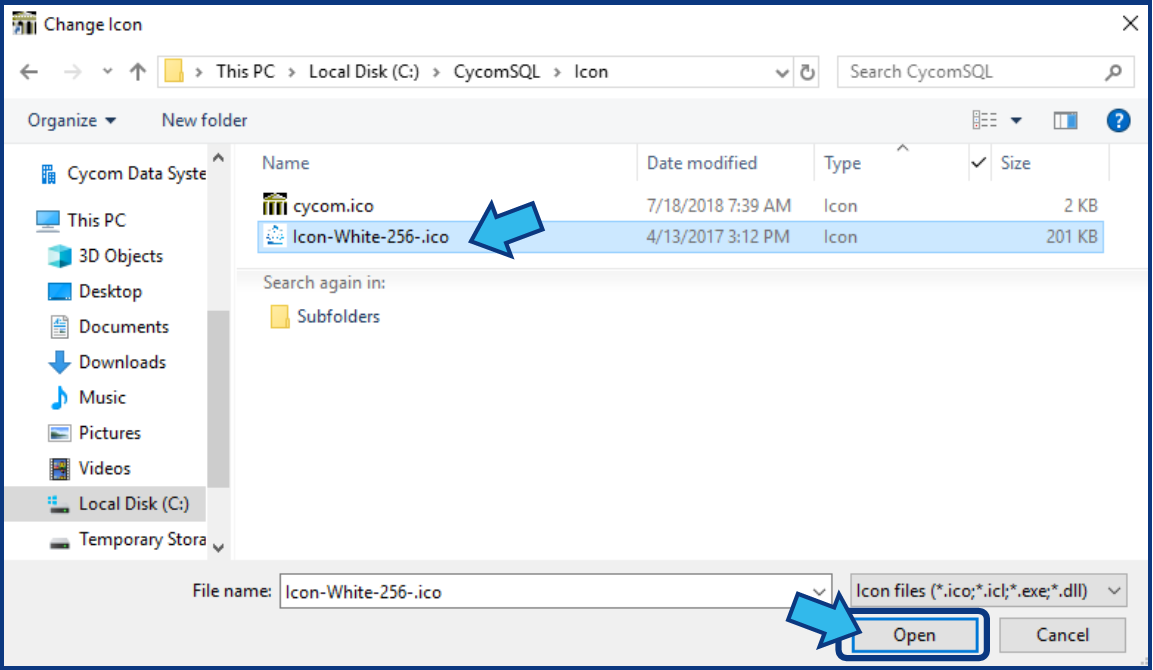
To find acceptable options quickly, sort Type by Icon by pressing the drop-down arrow on the right side of the Type heading and then place a check in the box to the left of Icon.

Choose the desired icon and open by either double-clicking the icon, or highlight the icon and press Open.
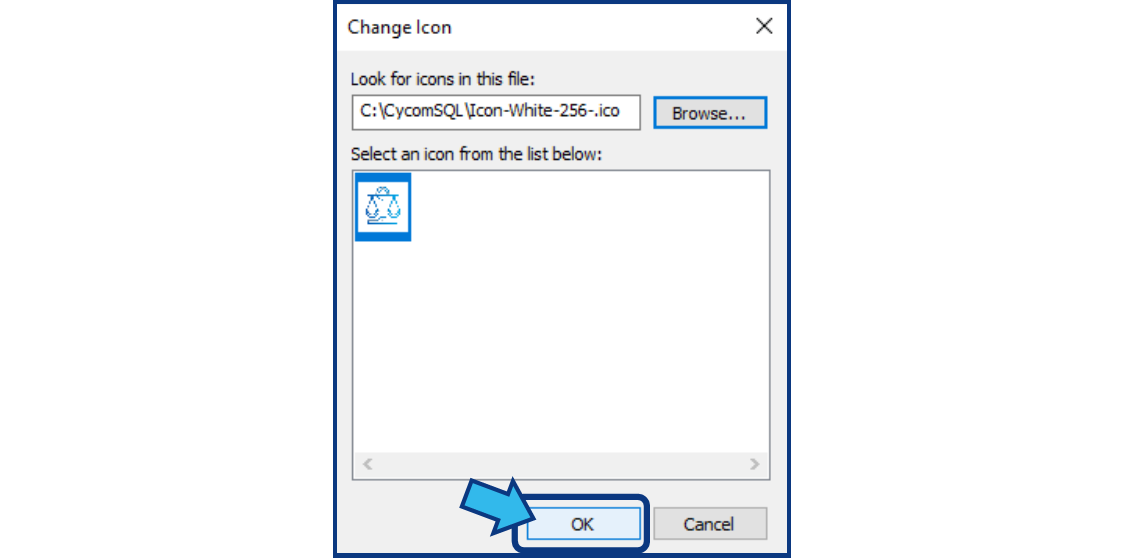
In the Change Icon window, press the OK button.
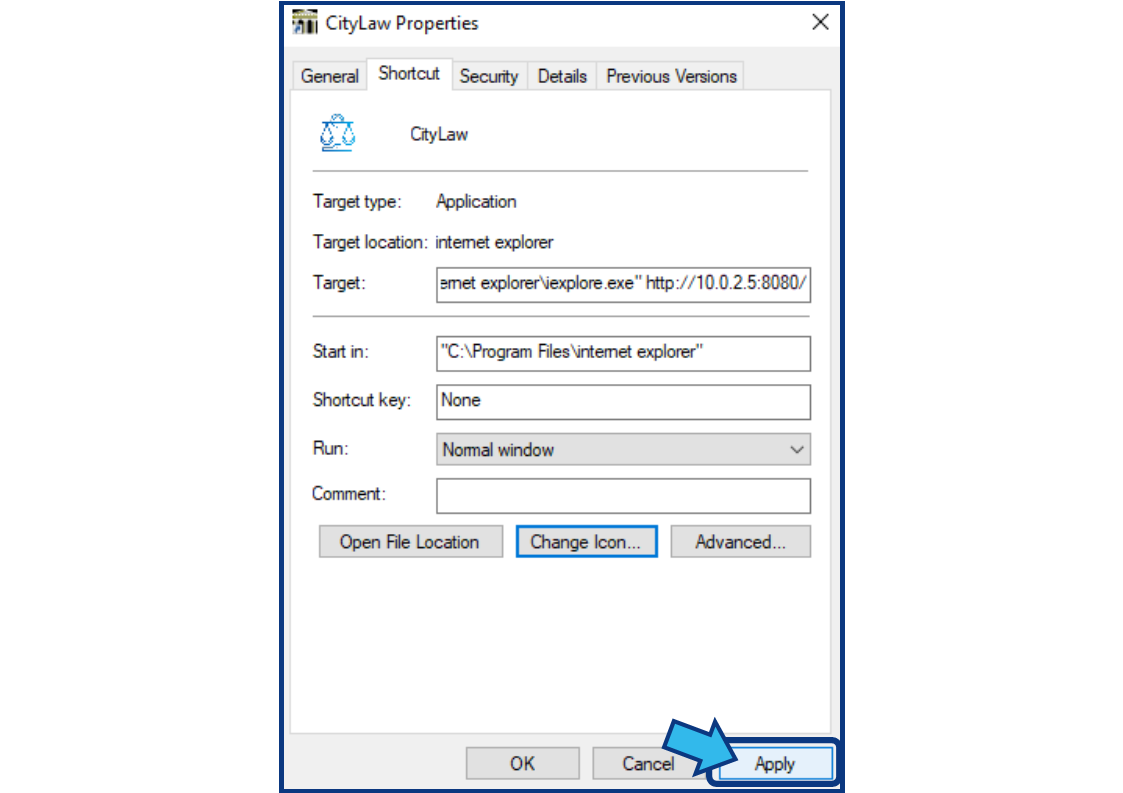
Step 5. Apply the changes.
In the Properties window, press the Apply button to apply the changes.
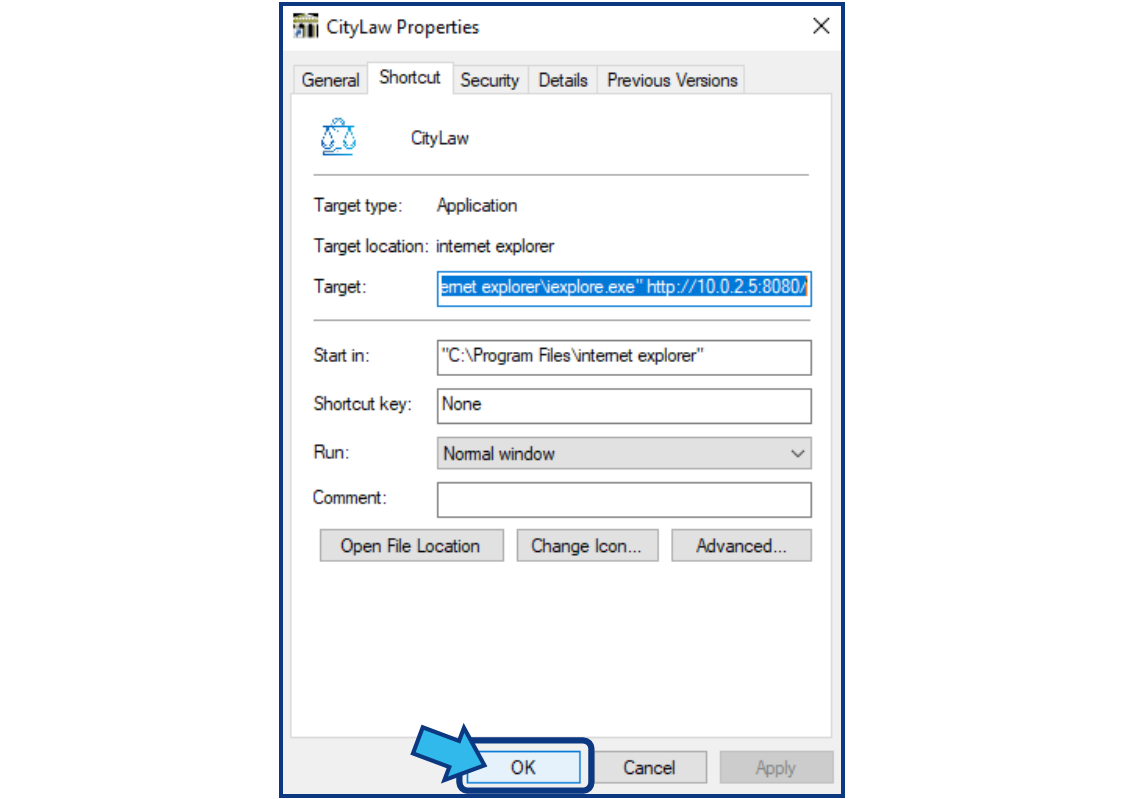
Step 6. Press OK.
In the Properties window, press the OK button to exit.
Comments
0 comments
Please sign in to leave a comment.