
Need a printable version of this article? Download the Article (PDF Version).
Need a reminder? Use the Quick Reference Guide.
Need more details? Check out the Standard Guide.
Quick Reference Guide
There are 4 steps to complete this task:
-
Create a CyImportFile Shortcut
-
Rename the Shortcut (this step is optional)
-
Open the SendTo Folder
-
Drag the Shortcut to the SendTo Folder
Standard Guide
Step 1. Create a CyImportFile Shortcut
As part of the standard installation process, most users have the CyImportFile shortcut added to their desktop. The icon has a distinctive green arrow (see image below).
![]()
If you already have the CyImportFile icon on your desktop, go to Step 2.
Do the following to create the CyImportFile desktop shortcut:
- Open File Explorer and navigate to C:\CycomSQL (The contents of your CycomSQL folder may be different than those shown below).
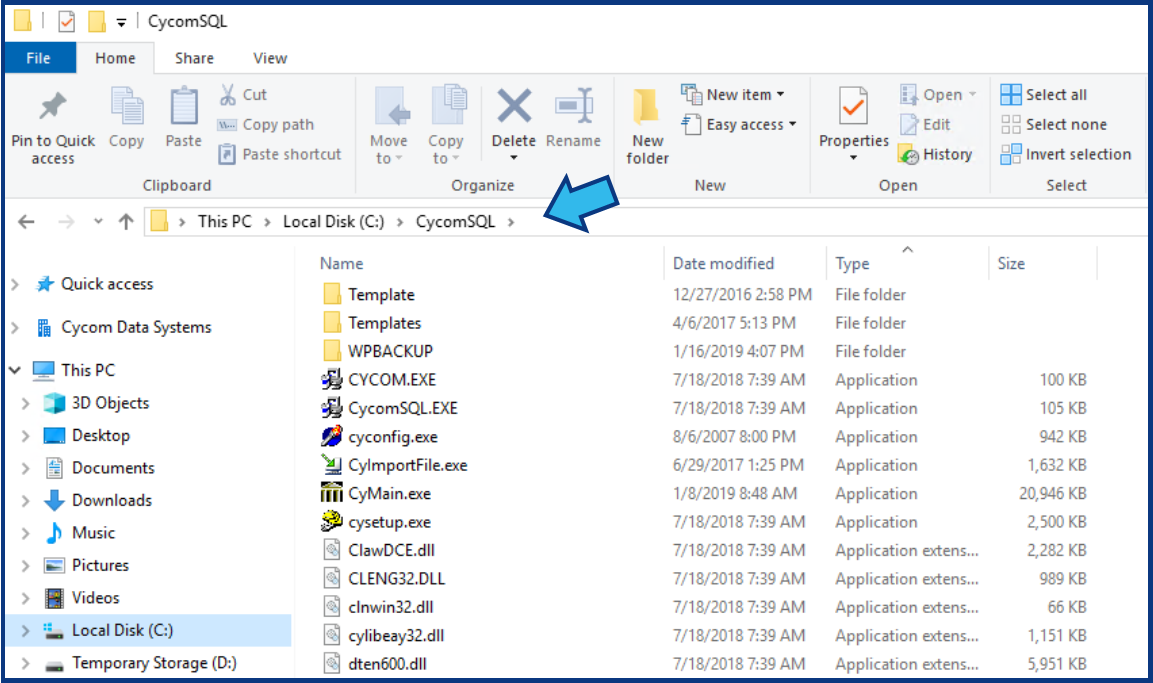
- Right-click on CyImportFile and select Send to and then Desktop (create shortcut).
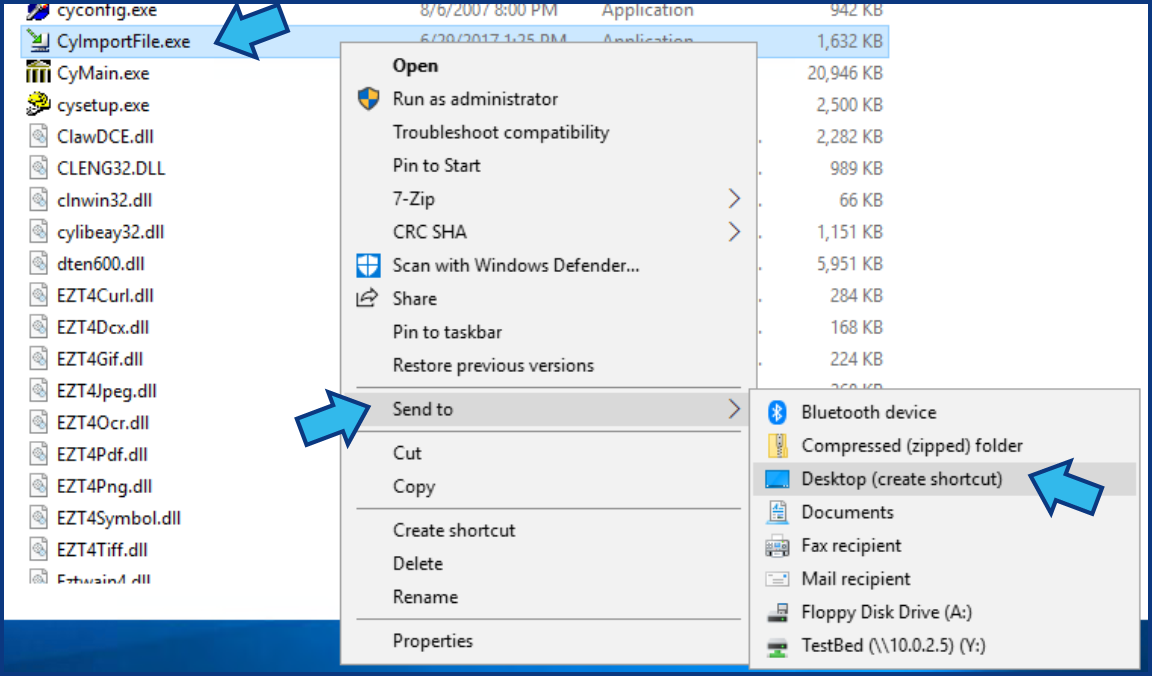
If CyImportFile is not available in the CycomSQL folder, contact Cycom Support for assistance.
Step 2. Rename the Shortcut (this step is optional)
If you would like the Send To option to be named differently, right-click on the CyImportFile desktop shortcut and select Rename.

Do not name the CyImportFile shortcut the same as your application shortcut. In this example, we have chosen to rename it CityLaw Import.
![]()
Step 3. Open the SendTo Folder
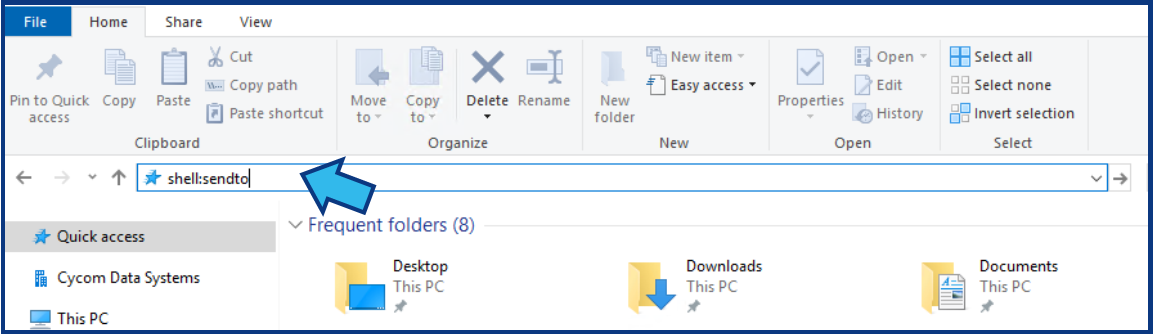
To open the SendTo folder, type shell:sendto into the File Explorer address bar and hit the Enter key.
shell:sendto
Step 4. Drag the Shortcut to the SendTo Folder
Drag the CyImportFile (or the name you chose in Step 2) shortcut from your desktop into the SendTo folder.
![]()
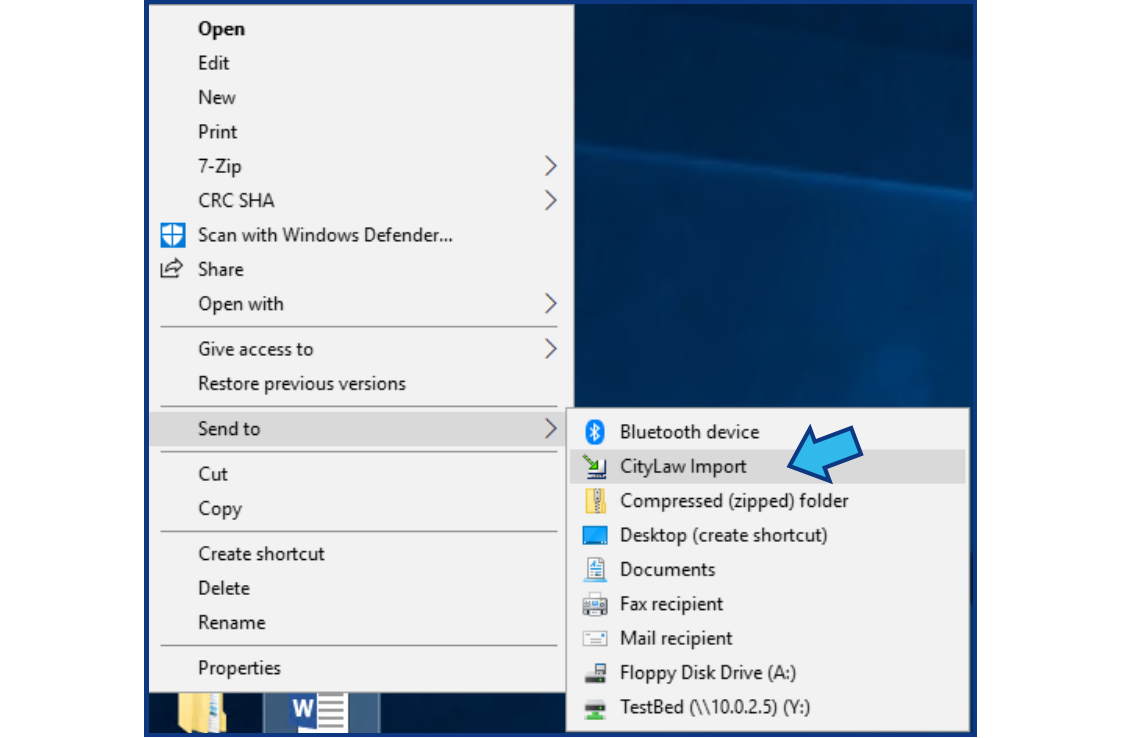
Now when you right-click on any file and select Send to, you will see CyImportFile (or the name you chose in Step 2) in the list of options.
Comments
0 comments
Please sign in to leave a comment.