
Need a printable version of this article? Download the Article (PDF Version).
Need a reminder? Use the Quick Reference Guide.
Need more details? Check out the Standard Guide.
Quick Reference Guide
There are 8 steps to complete this task:
-
Open the template in Microsoft Word.
-
Select File.
-
Select Properties to open Advanced Properties.
-
Select the Custom tab.
-
Ensure the required CycomTemplate and DocProfile properties are present with the correct values.
-
Add the optional SaveasPDF, IsExpWitnessAmount, and IsWorkflowDelay properties if applicable.
-
Press OK.
-
Close the template.
Standard Guide
Step 1. Open the template in Microsoft Word.
Open the template you want to associate with a CLW Workflow in Microsoft Word.
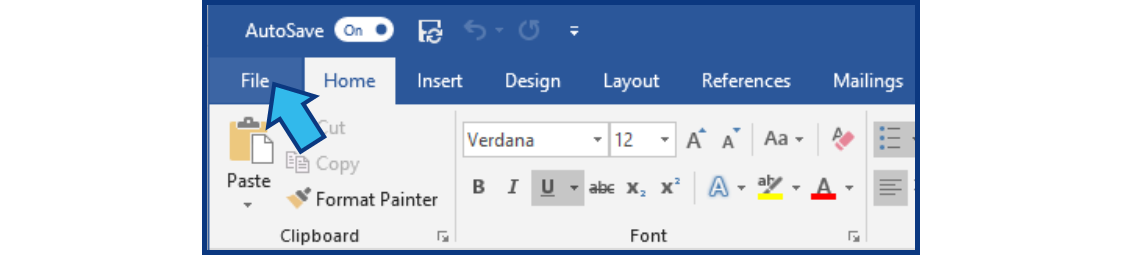
Step 2. Select File
On the Menu Bar at the top, select File.
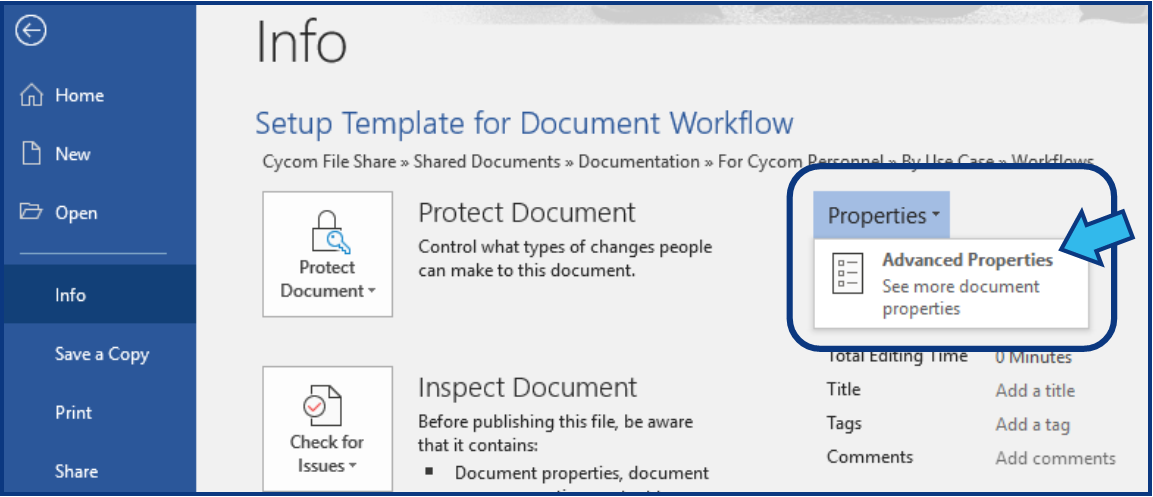
Step 3. Select Properties to open Advanced Properties.
On the top right, select the Properties drop-down and select Advanced Properties.
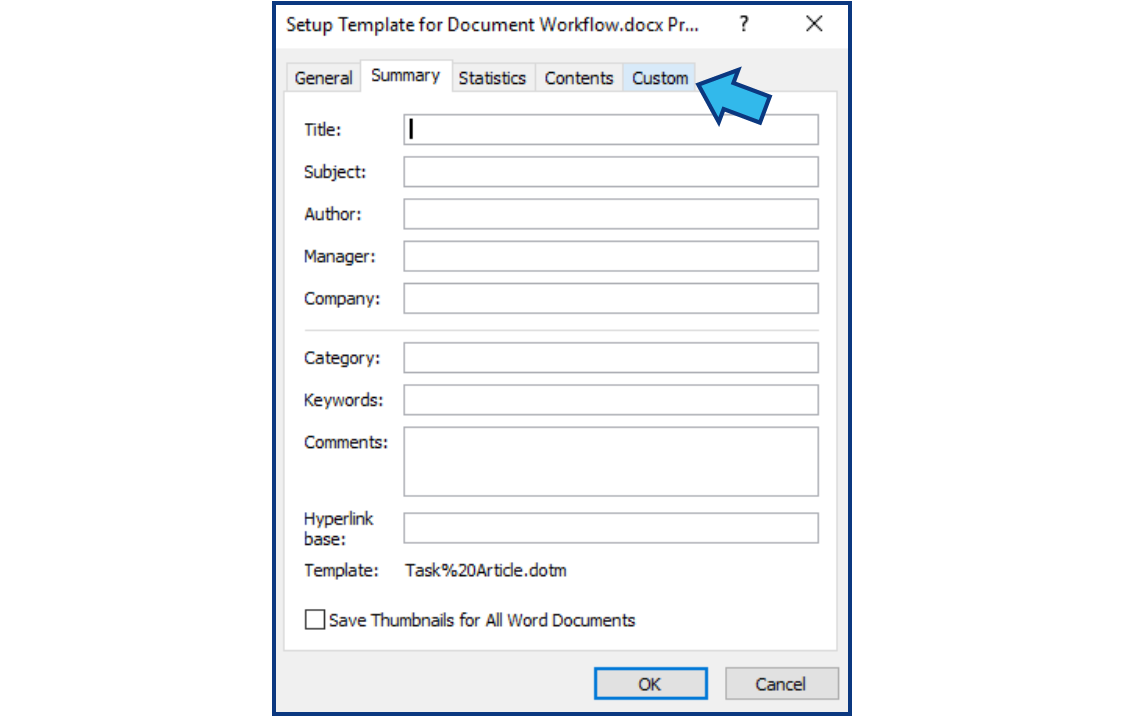
Step 4. Select the Custom tab.
Select the Custom tab from the Properties window.
Step 5. Ensure the required CycomTemplate and DocProfile properties are present with the correct values.
Minimally, CycomTemplate and DocProfile must be listed in the Properties shown.
If not present, do the following steps to add them.
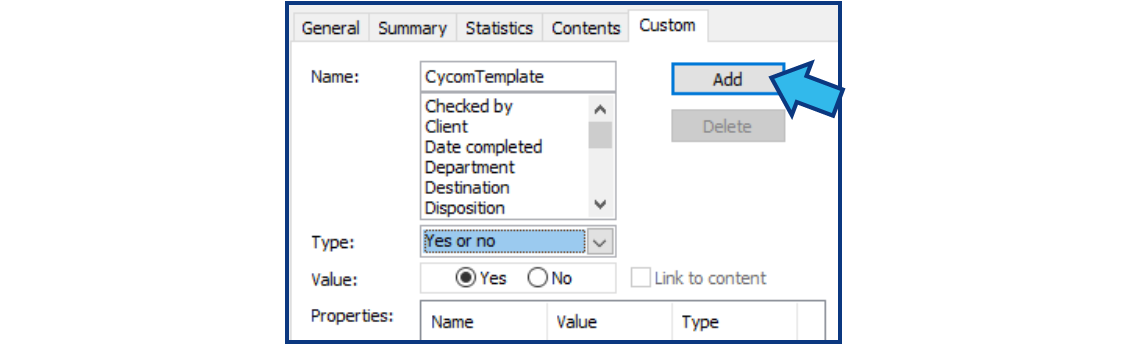
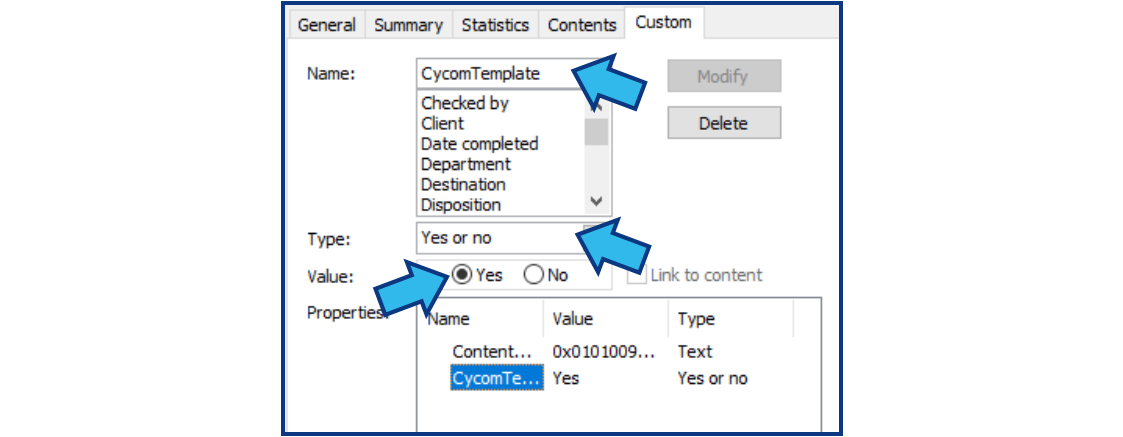
Add CycomTemplate property:
- Enter CycomTemplate in the Name field.
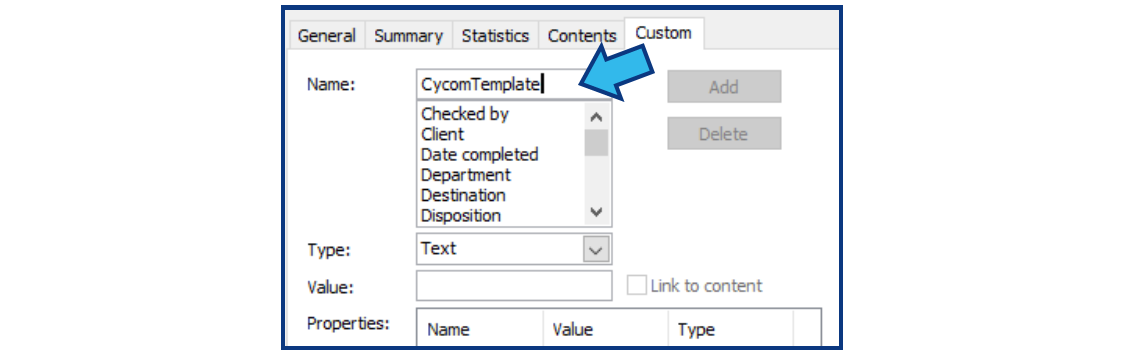
- Select Yes or no for the Type field.
- Select Yes for Value.

- Press Add to add the new CycomTemplate property to this template.
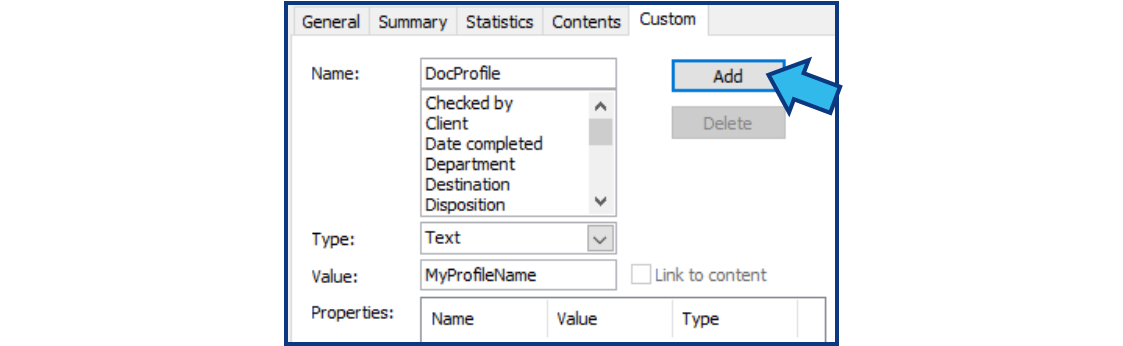
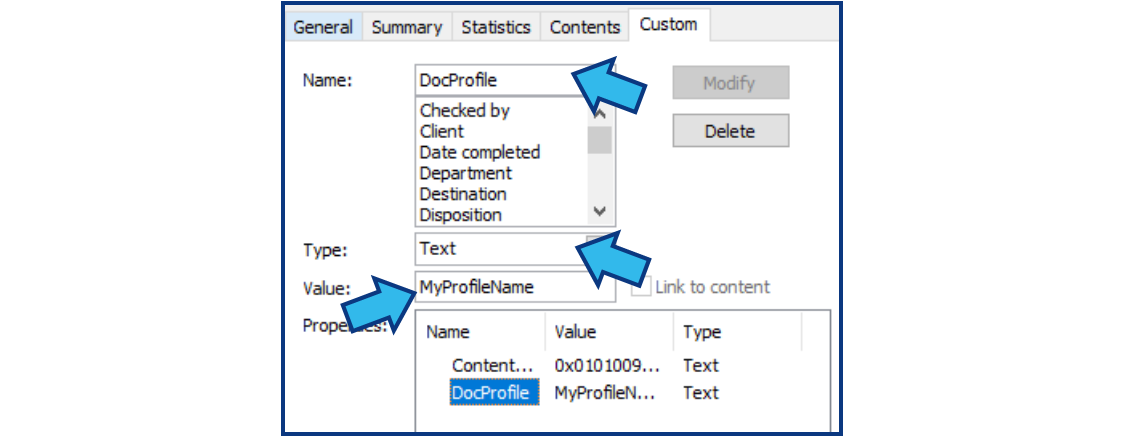
Add DocProfile property:
- Enter DocProfile in the Name field.
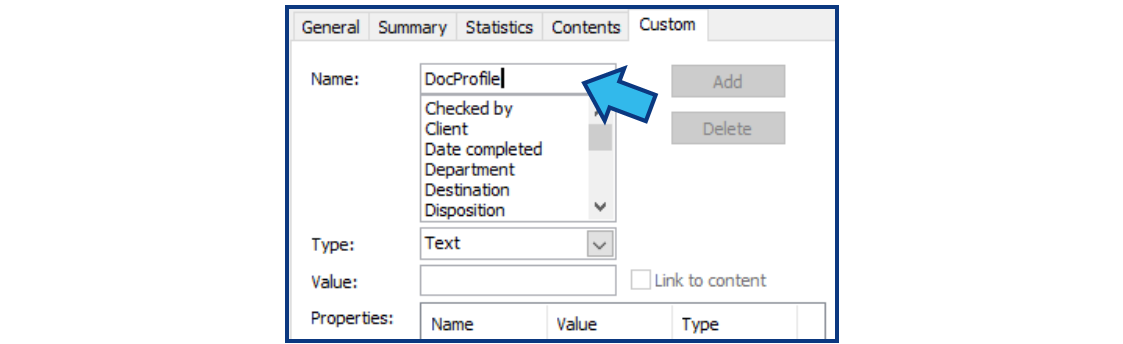
- Select Text for the Type field.
- Enter the Workflow Profile name of the Workflow to which this template will be associated.

- Press Add to add the new DocProfile property to this template.
If present, use the following steps to verify the values provided are correct.
Select the CycomTemplate property.
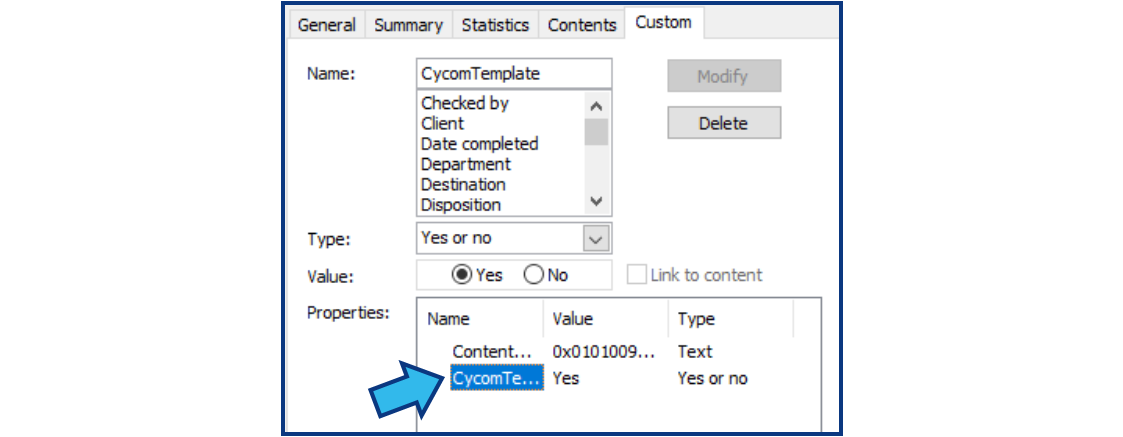
Verify CycomTemplate property:
- Verify the Name is CycomTemplate (without a space, ‘C’ and ‘T’ uppercase, and without any additional characters).
- Verify the Type is Yes or no.
- Verify the Value is Yes.
Verify DocProfile property:
- Verify the Name is DocProfile (without a space, ‘D’ and ‘P’ uppercase, and without any additional characters).
- Verify the Type is Text.
- Verify the Value is the exact Workflow Profile name of the Workflow to which this template will be associated.
Step 6. Add the optional SaveasPDF, IsExpWitnessAmount, and IsWorkflowDelay properties if applicable.
The following properties are optional. If needed, use the steps provided in Step 5 for adding the CycomTemplate property substituting the information provided below in the Name, Type, and Value fields.
SaveasPDF property:
- Name: SaveasPDF
- Type: Yes or no
- Value: Yes
When this property is added and the value is set to Yes, it will cause Word to open the template, immediately save it to the matter as a PDF, and then close the template. This is especially useful when there is a need to “lock down” a template format to prevent the user from unintentionally changing the layout or data within the template.
IsExpWitnessAmount property:
- Name: IsExpWitnessAmount
- Type: Yes or no
- Value: Yes
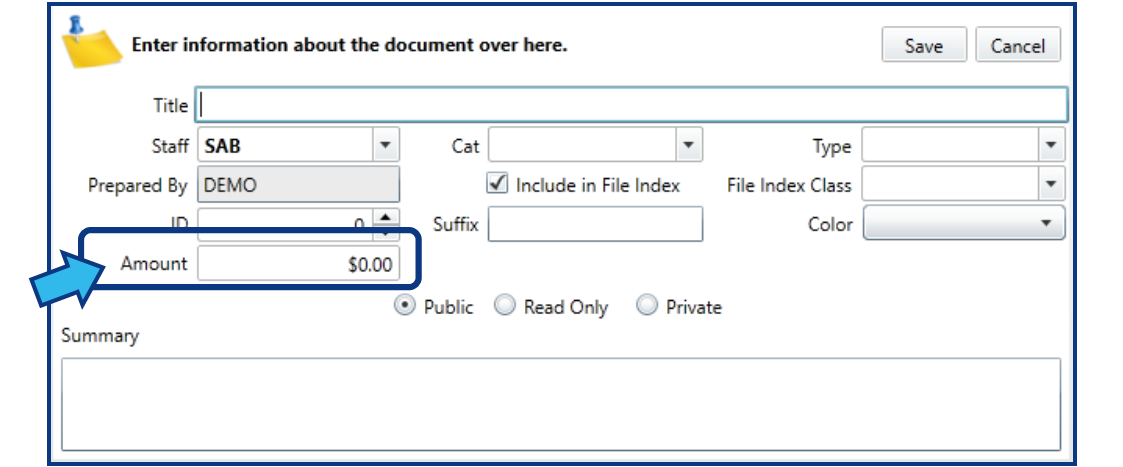
When this property is added and the value is set to Yes, it causes a field to be visible on the Document Details window at the creation time of the document, as shown below. The purpose of this field is so that a document workflow can enable different workflow approval steps if the dollar amount is above/below a set value.
IsWorkflowDelay property:
- Name: IsWorkflowDelay
- Type: Yes or no
- Value: Yes
When this property is added and the value is set to Yes, this will cause the document workflow steps to be temporarily bypassed. This is useful when a document is being created by the user, but not all information is known at the time of creation of the document. Perhaps some details will be filled in on the document later. When this option is enabled, the user is presented with a popup after they click the Save button in the Document Details window, asking whether the document should be submitted for workflow execution. Answering Yes to that question will cause the workflows to execute.
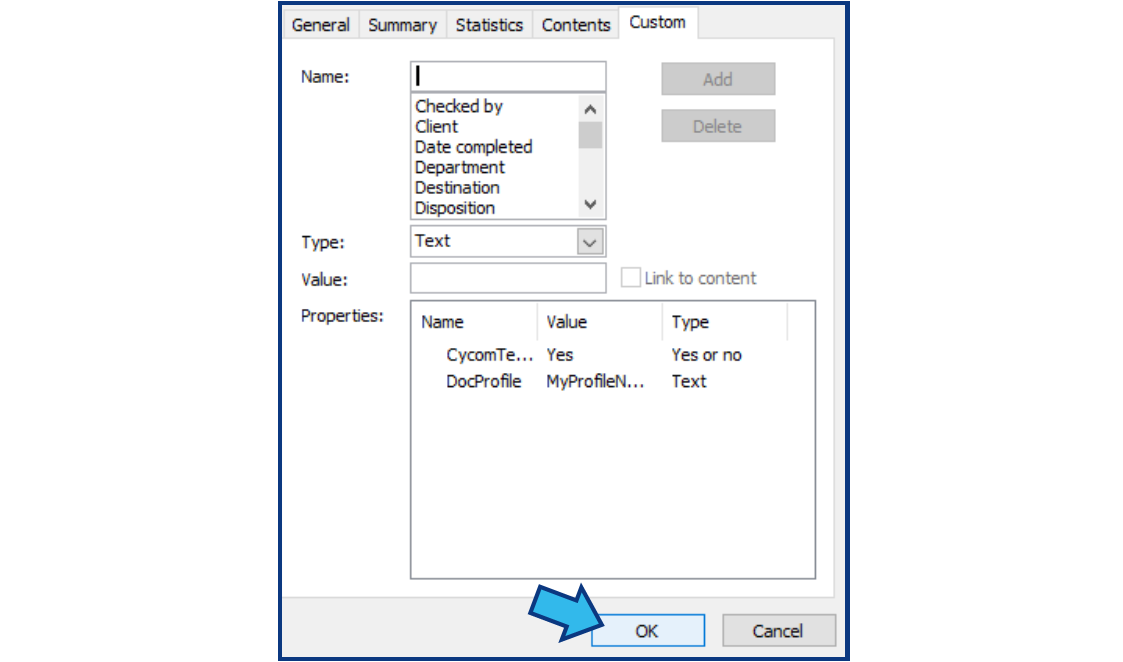
Step 7. Press OK.
Once all required and desired properties are added and/or verified, press OK to accept and apply any changes.
Step 8. Close the template.
The template is now able to be used in a CLW Workflow. Close the template and/or Microsoft Word.
Comments
0 comments
Please sign in to leave a comment.