
Need a printable version of this article? Download the Article (PDF Version).
Need a reminder? Use the Quick Reference Guide.
Need more details? Check out the Standard Guide.
Quick Reference Guide
There are 20 steps to complete this task:
-
Open System Management.
-
Select the Admin tab and enter the Admin Password.
-
Select Workflow Management Profile.
-
Select the New Activity type.
-
Choose the Module for the type of matter.
-
Drag CalendarEntry to the Selected Activities list.
-
Press Add Profiles icon.
-
Select the Module.
-
Press New.
-
Enter a Profile Name and a Category (if applicable).
-
Press Save.
-
Press Add Parameters icon.
-
Select the Module and Profile.
-
Add the Parameter(s).
-
Close the Activity Parameter Maintainance window.
-
Close the Workflow Profile Maintainance window.
-
Save the Profile.
-
Close the Workflow Profiles window.
-
Close the System Management window.
-
Confirm the calendar entry is generated as expected by creating a new matter.
Standard Guide
Step 1. Open System Management.
There are two ways to open this module.
1-Step Option:
Press the System Management icon on the Global Toolbar.
![]()
![]()
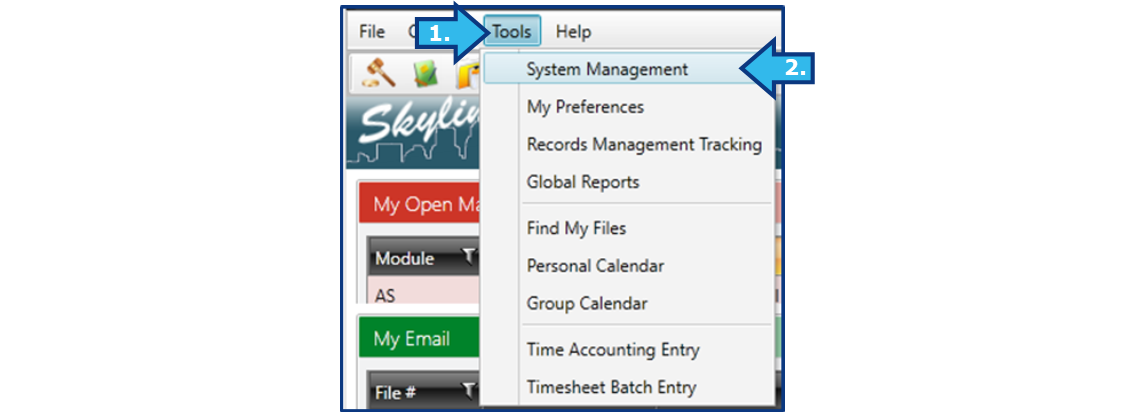
2-Step Option:
- On the Menu Bar, press Tools.
- Press System Management.
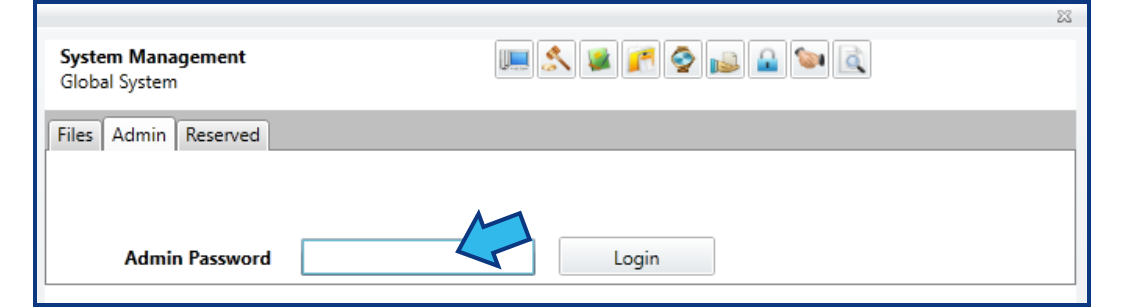
Step 2. Select the Admin tab and enter the Admin Password.
System Administrator privileges are required to create or edit workflow automations. Select the Admin tab and enter the password to access Admin options.
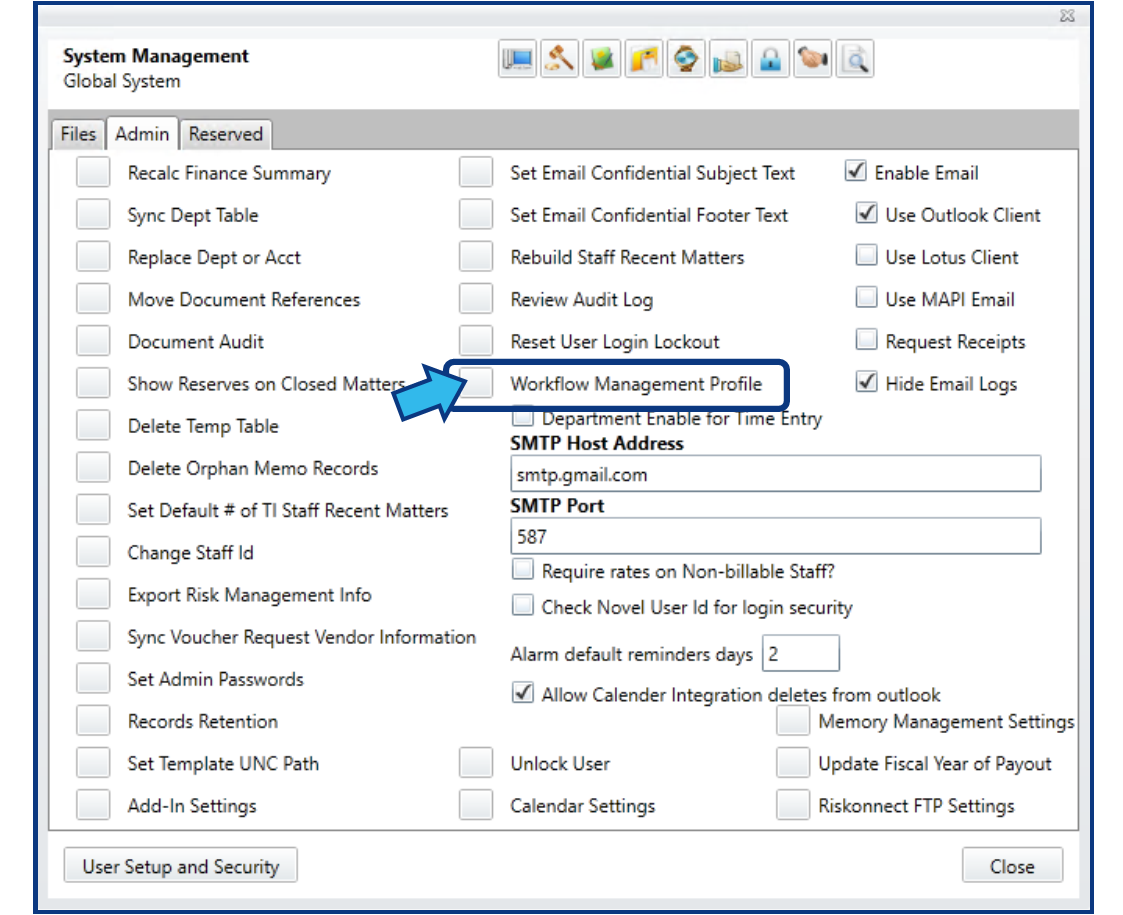
Step 3. Select Workflow Management Profile.
Select the box to the left of Workflow Management Profile, located near the middle of the Admin options.
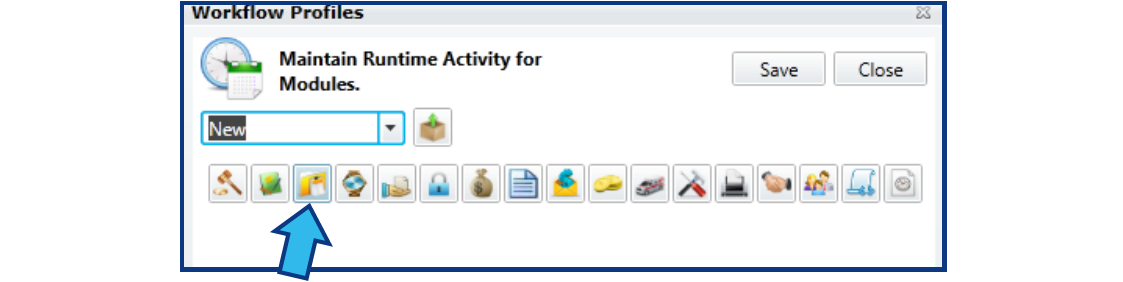
Step 4. Select the New Activity type.
In the Runtime Activity drop-down, select the New activity.

Step 5. Choose the Module for the type of matter.
Once a Runtime Activity is selected, module icons will appear. Choose the appropriate icon for the new matter type to which this automated calendar entry will be attached. The Claims module is selected for this example.
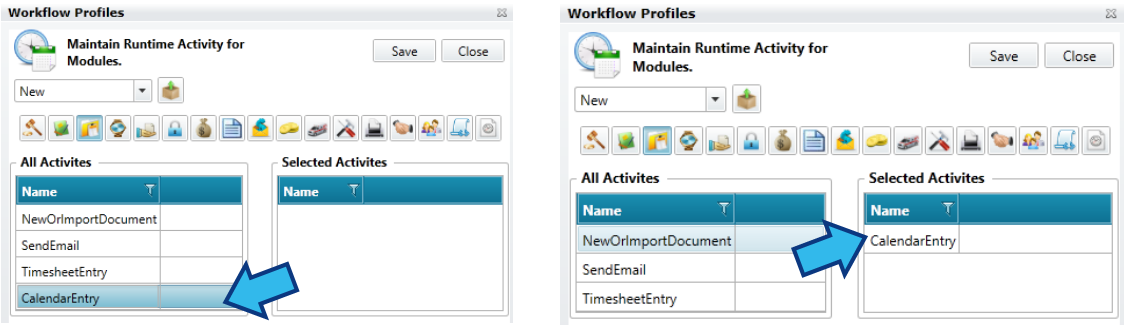
Step 6. Drag CalendarEntry to the Selected Activities list.
Once a module is selected, 2 lists appear. On the left is a listing of All Activities which can be automated. On the right are the Selected Activities. Drag the CalendarEntry activity to the Selected Activities list.
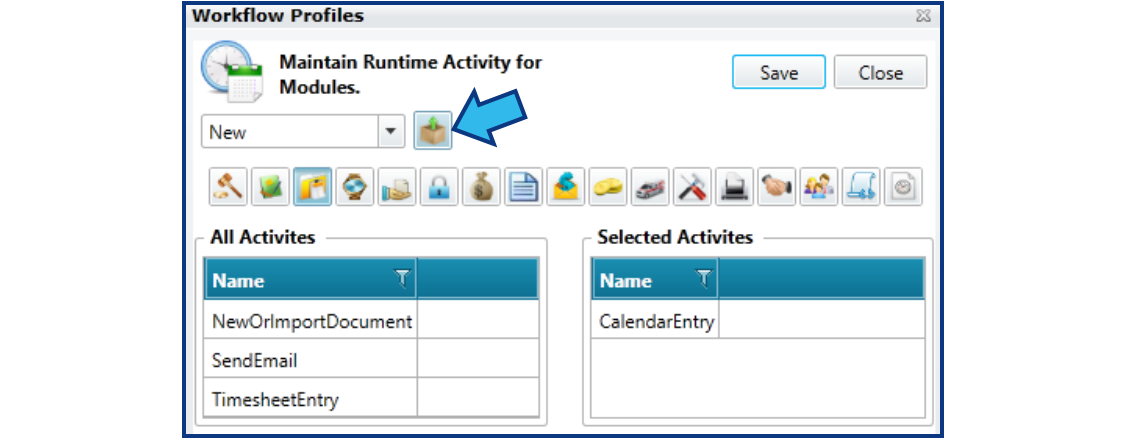
Step 7. Press Add Profiles icon.
The Add Profiles icon is located beside the Runtime Activity drop-down.
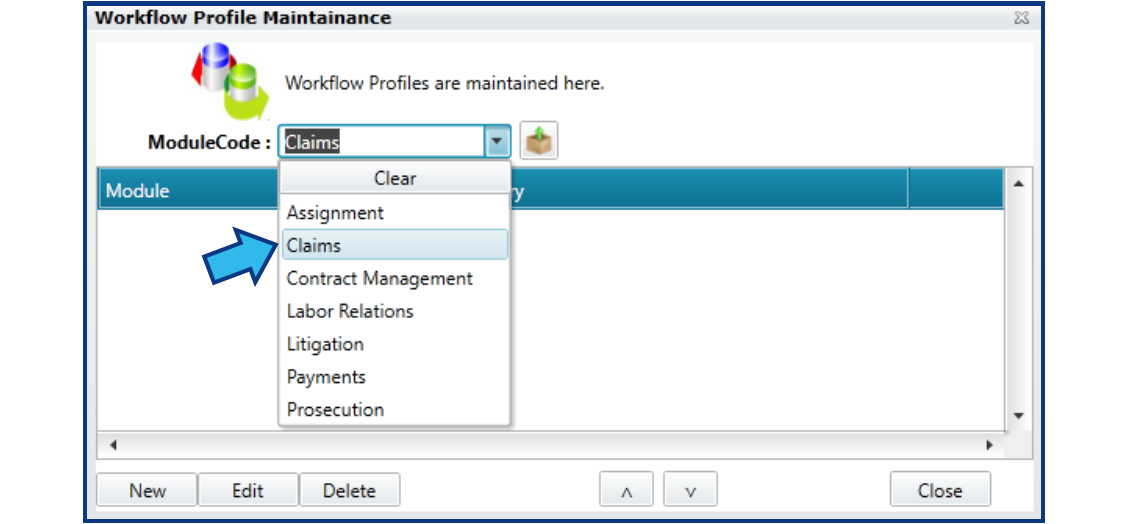
Step 8. Select the Module.
After completing Step 7, a Workflow Profile Maintainance window appears. In the ModuleCode drop-down, select the module. This should be the same module selected in Step 5. The Claims module is selected for this example.
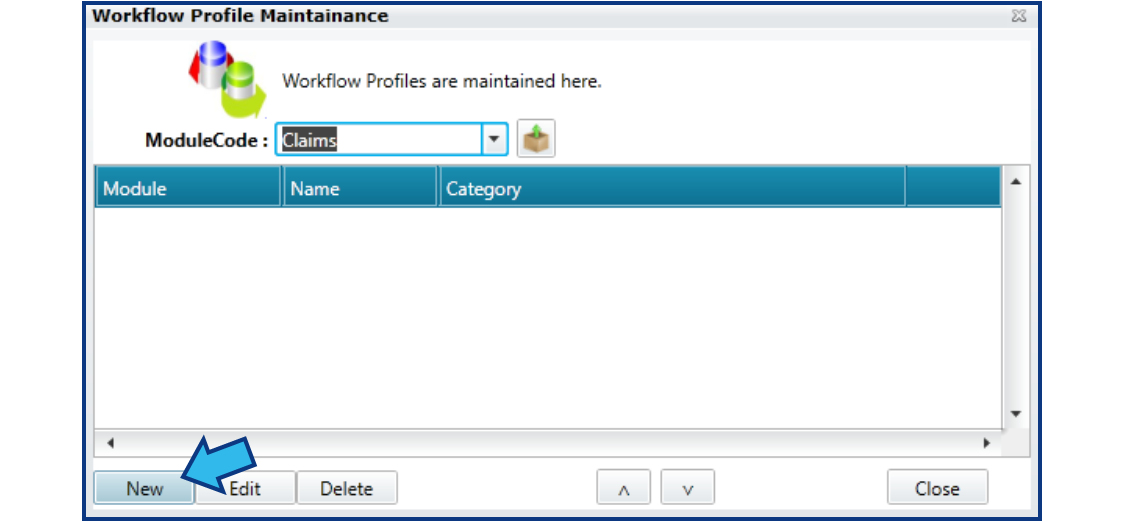
Step 9. Press New.
Create a new Workflow Profile by pressing the New button located at the bottom-left.
Step 10. Enter a Profile Name and a Category (if applicable).
Provide a Profile Name. If the Profile is limited to one category type, use the drop-down arrow to select the Category. If the Profile is limited to two or more category types, use the + + button to select multiple categories. If the Profile is not limited to specific categories, leave the Category field empty.

Step 11. Press Save.
The Save button is located on the bottom-right.

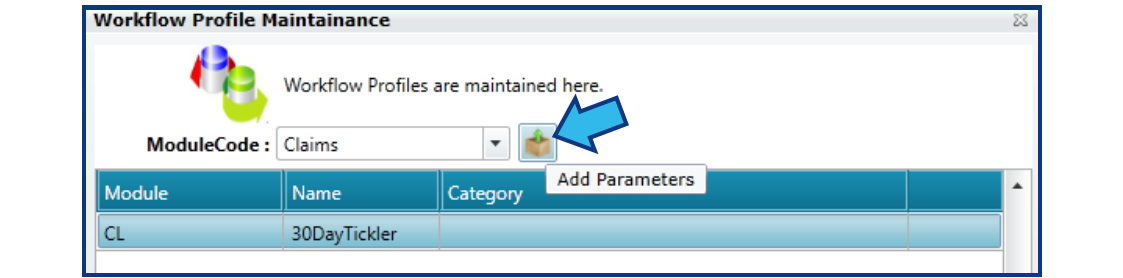
Step 12. Press Add Parameters icon.
The Profile just created in Step 11 will be highlighted. If it is not, highlight the desired Profile and press the Add Parameters icon located to the right of the ModuleCode field.
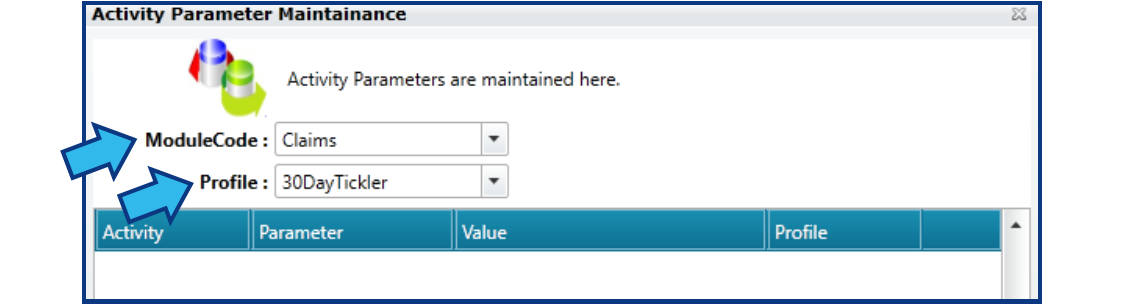
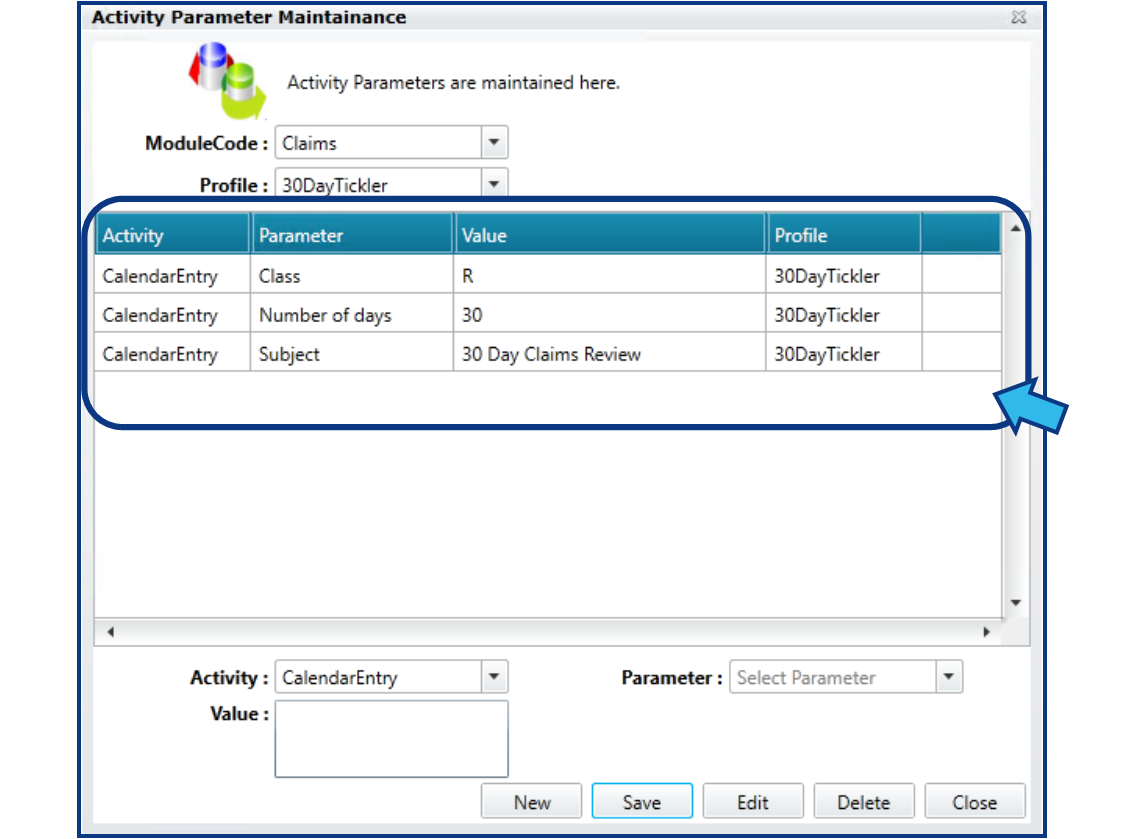
Step 13. Select the Module and Profile.
In the ModuleCode and Profile drop-downs, select the Module and Profile from Step 8 and Step 10.
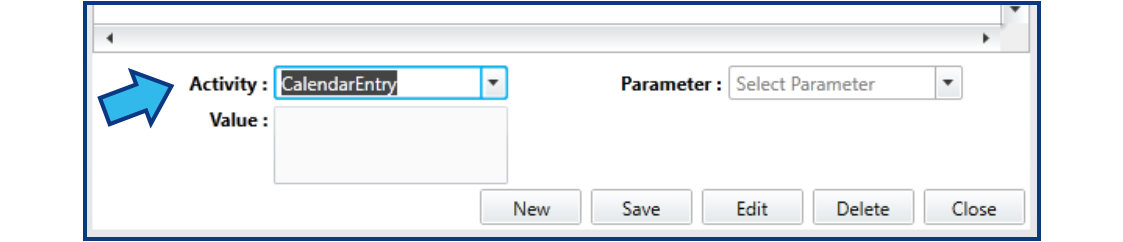
Step 14. Add the Parameter(s).
With the Module and Profile selected, the Parameters may be added. For a Calendar Entry, there are three required Parameters: Subject, Number of days, and Class. To add these Parameters, do the following:
In the Activity drop-down, select CalendarEntry.
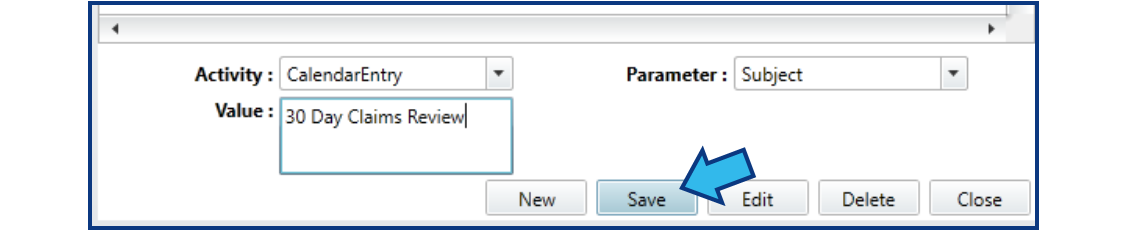
In the Parameter drop-down, select Subject.

In the Value field, enter the Subject to distinguish this calendar entry. The Subject should be descriptive to prompt the user of the task required.
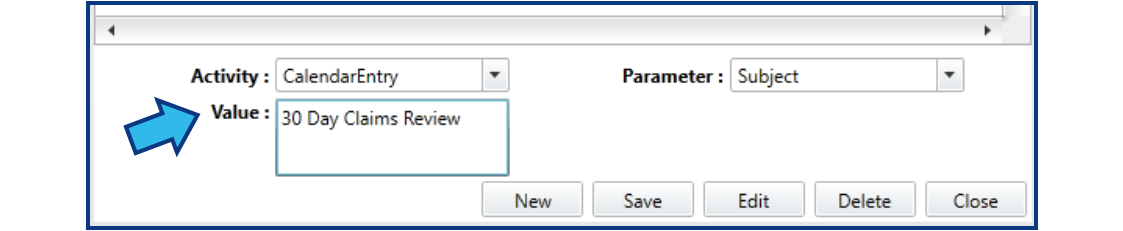
Press Save to add the Subject Parameter.
A Success dialog box will appear to confirm the Parameter has been added to the Profile. Press OK to continue.

In the Parameter drop-down, select Number of days.
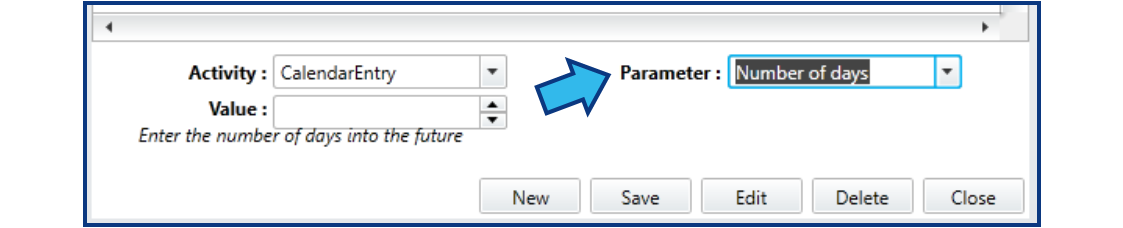
In the Value field, enter the number of days in the future this event should be scheduled. This is calculated from the date the new matter is Opened.
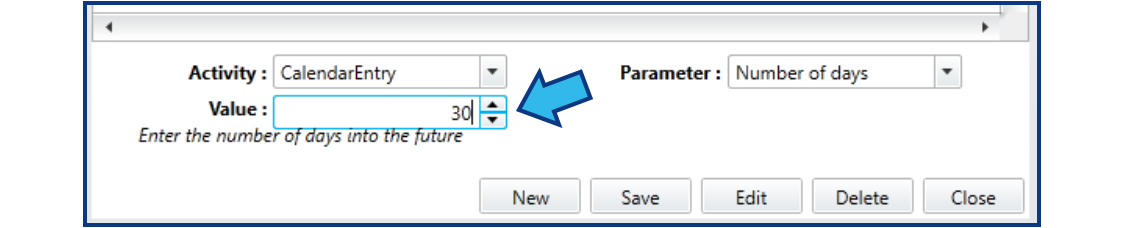
Press Save to add the Parameter and press OK in the Success dialog box. Next, in the Parameter drop-down, select Class. In the Value drop-down, select the type of calendar event. In this example, a Tickler is chosen.

Press Save to add the Parameter and press OK in the Success dialog box. Once added, the Parameters will be listed on the Activity Parameter Maintainance table.
Additional CalendarEntry Parameters, if applicable, may be added in a similar fashion, by selecting the Parameter, selecting or entering the Value, and then pressing Save and OK.
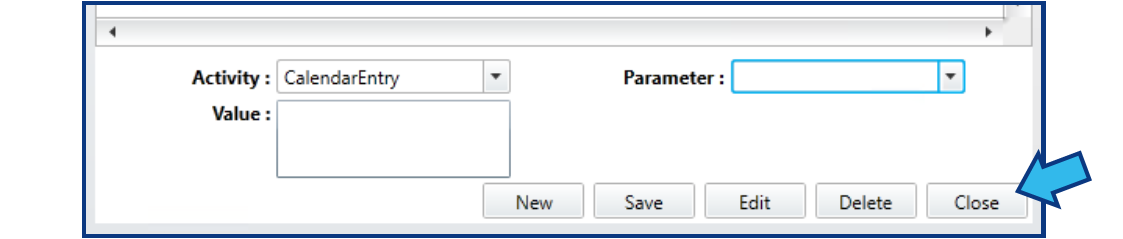
Step 15. Close the Activity Parameter Maintainance window.
Once all required and desired optional Parameters have been added, press Close in the bottom-right corner to close the Activity Parameter Maintainance window.
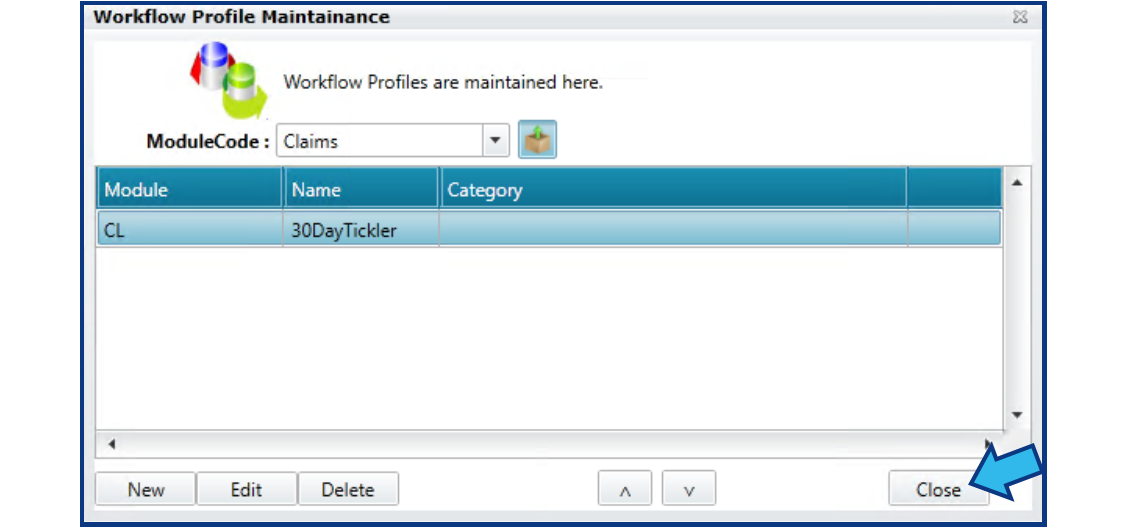
Step 16. Close the Workflow Profile Maintainance window.
Press the Close button located in the bottom-right corner of the Workflow Profile Maintainance window.
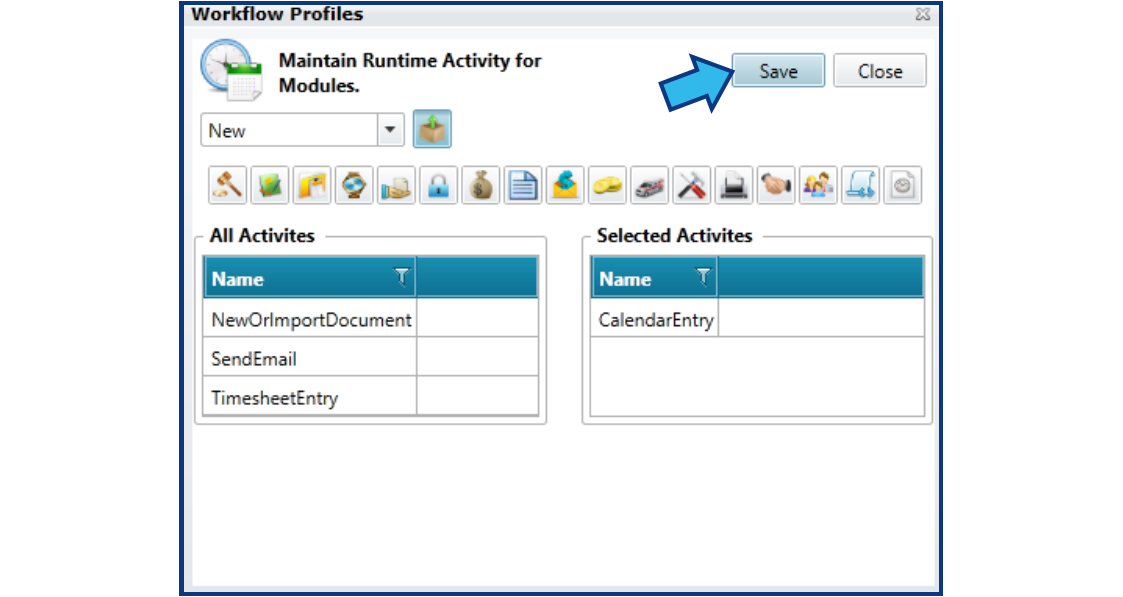
Step 17. Save the Profile.
Save the Profile by pressing Save near the top-right corner of the Workflow Profiles window.
Step 18. Close the Workflow Profiles window.
Press the Close button in the top-right corner of the Workflow Profiles window.

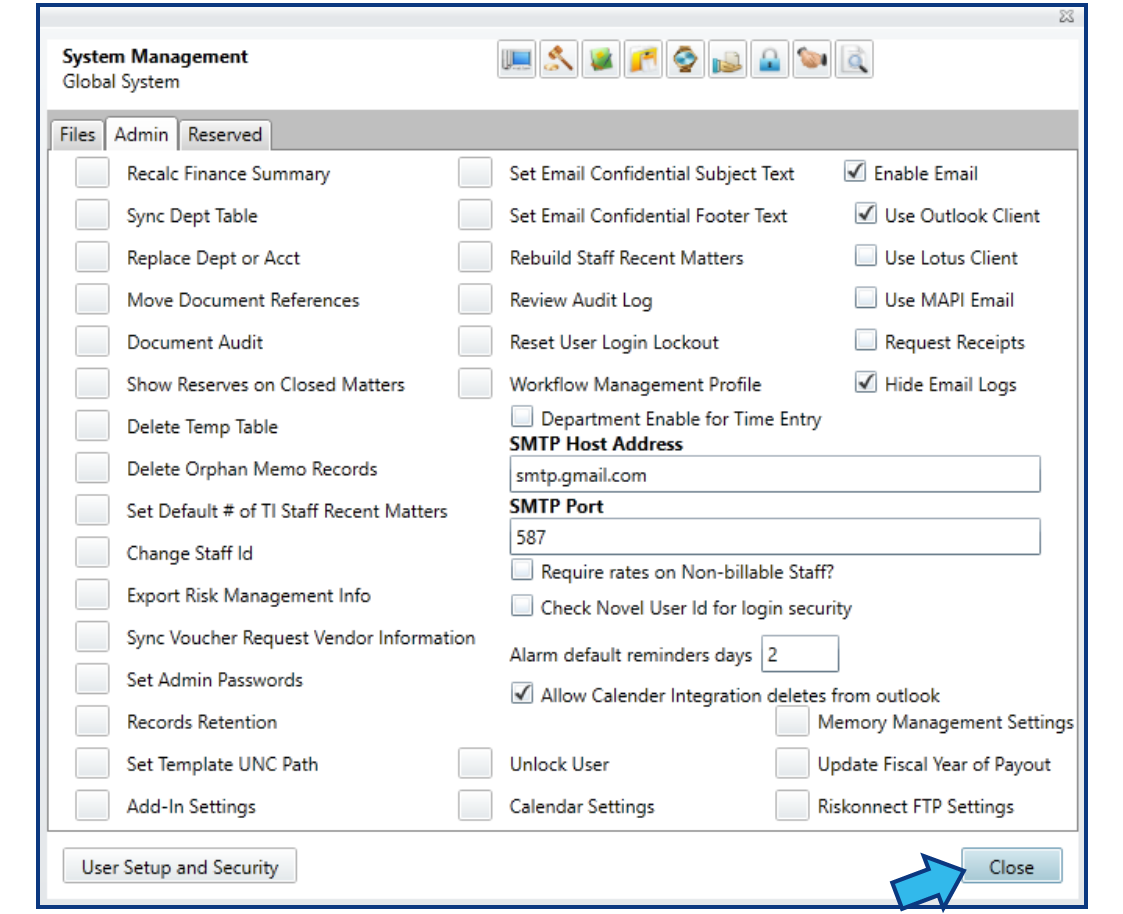
Step 19. Close the System Management window.
Press the Close button in the lower-right corner of the System Management window.
Step 20. Confirm the calendar entry is generated as expected by creating a new matter.
Create a new matter to confirm that the automated calendar entry appears in the matter calendar as expected. If the calendar entry is not generated, repeat the steps to ensure the Profile and Parameters were entered and saved correctly.
Comments
0 comments
Please sign in to leave a comment.