
Need a printable version of this article? Download the Article (PDF Version).
Need a reminder? Use the Quick Reference Guide.
Need more details? Check out the Standard Guide.
Quick Reference Guide
There are 17 steps to complete this task:
-
Open System Management.
-
Select the Admin tab and enter the Admin Password.
-
Select Workflow Management Profile.
-
Select the Document Activity.
-
Choose the Module for this Workflow.
-
Drag the appropriate Activities to the Selected Activities list.
-
Press Add Profiles icon.
-
Select the Module and Profile.
-
Press Add Parameters icon.
-
Select the Module and Profile.
-
Enter the Workflow steps.
-
Close the Document Approval Step Maintainance window.
-
Close the Workflow Profile Maintainance window.
-
Save the Profile.
-
Close the Workflow Profiles window.
-
Close the System Management window.
-
Confirm the document template has the necessary custom properties.
Standard Guide
Step 1. Open System Management.
There are 2 ways to open this module.
1-Step Option:
Press the System Management icon on the Global Toolbar.
![]()
![]()
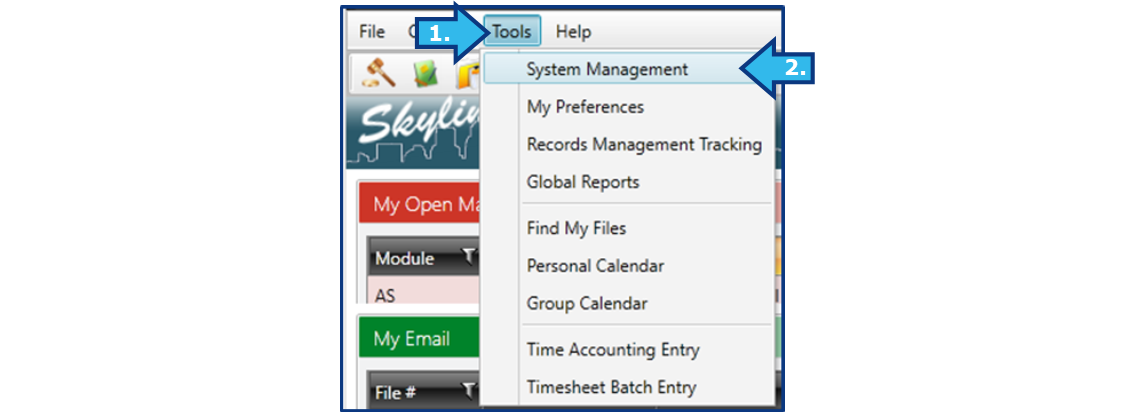
2-Step Option:
- On the Menu Bar, press Tools.
- Press System Management.
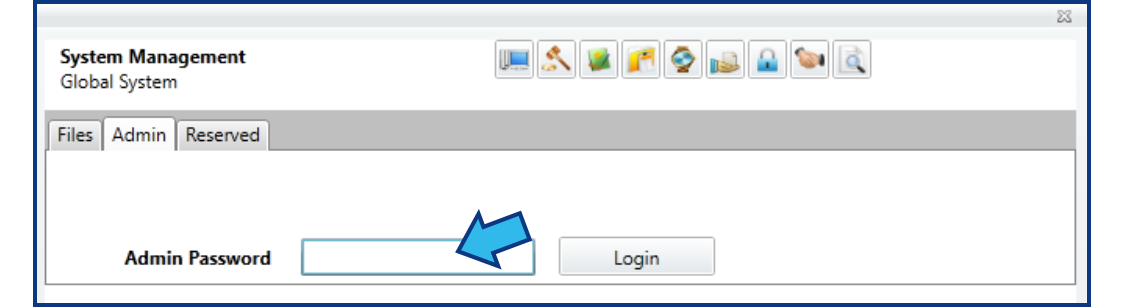
Step 2. Select the Admin tab and enter the Admin Password.
System Administrator privileges are required to create or edit workflow automations. Select the Admin tab and enter the password to access Admin options.
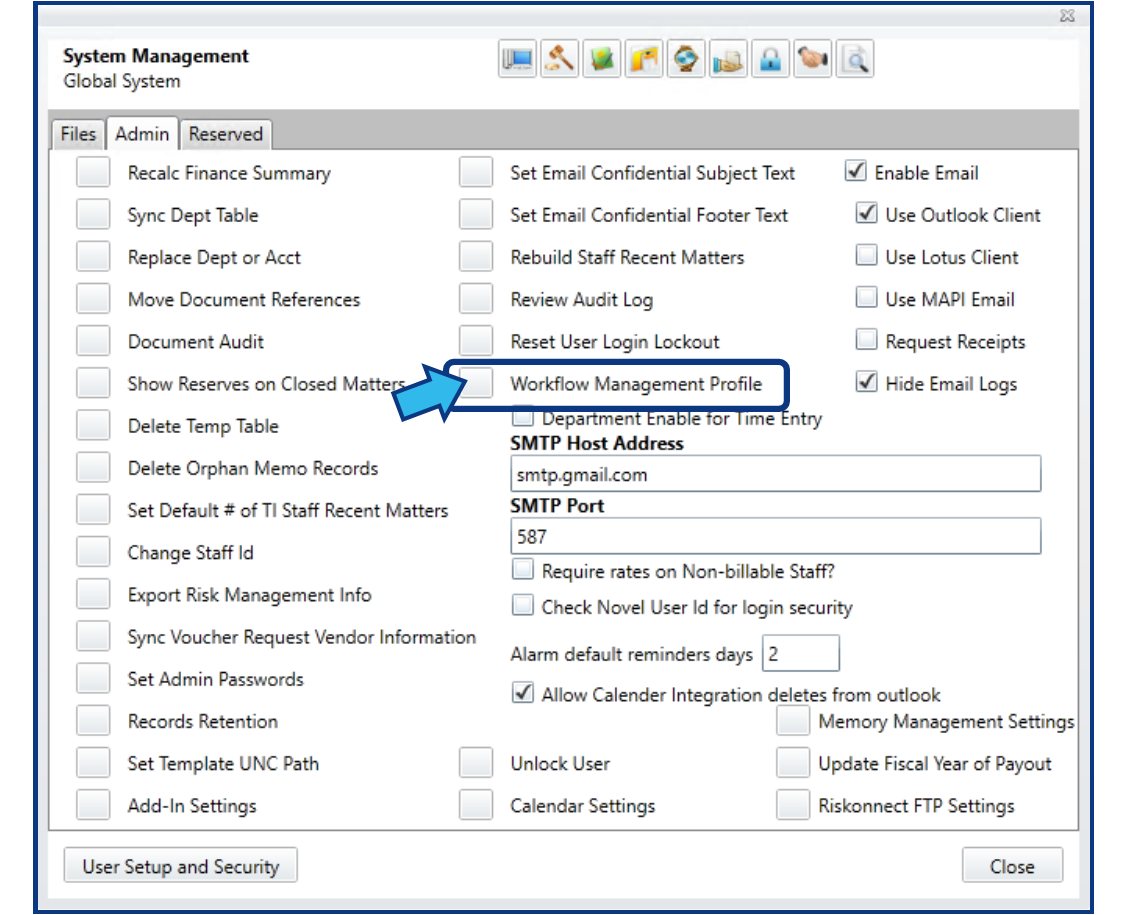
Step 3. Select Workflow Management Profile.
Select the box to the left of Workflow Management Profile, located near the middle of the Admin options.
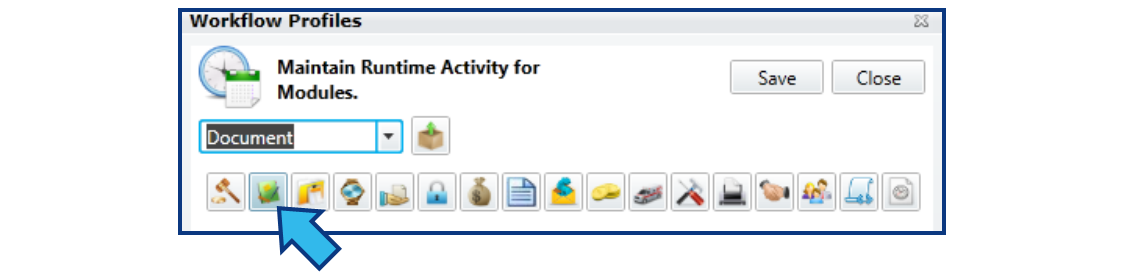
Step 4. Select the Document Activity.
In the Runtime Activity drop-down, select the Document activity.

Step 5. Choose the Module for this Workflow.
Once a Runtime Activity is selected, module icons will appear. Choose the appropriate icon for the new matter type to which this Document Workflow will be associated. The Assignment module is selected for this example.
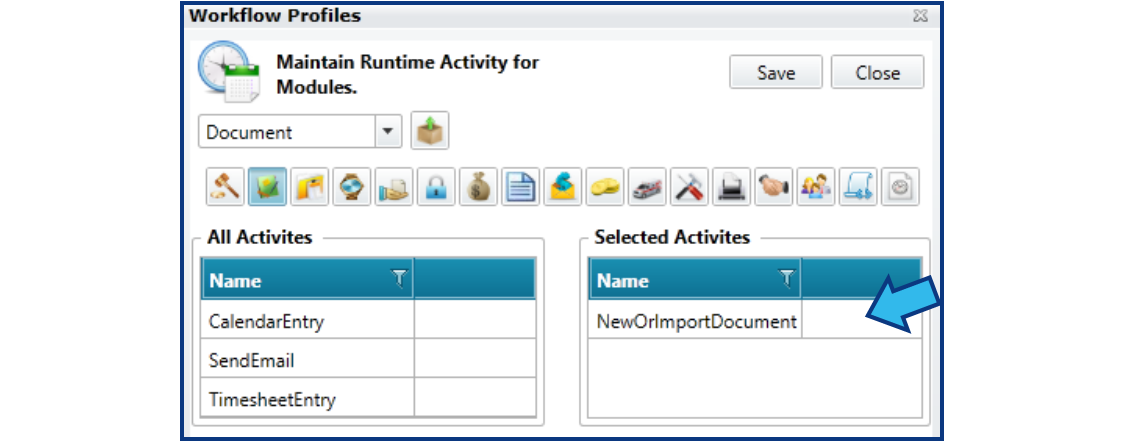
Step 6. Drag the appropriate Activities to the Selected Activities list.
Once a module is selected, two lists appear. On the left is a listing of All Activities which can be automated. On the right are the Selected Activities. Drag the NewOrImportDocument activity to the Selected Activities list.
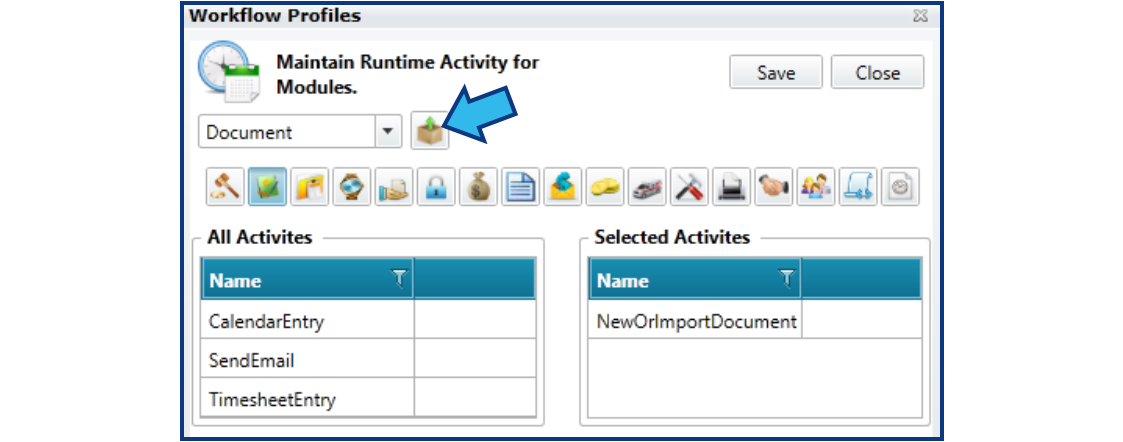
Step 7. Press Add Profiles icon.
The Add Profiles icon is located beside the Runtime Activity drop-down.
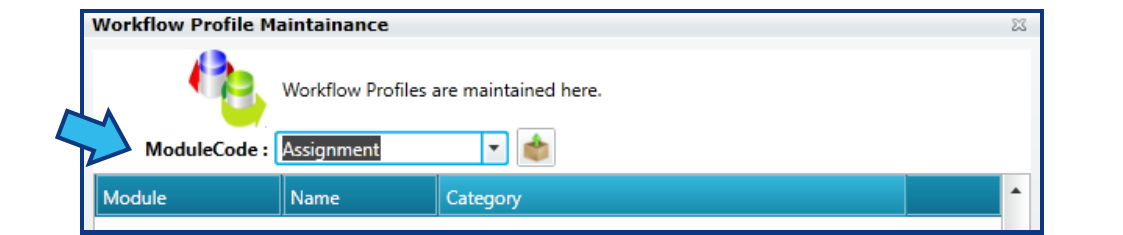
Step 8. Select the Module and Profile.
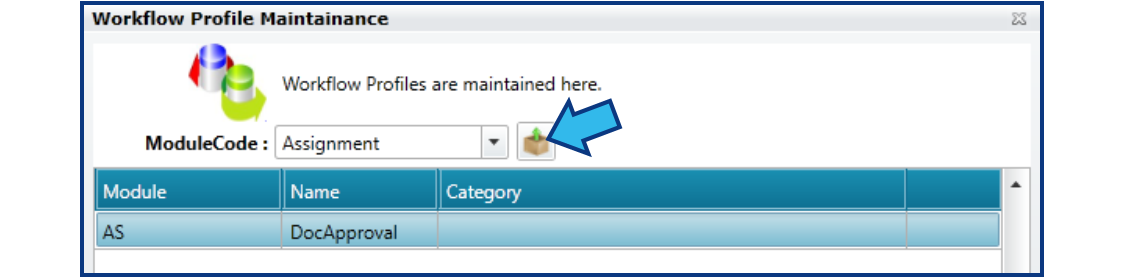
After completing Step 7, a Workflow Profile Maintainance window appears. In the ModuleCode drop-down, select the module. This should be the same module selected in Step 5. The Assignment module is selected for this example.
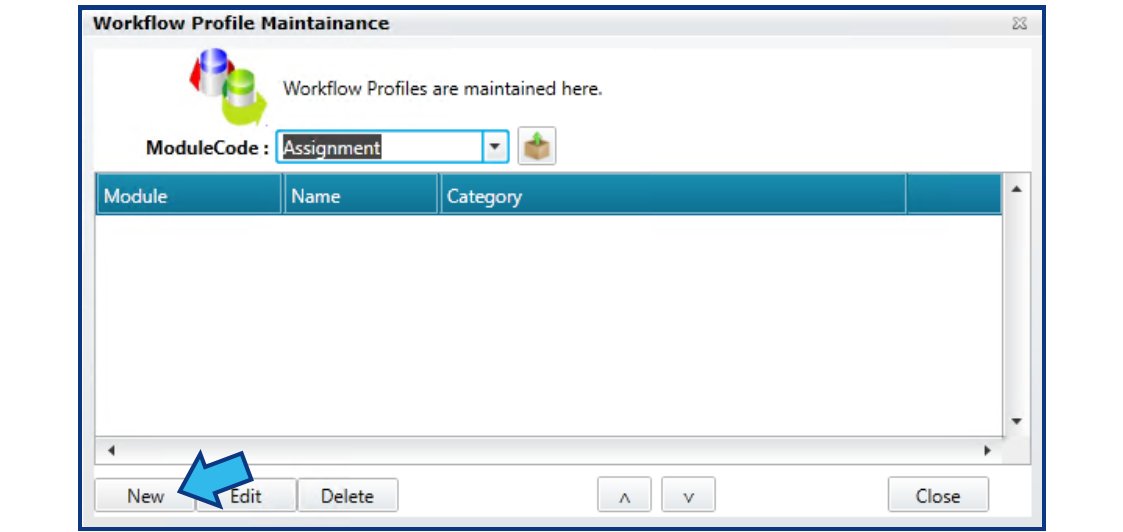
A list of available profiles will appear in the table. Select the appropriate profile or create a new one by pressing New in the bottom-left corner.
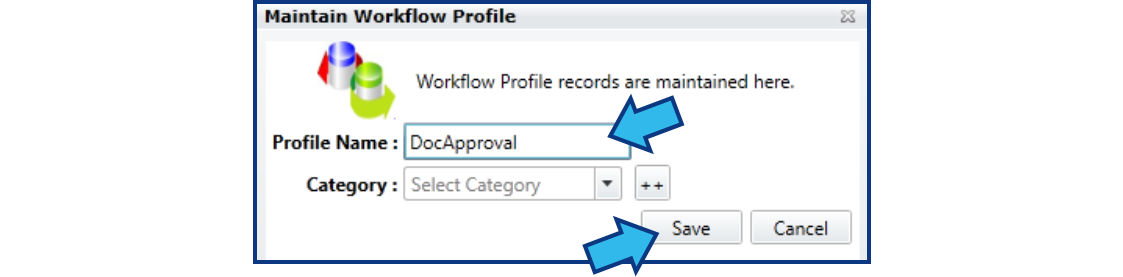
In the Maintain Workflow Profile window, provide a Profile Name and, if applicable, a Category. Press Save.
Step 9. Press Add Parameters icon.
Press the Add Parameters icon located to the right of the ModuleCode field.
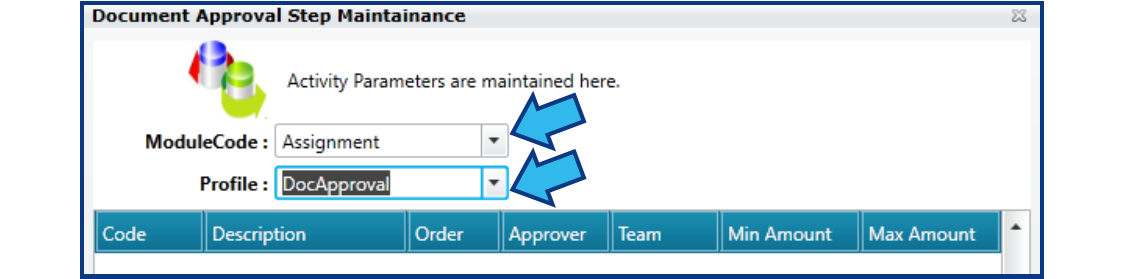
Step 10. Select the Module and Profile.
In the ModuleCode and Profile drop-downs, select the Module and Profile from Step 8.
Step 11. Enter the Workflow steps.
For each step, do the following:
Select an Approval Code for the step. This is the type of approval represented by this step. The Description field will display the approval type once an Approval Code is selected.
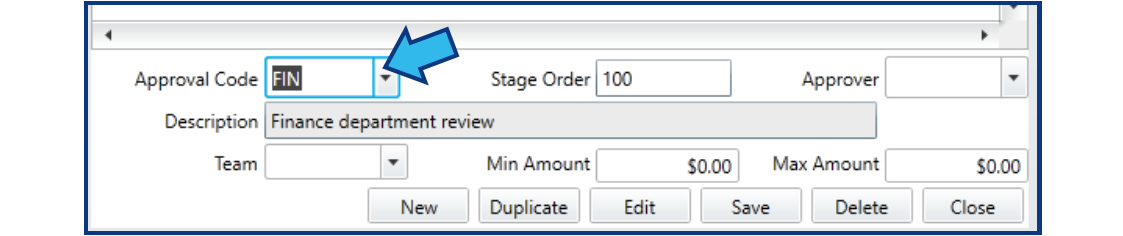
The Stage Order is pre-populated. However, this can be changed to suit the purposes of the Workflow.

Select an Approver. This is the individual responsible for giving approval for this step. This person must have a valid email address in their contact information in CLW in order to receive automatic email notifications that they have pending approvals.
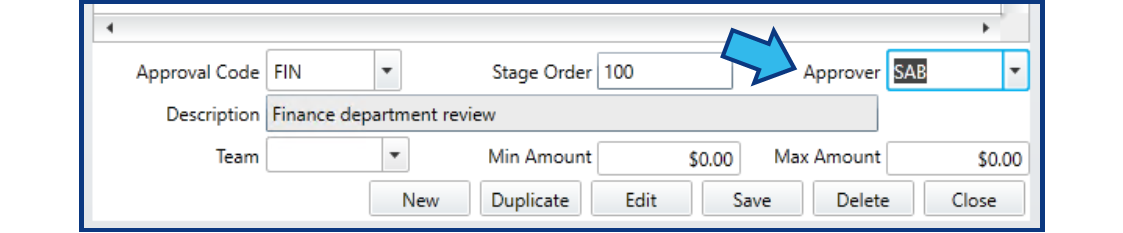
Selecting a Team is optional. If multiple teams exist in the organization, each team can have its approvers assigned.
Min and Max Amount can be applied for steps that are only necessary when certain conditions apply. For example, if an extra financial approval is required for a document related to a matter valued at over $10,000, that step would need $10,000 entered in the Min Amount and a cap value entered for Max Amount. The Max Amount must be higher than the Min Amount. NOTE: If Min and Max Amount are used, the associated document template must contain the IsExpWitnessAmount custom property.
Once the step details have been selected and/or entered, press Save.
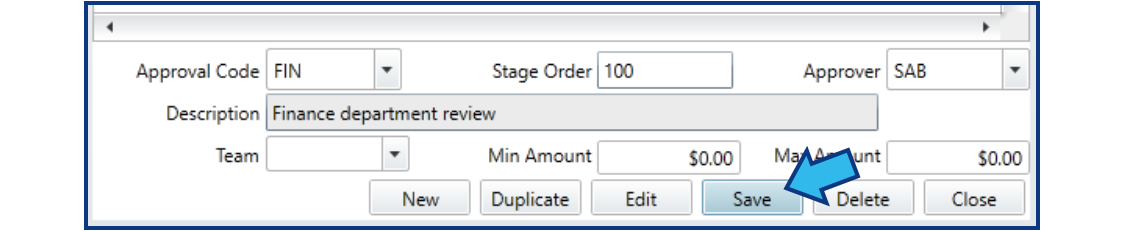
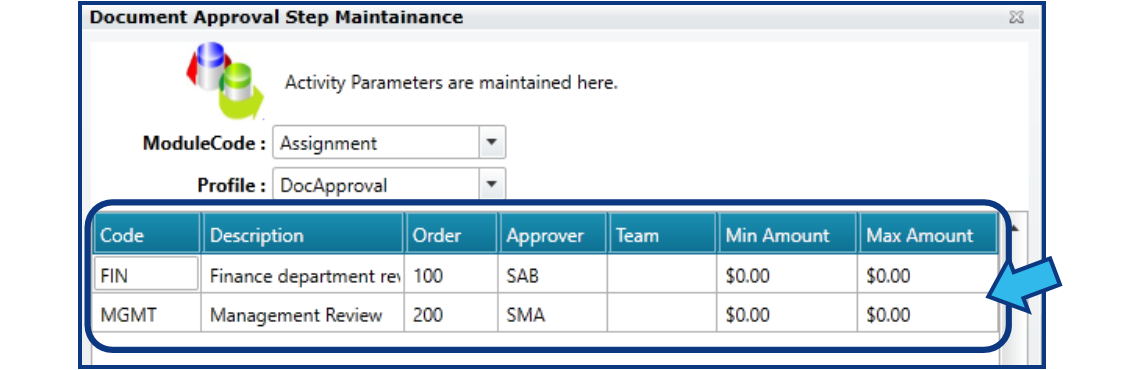
All saved steps will appear in the step list.
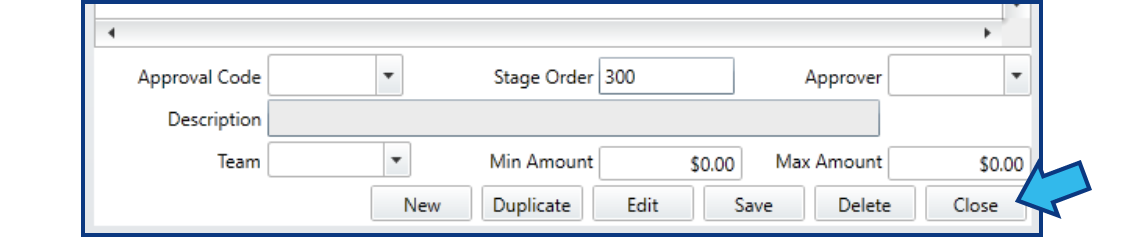
Step 12. Close the Document Approval Step Maintainance window.
Once all steps have been added successfully, press Close in the bottom-right corner to close the Document Approval Step Maintainance window.
Step 13. Close the Workflow Profile Maintainance window.
Press the Close button located in the bottom-right corner of the Workflow Profile Maintainance window.

Step 14. Save the Profile.
Save the Profile by pressing Save near the top-right corner of the Workflow Profiles window.

Step 15. Close the Workflow Profiles window.
Press the Close button in the top-right corner of the Workflow Profiles window.

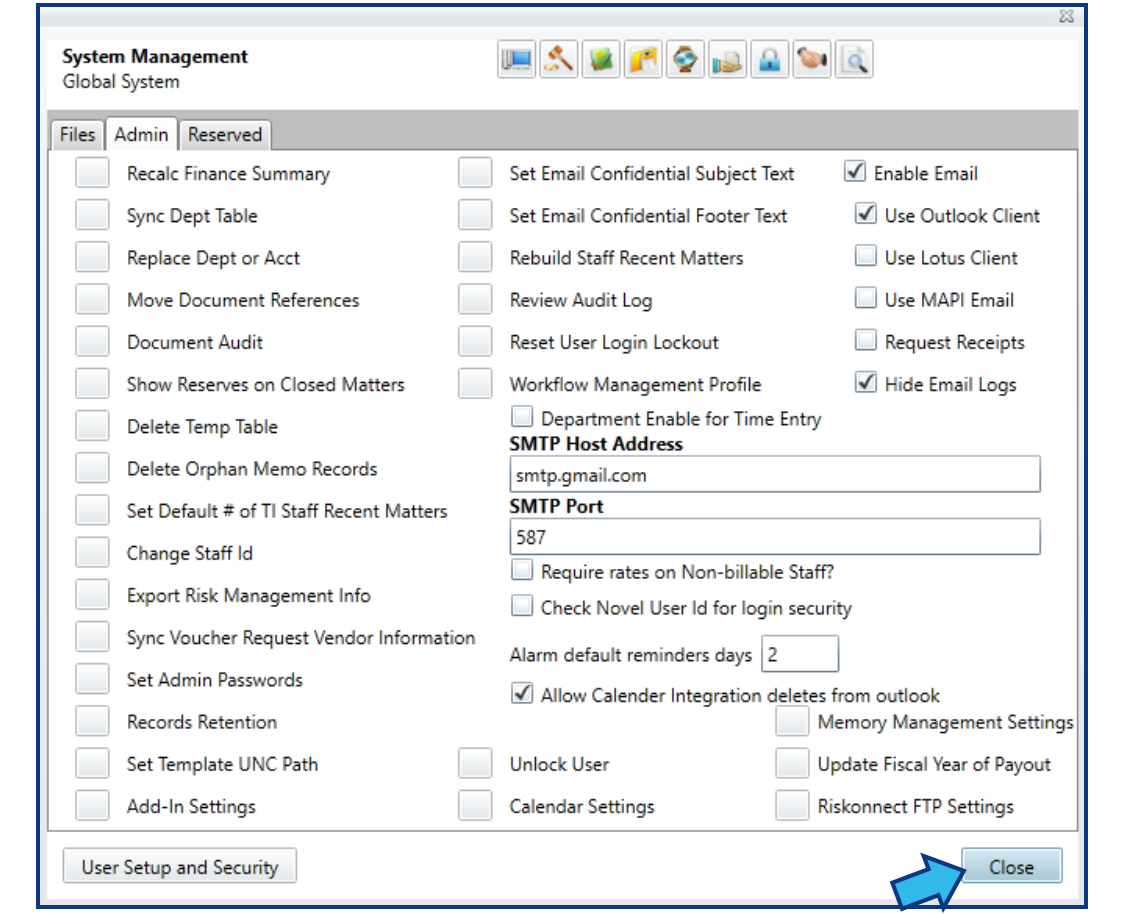
Step 16. Close the System Management window.
Press the Close button in the lower-right corner of the System Management window.
Step 17. Confirm the document template has the necessary custom properties.
Refer to the article, Setup Template for Document Workflow, for instructions to confirm the document template for this Workflow has the necessary custom properties applied.
Comments
0 comments
Please sign in to leave a comment.