
Need a printable version of this article? Download the Article (PDF Version).
Interrupted before saving a document through CLW?
If Microsoft Word is set to auto-save files, the file can be restored to the last auto-saved version. In CLW, locate and highlight the document. Press Open.
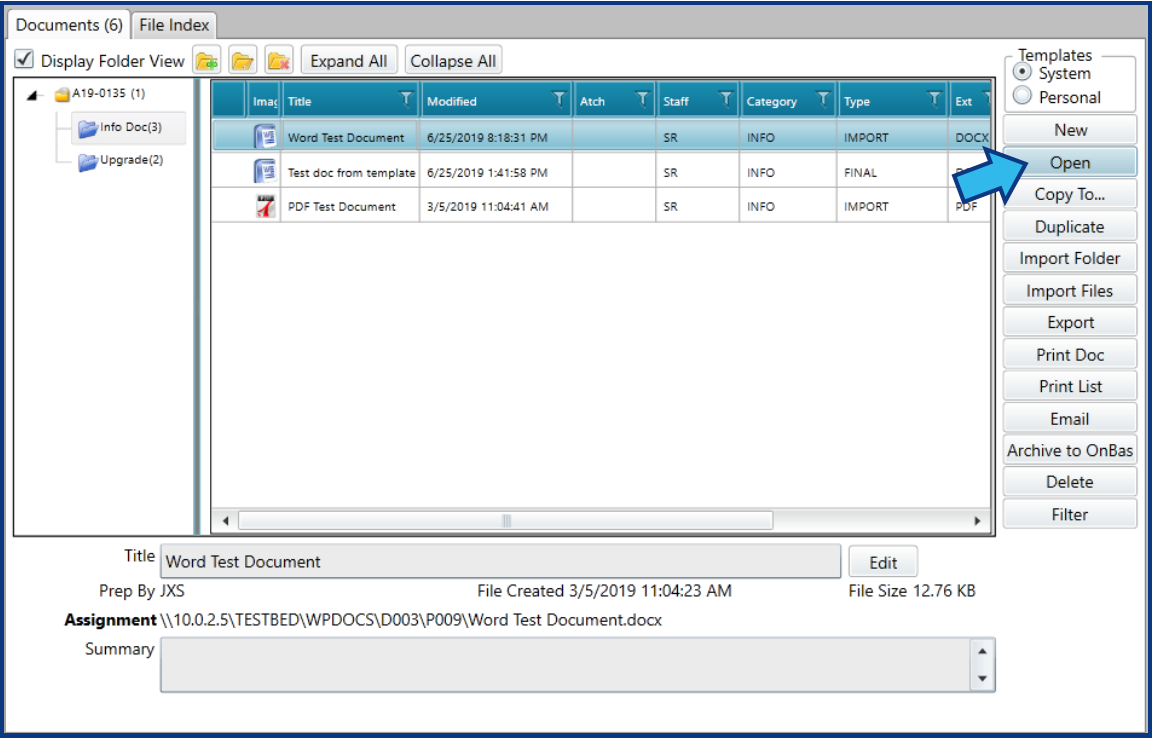
If there are any auto-saved versions, a Document Recovery pane should appear when Word is opened.
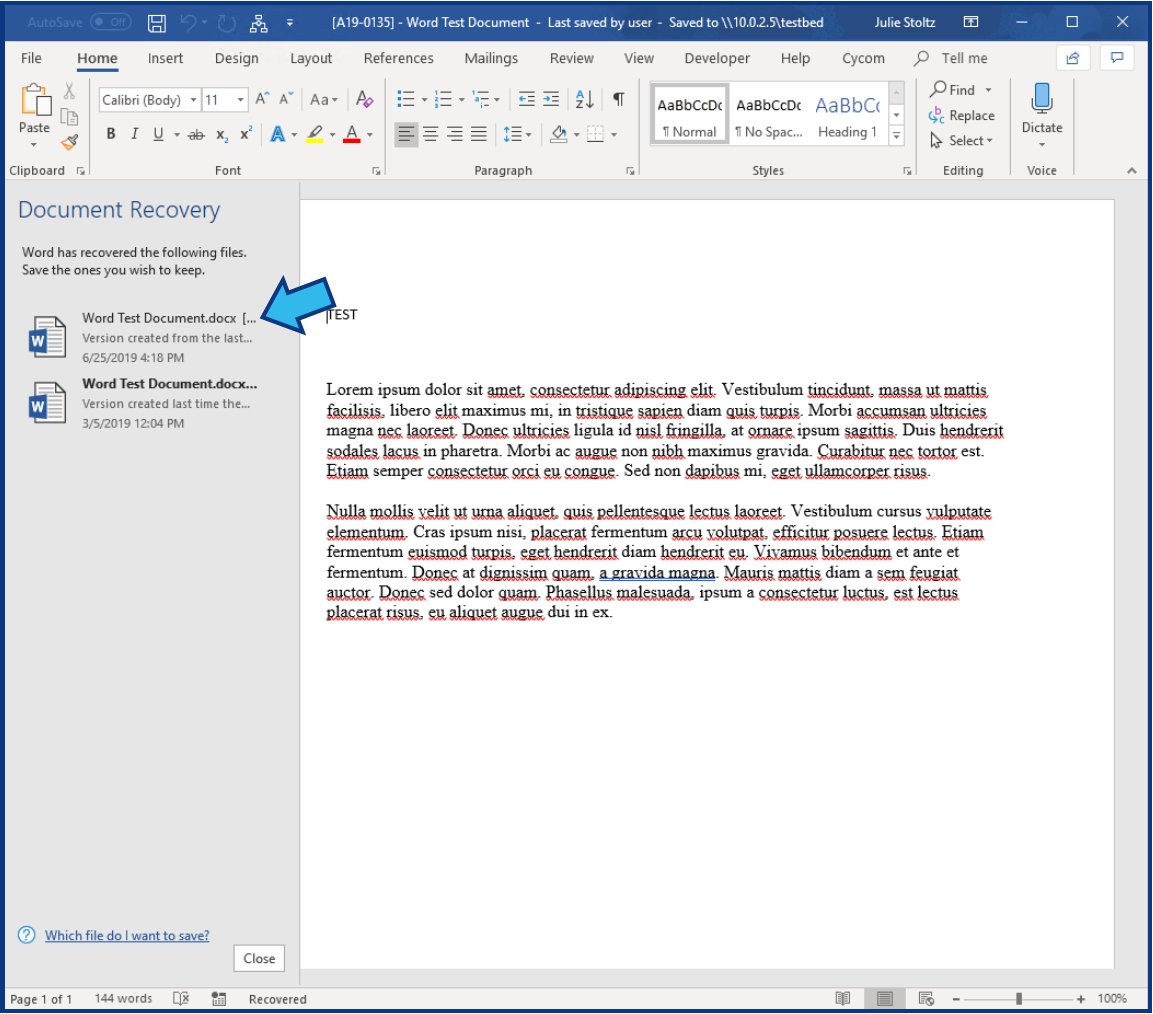
See a Document Recovery pane? Complete the steps in Recovery Method #1.
No Document Recovery pane? Complete the steps in Recovery Method #2.
Recovery Method #1
There are 4 steps to complete this task:
Step 1. Open the edited file version.
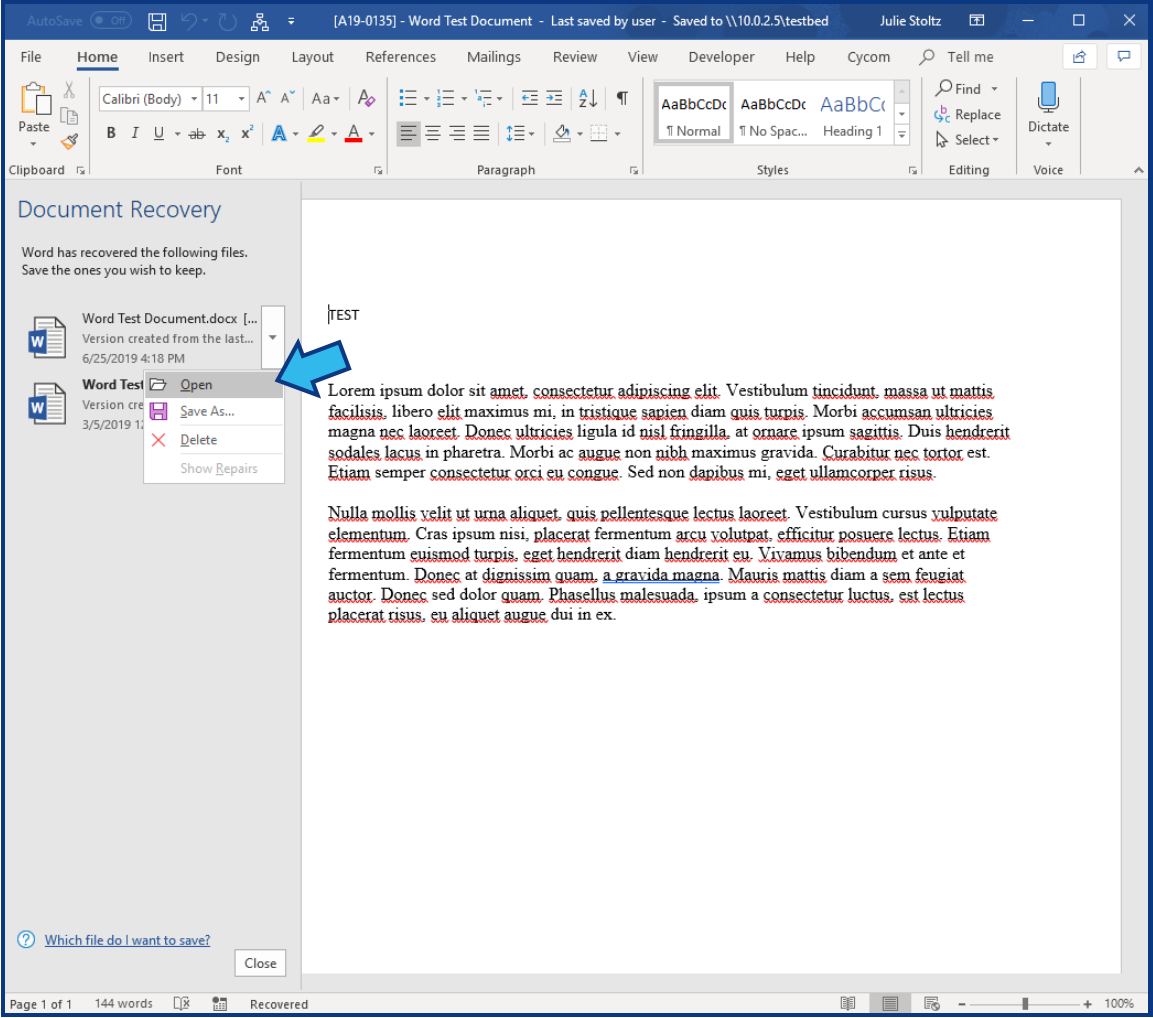
Hover over the edited file version in the Document Recovery pane and left-click the drop-down arrow that appears. Select Open. A new document will open.
Step 2. Close the original file.
The original file will show the matter file# in the title. This file must be closed before proceeding. Close the window by pressing the 'X' in the top-right corner. WARNING: Ensure the correct file is closed in this step. DO NOT close the AutoRecovered file at this point or the changes will be lost.

Step 3. Save the recovered file.
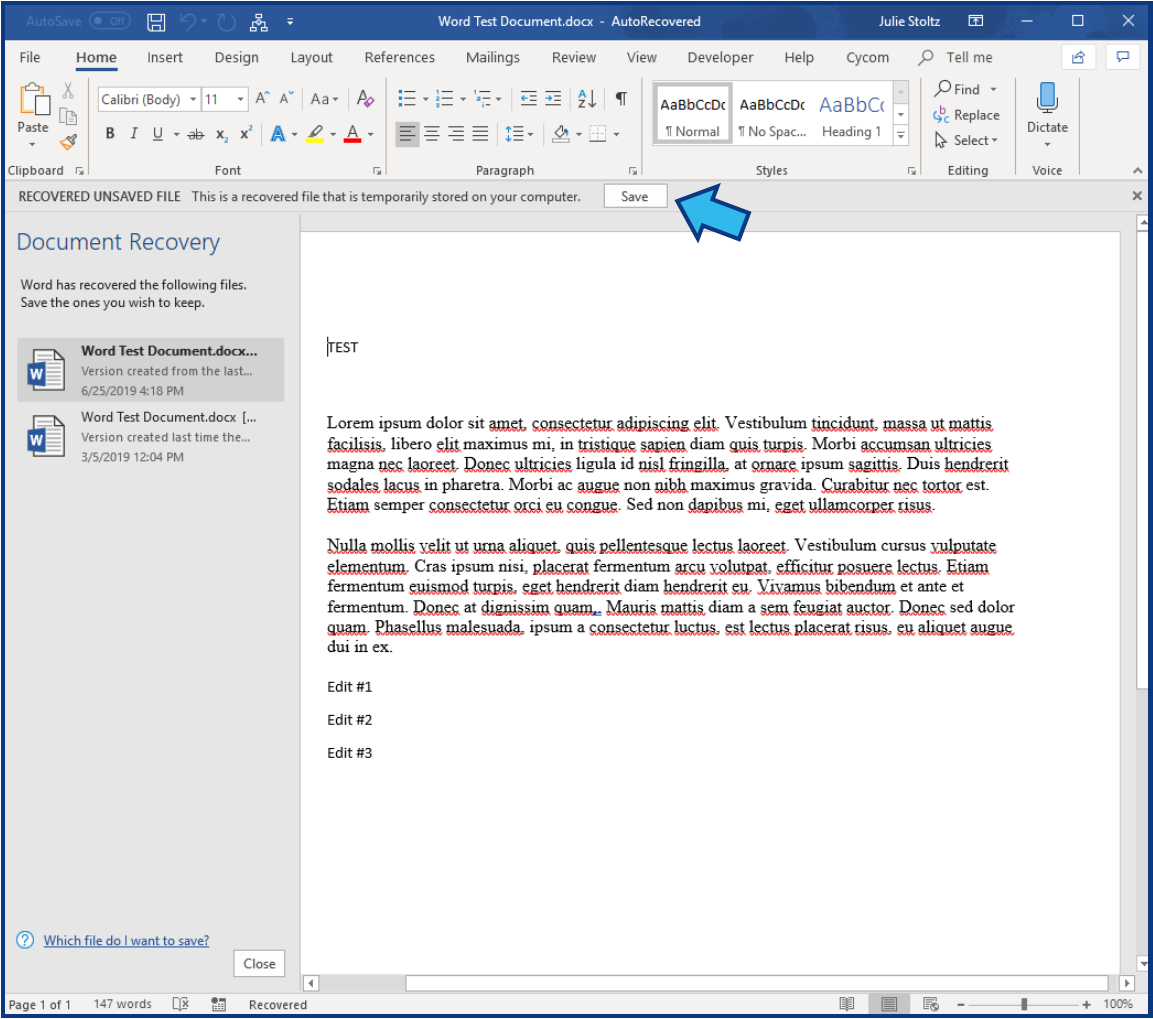
In the auto-recovered file, press Save.
Step 4. Close Word.
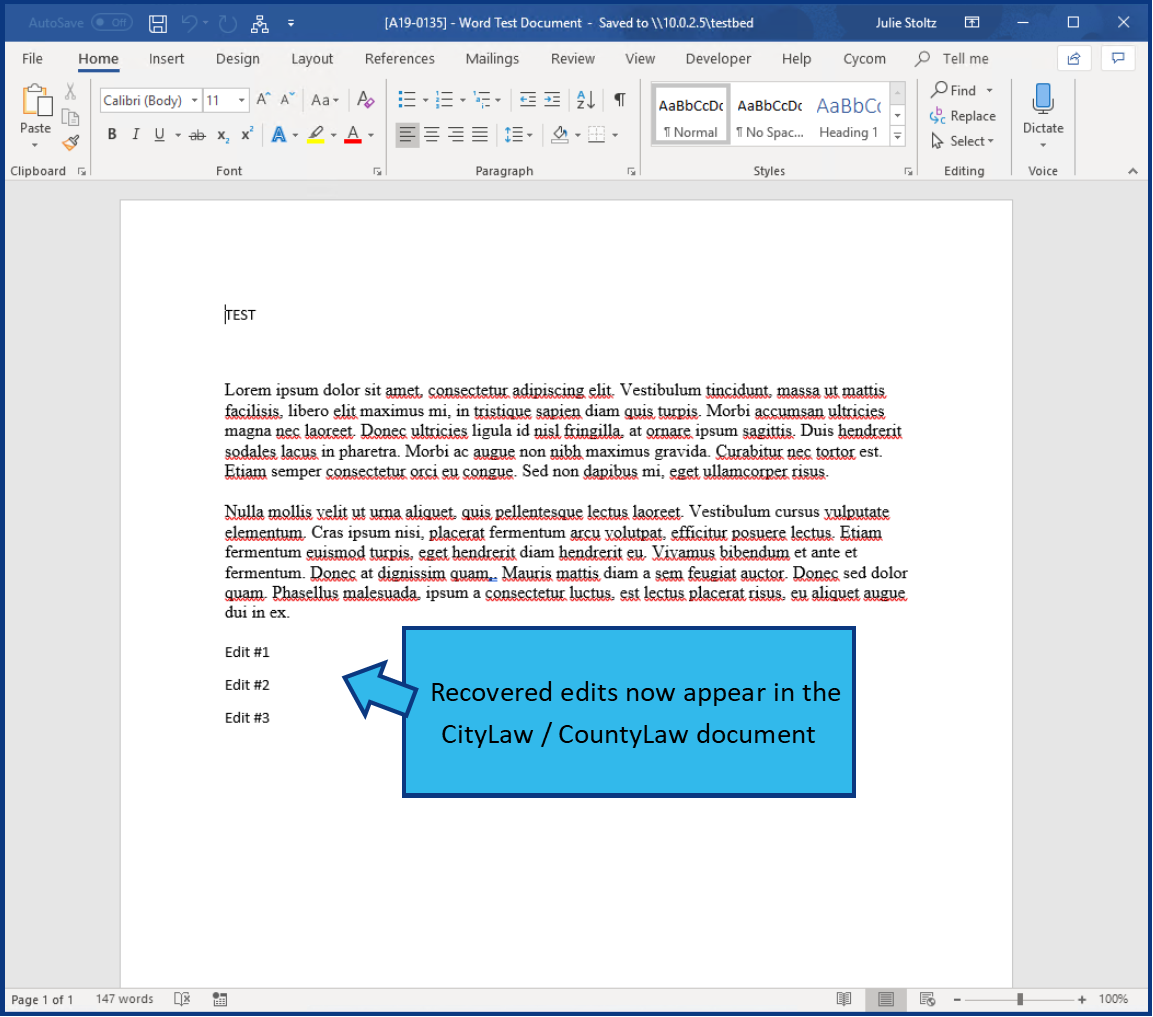
Close Word by pressing the 'X' in the top-right corner. Return to CLW and select and open the document. The file should now be updated to the new version.
Recovery Method #2
There are 4 steps to complete this task:
-
Navigate to the AutoRecover file location.
-
Open the AutoRecovery file with Word.
-
Press Restore.
-
Close Word.
Step 1. Navigate to the AutoRecover file location.
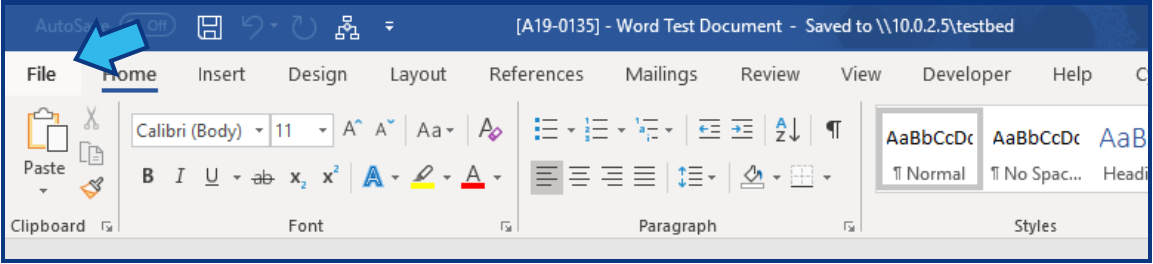
To find the AutoRecover file, open Word and select File.
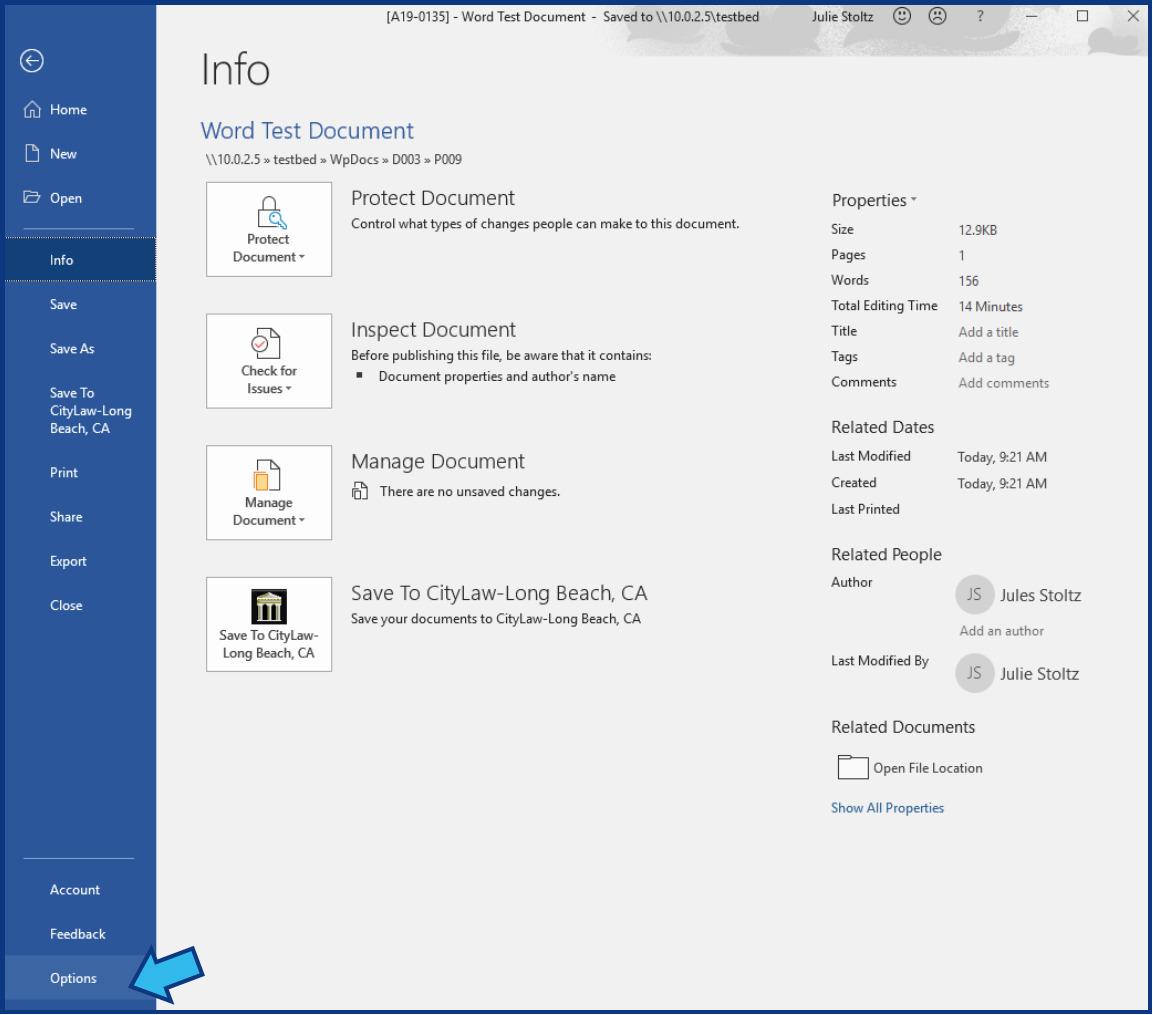
Select Options.
Select Save. Highlight the address shown in the AutoRecover file location field. Press CTRL + C on the keyboard, or right-click and select Copy. Close Word.

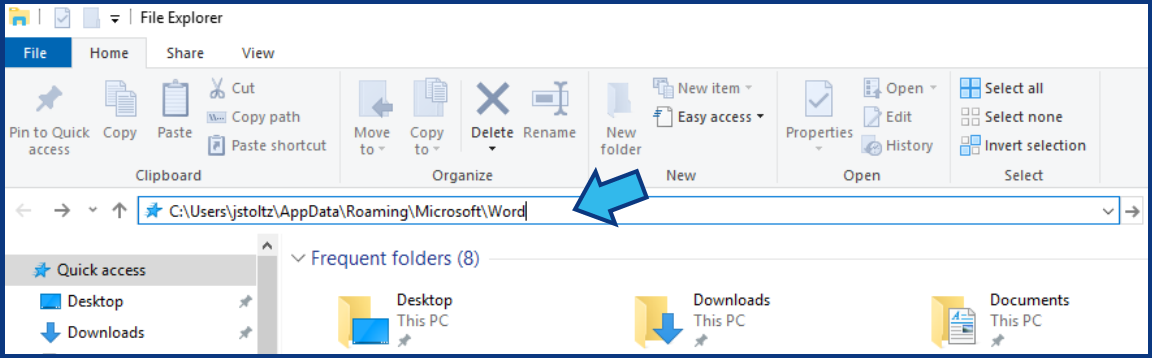
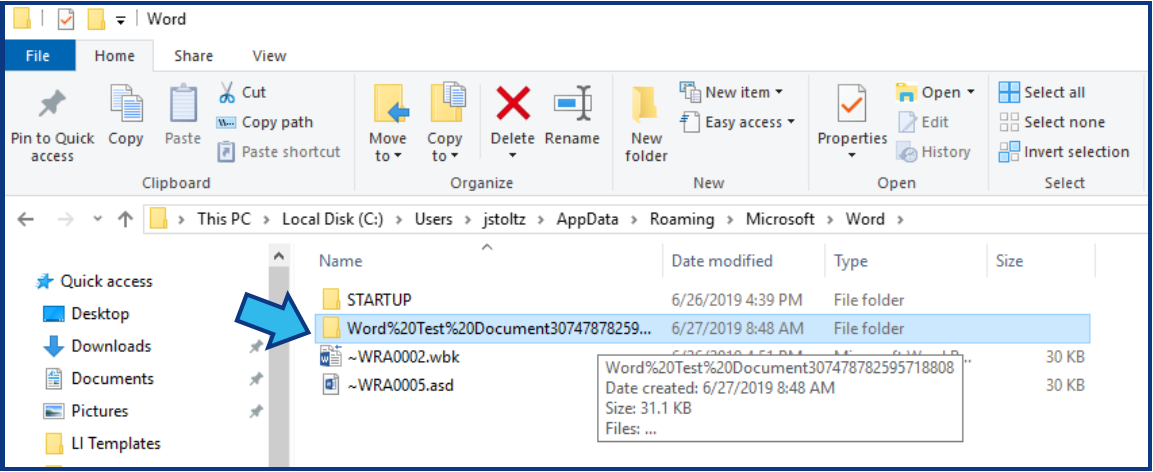
Open File Explorer and in the address bar paste the AutoRecover file location address. Press CTRL + V on the keyboard, or right-click and select Paste. Press the Enter key.
Step 2. Open the AutoRecovery file with Word.
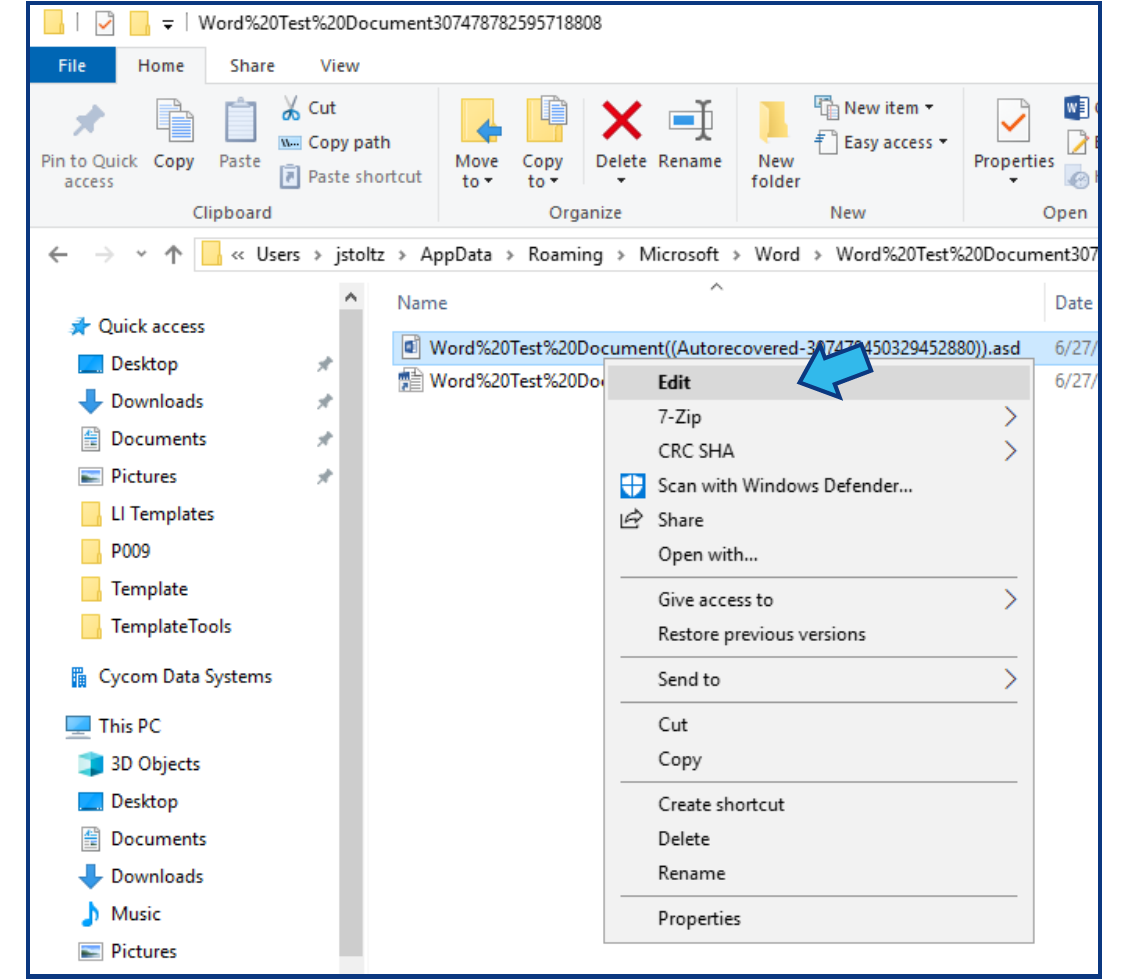
Find the desired AutoRecovery file. If there is a folder with a modified version of the title of the document, open the folder. Use the date/time of modification to choose the latest edited version if there are options.
Right-click and select Edit (if available) or Open with (select Word).
Step 3. Press Restore.
The AutoRecovered file will open and compare itself to the original file. If there are changes, a Restore option will be visible above the document. Press Restore. NOTE: If Restore is not available, the original file and the auto-saved file do not differ.

Press OK to confirm.

Step 4. Close Word.
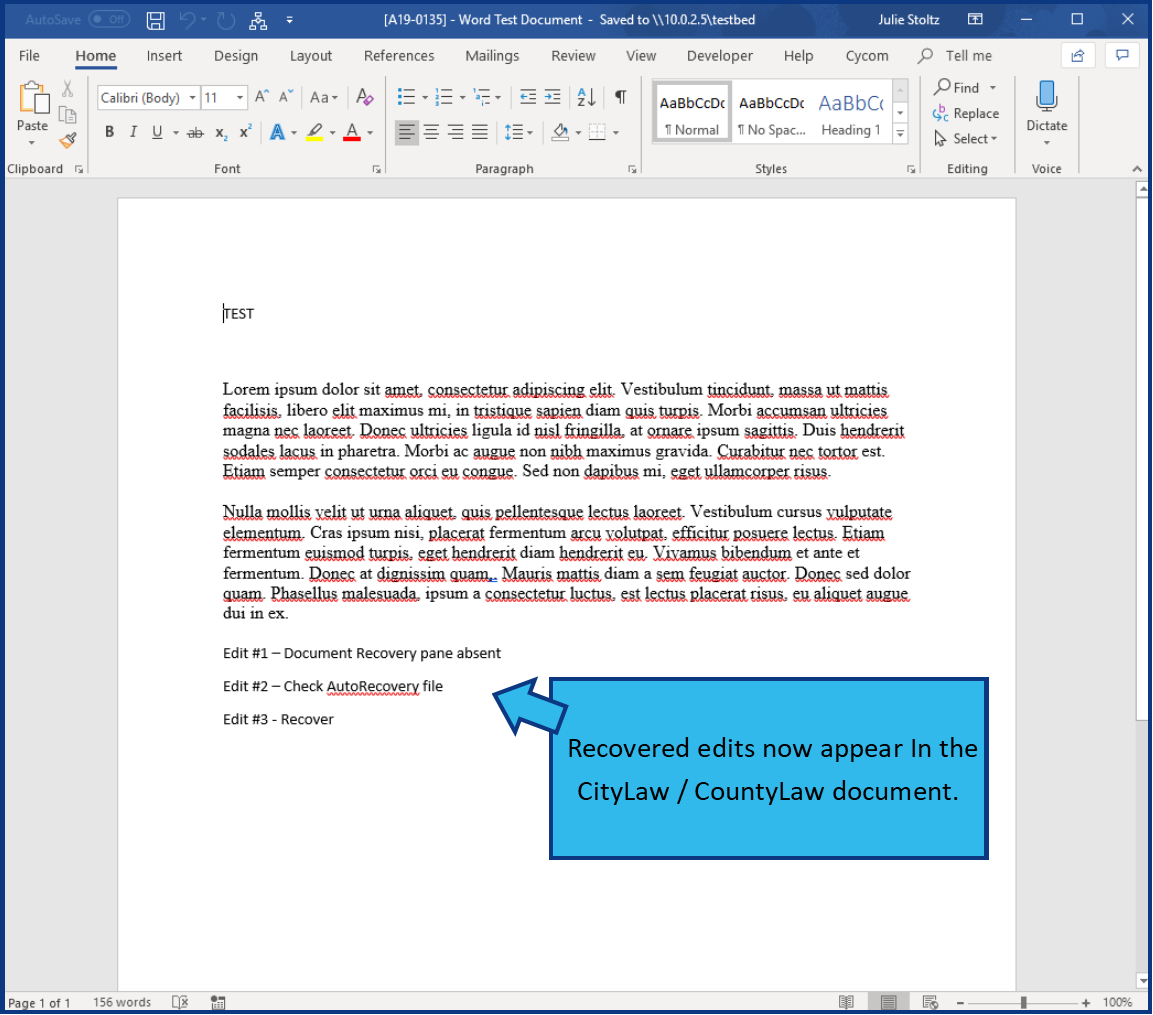
Close Word by pressing the 'X' in the top-right corner. Return to CLW and select and open the document. The file should now be updated to the new version.
Comments
0 comments
Please sign in to leave a comment.