
Need a printable version of this article? Download the Article (PDF Version).
An Audit Log is maintained to keep a record of changes made in CLW. To access the Audit Log, you must be a System Administrator, and/or have access to the System Management module and the Admin Password.
There are four steps to complete this task:
-
Open System Management
-
Select the Admin Tab and Enter Admin Password
-
Select Review Audit Log
-
Select Print and Enter Report Options
Step 1. Open System Management
Select the System Management icon on the Global Toolbar.

Step 2. Select the Admin Tab and Enter Admin Password
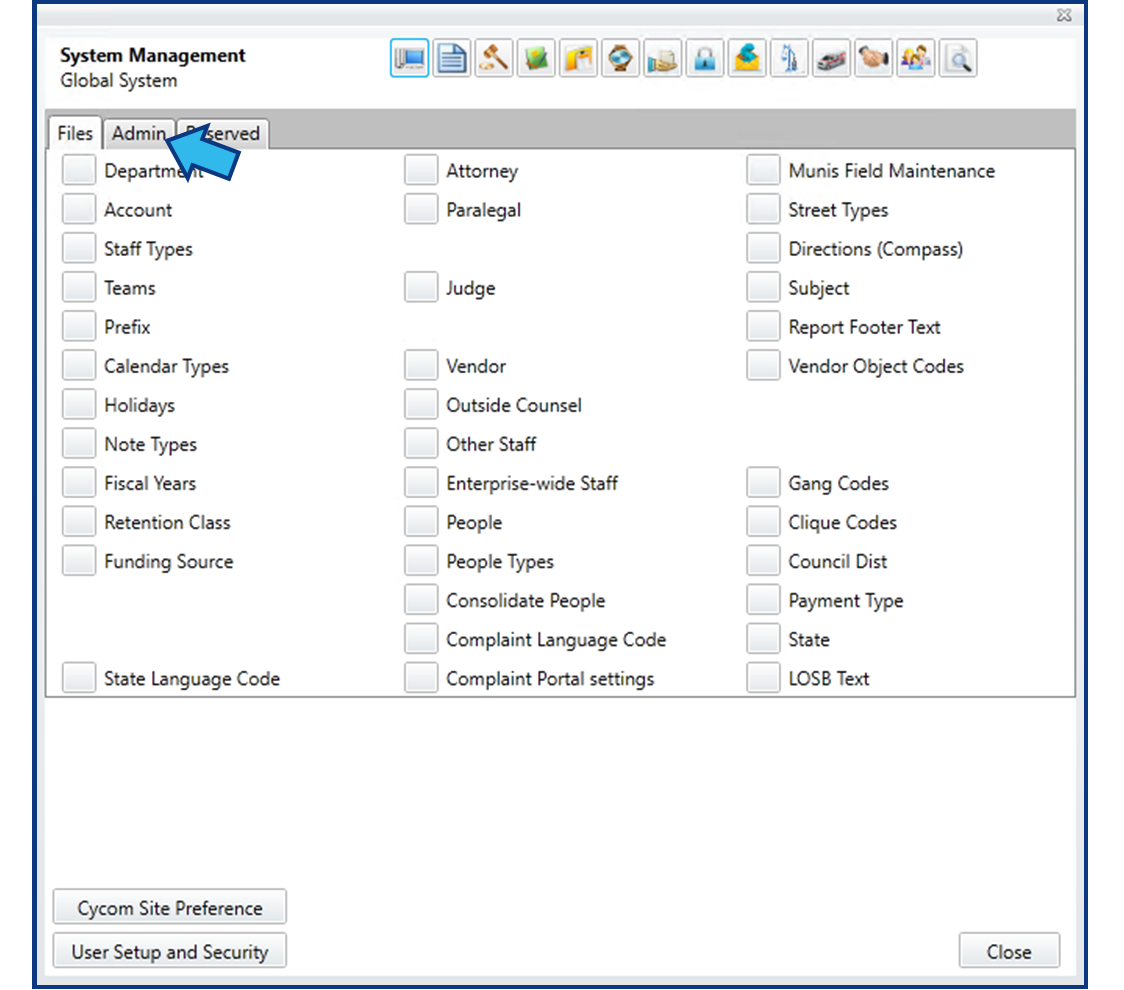
In the Global System view, select the Admin tab.
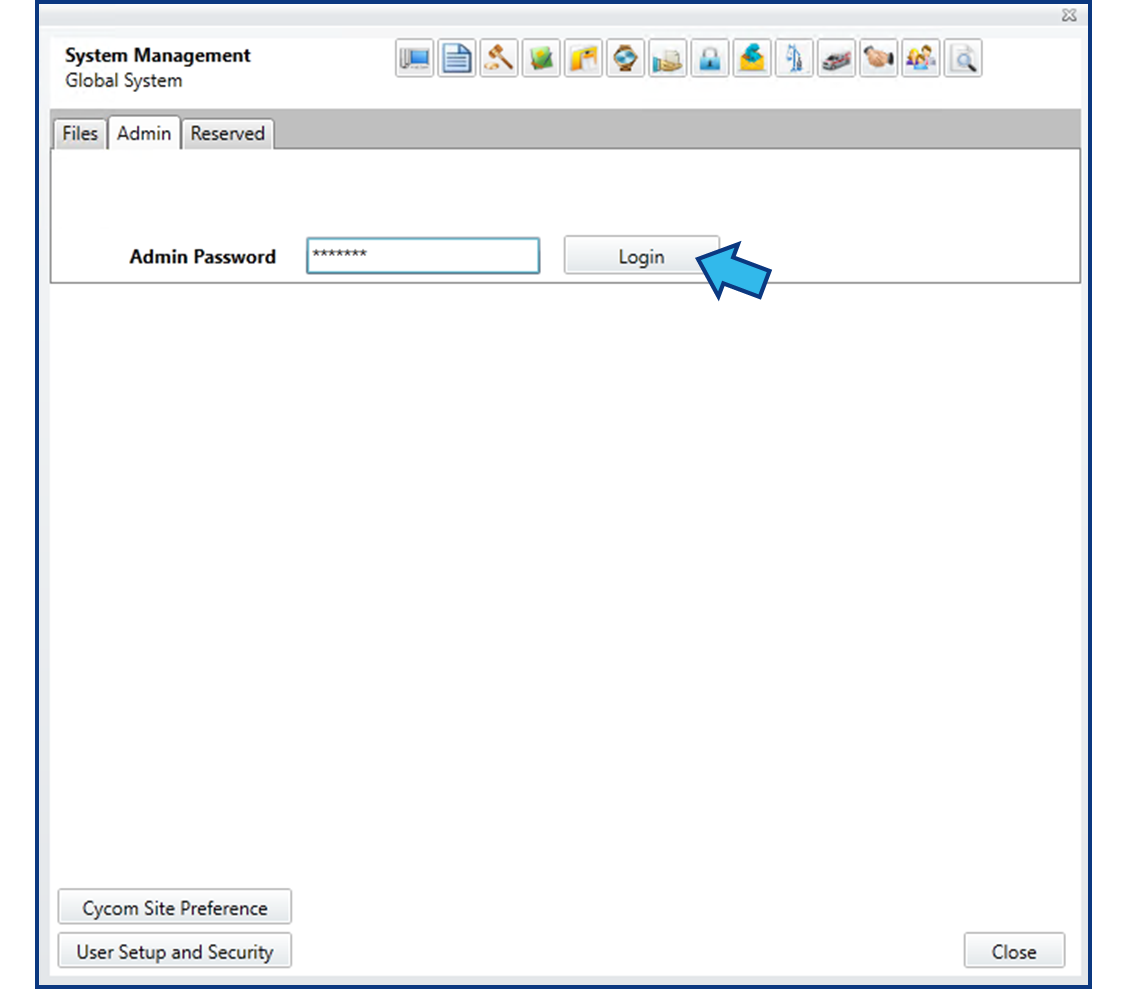
You will be prompted to enter the Admin Password. You cannot access the Admin tab contents without the Admin Password. After entering the password, select Login.
Step 3. Select Review Audit Log
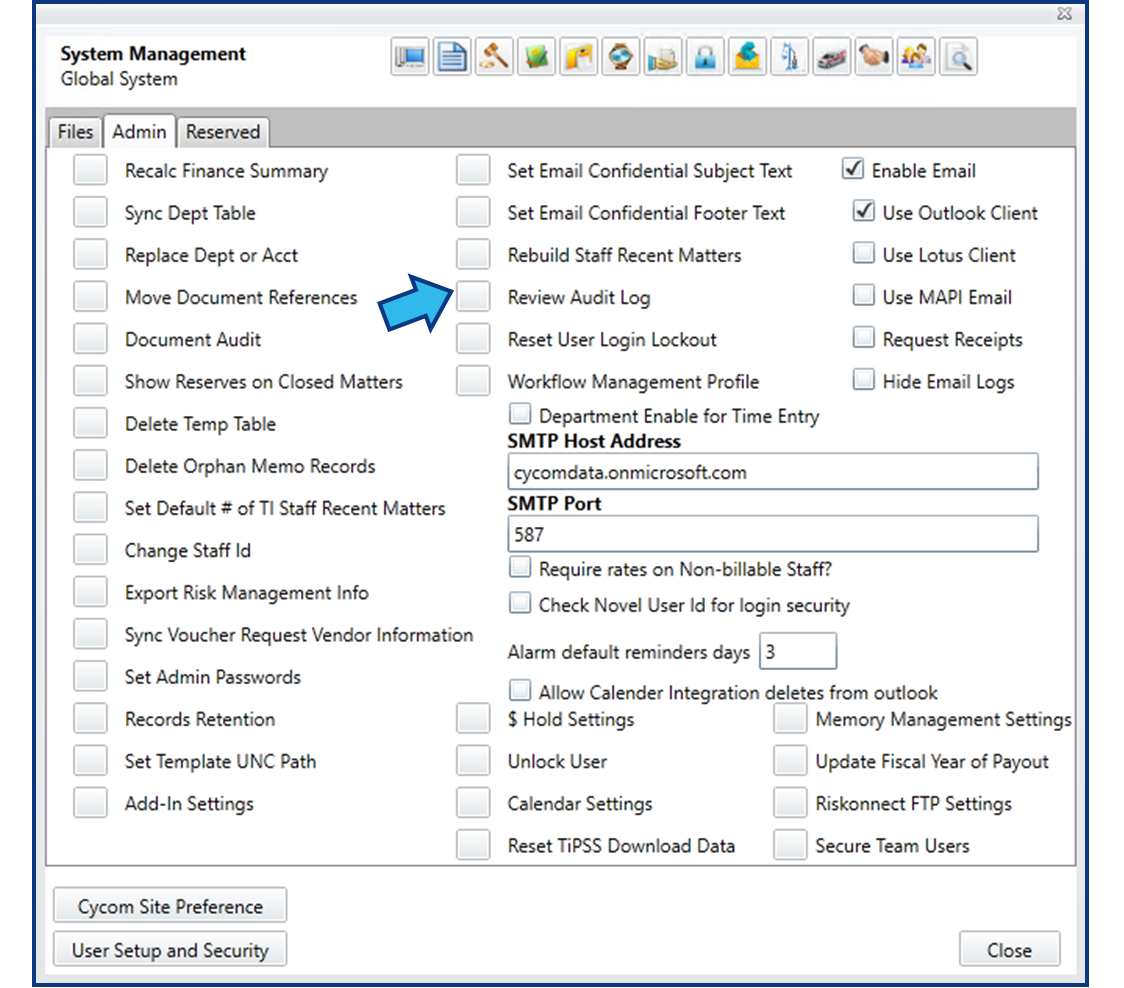
In the center column, near the top, select Review Audit Log.
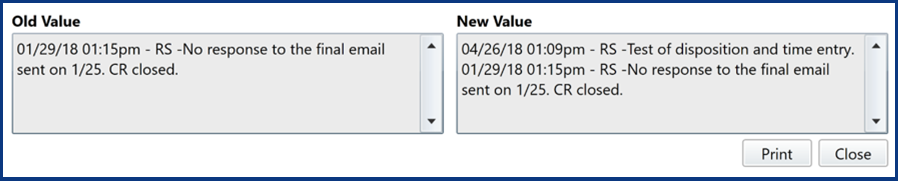
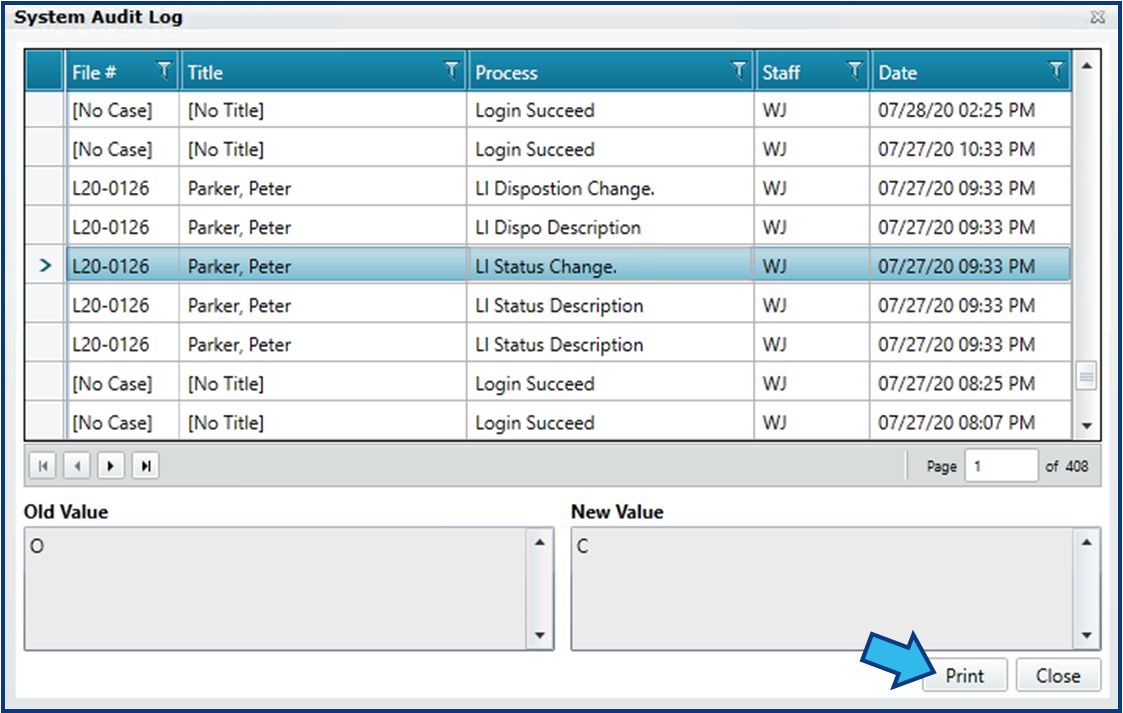
The System Audit Log window will appear and load your Audit Log details. The grid at the top of the window will display all your Audit Log entries. Select an entry to view the change which was made. The Old Value text area will display the state before the change occurred, and the New Value text area will display the state after the change occurred.
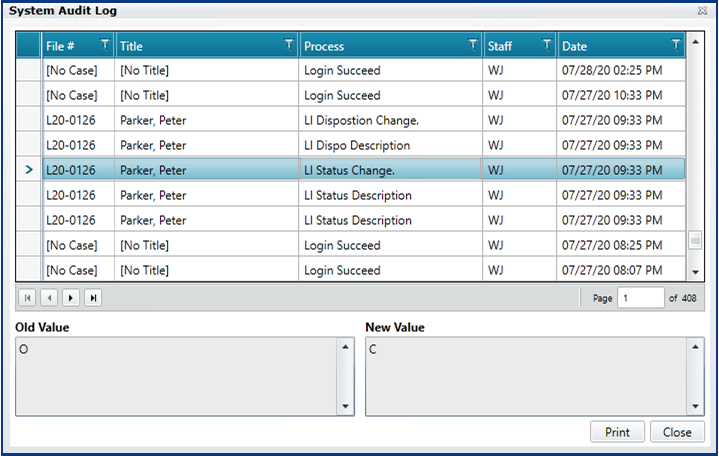
For example, an update to a Disposition field might appear as follows:
Step 4. Select Print and Enter Report Options
Press the Print button to open the Audit Log Report options.
The Audit Log Report options allow you to specify a date range for the report, a matter, and one or more staff. Select Group by Matters if you would like to view the changes made to particular matters, rather than viewing changes made in chronological order.
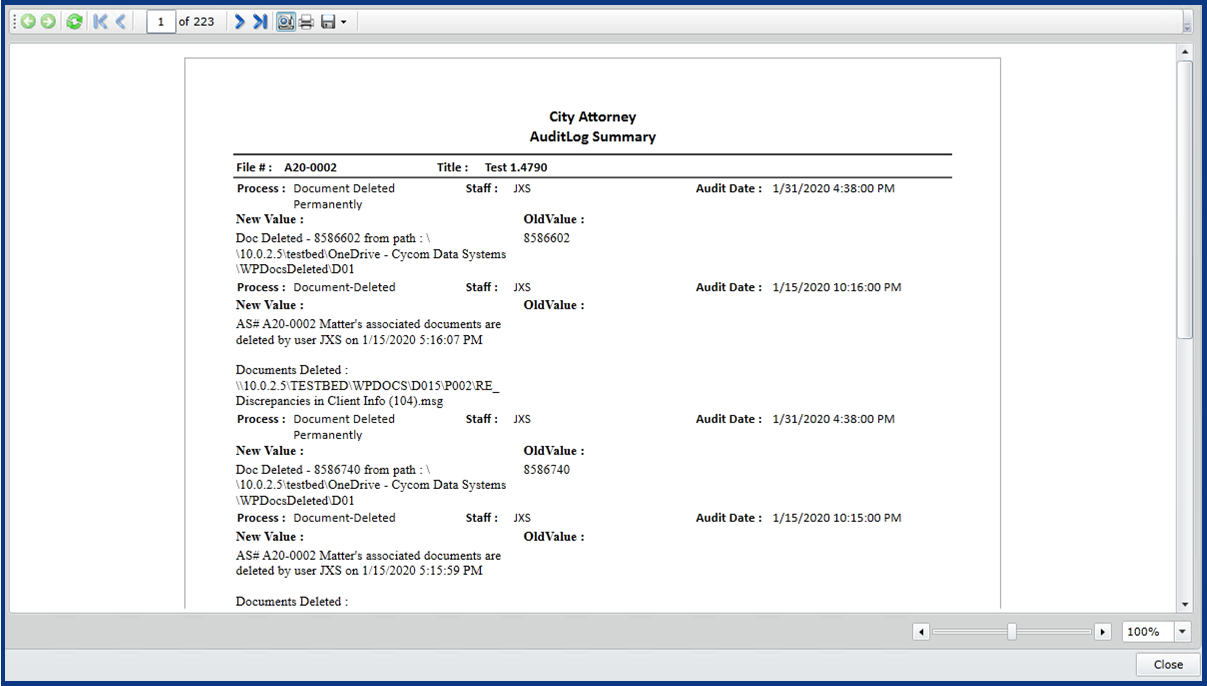
Press Ok to open the Audit Log Report preview window. From here you may print or export the report.
Comments
0 comments
Please sign in to leave a comment.