Need a printable version of this article? Download the Article (PDF Version).
Creating a new user involves two steps. The first step, creating a CLW user record, can be done by anyone with access to the System Management module. The second step, assigning a security profile, can only be done by a System Administrator with access to the Admin Password.
Contents:
Create a User Record
There are three steps to complete this task:
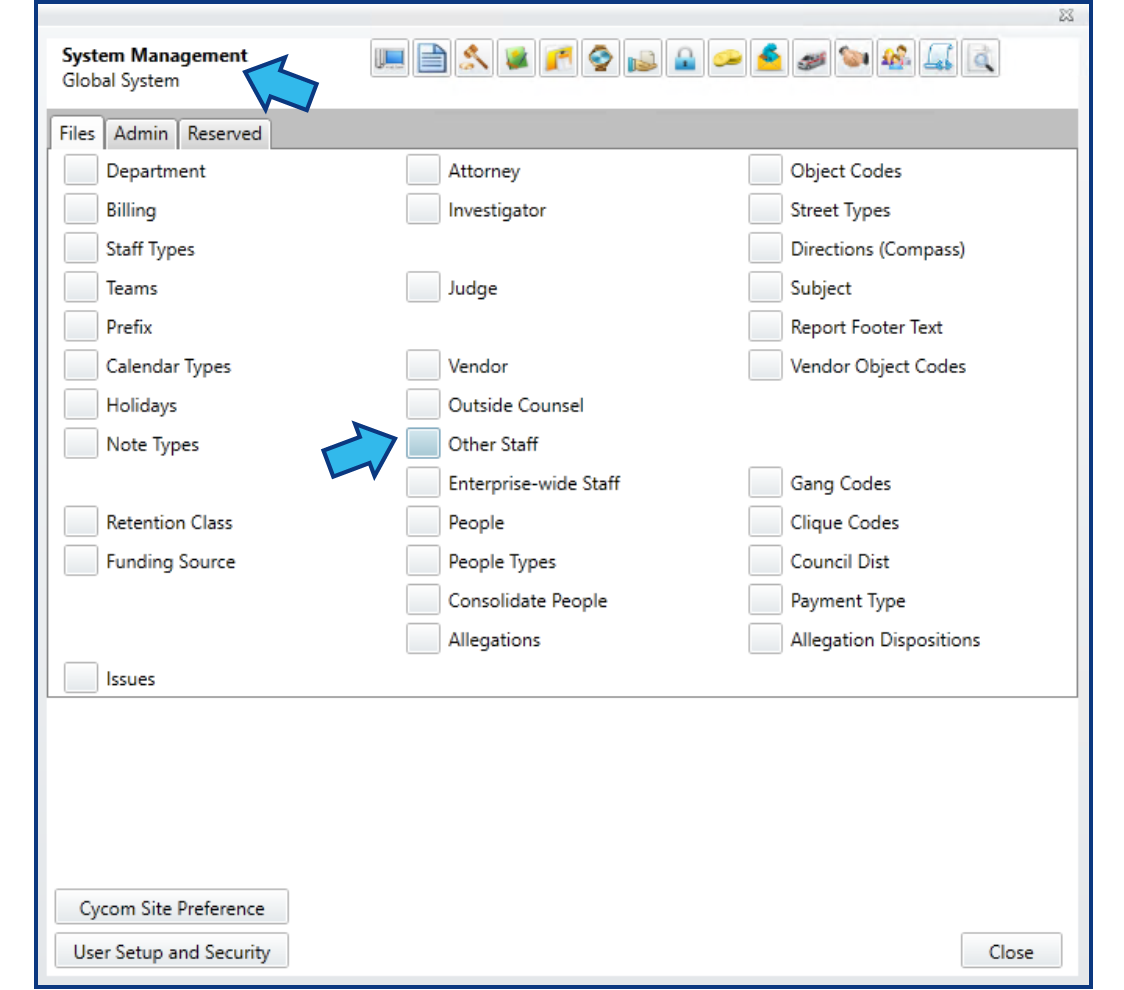
Step 1. Open System Management
Open System Management by pressing the System Management icon on the Global Toolbar.
![]()
Step 2. Select the User Type
In the Files tab, select the type of user you wish to create. In this example, we will select Other Staff.
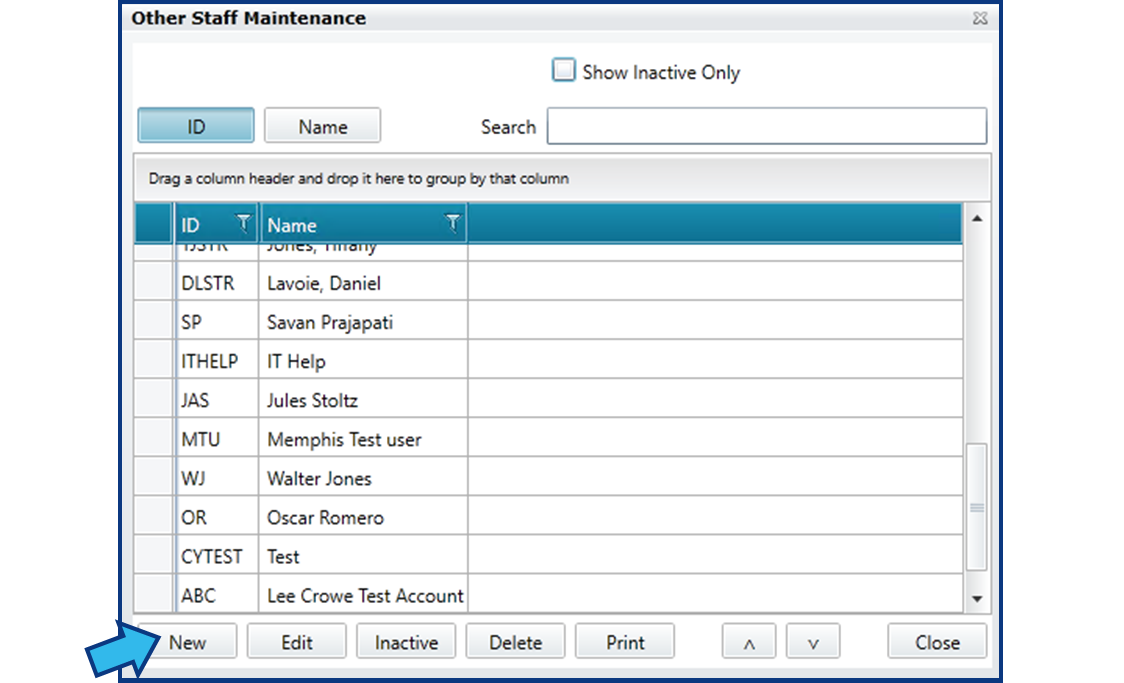
Step 3. Create and Save a New User Record
In the Maintenance window, select New.
Enter the user’s details. Minimally, enter the following fields (descriptions follow image):
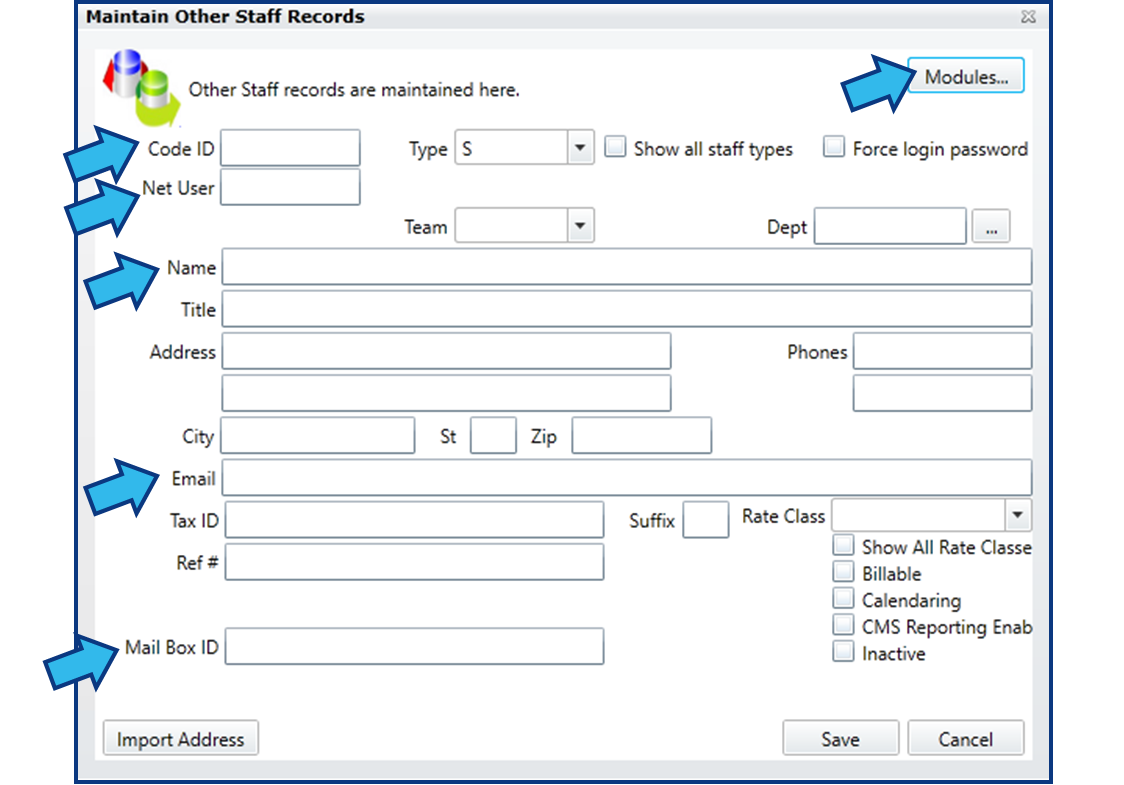
Code ID
This is a short character string representing the new user's name. This is typically the user's initials, or the first letter of their first name followed by the first three or four letters of their last name. It is CLW Best Practice to try to use the same code naming strategy for all users so that codes are consistent through all displays and reports, and so that users can quickly learn and identify a given code.
Net User
This is the user's Windows username and it is case-sensitive. Filling in the Net User field will bypass the CLW login screen if the user is already logged in to Windows, unless Enforce Password is enabled. To find a user’s Net User ID, either contact your IT department or person responsible for setting up the user’s Windows account, or else refer to this article: Find a User’s Net User ID
Name
The name of the new user. This should be entered as it would appear in proper mailing format.
A valid email address is required for CLW email functionality. If the Outlook Calendar add-in is also used, the email address should be entered into the Mail Box ID field. If you are not sure if your site uses this add-in, enter the email address in both places.
Modules...
Press the Modules... button and check all the modules for which this user should be included as assignable staff. This is usually the same modules to which this user will have access. Press the Save button to return to the previous window.
Once all required and desired information is entered for the user, press the Save button to save the new user record.
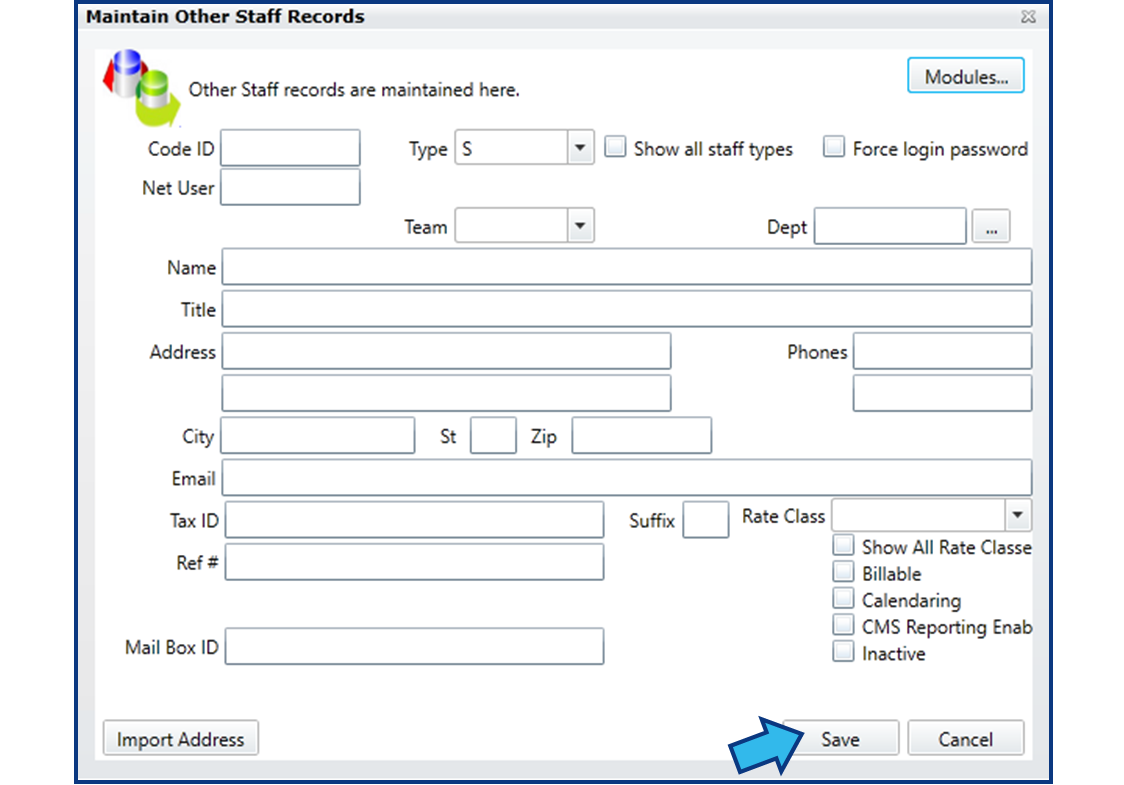
IMPORTANT: The user will still not be able to log in at this point. A security profile must be assigned. Refer to the section below.
Assign a User a Security Profile
There are five steps to complete this task:
Step 1. Open User Setup and Security
Open User Setup and Security from the Options menu.

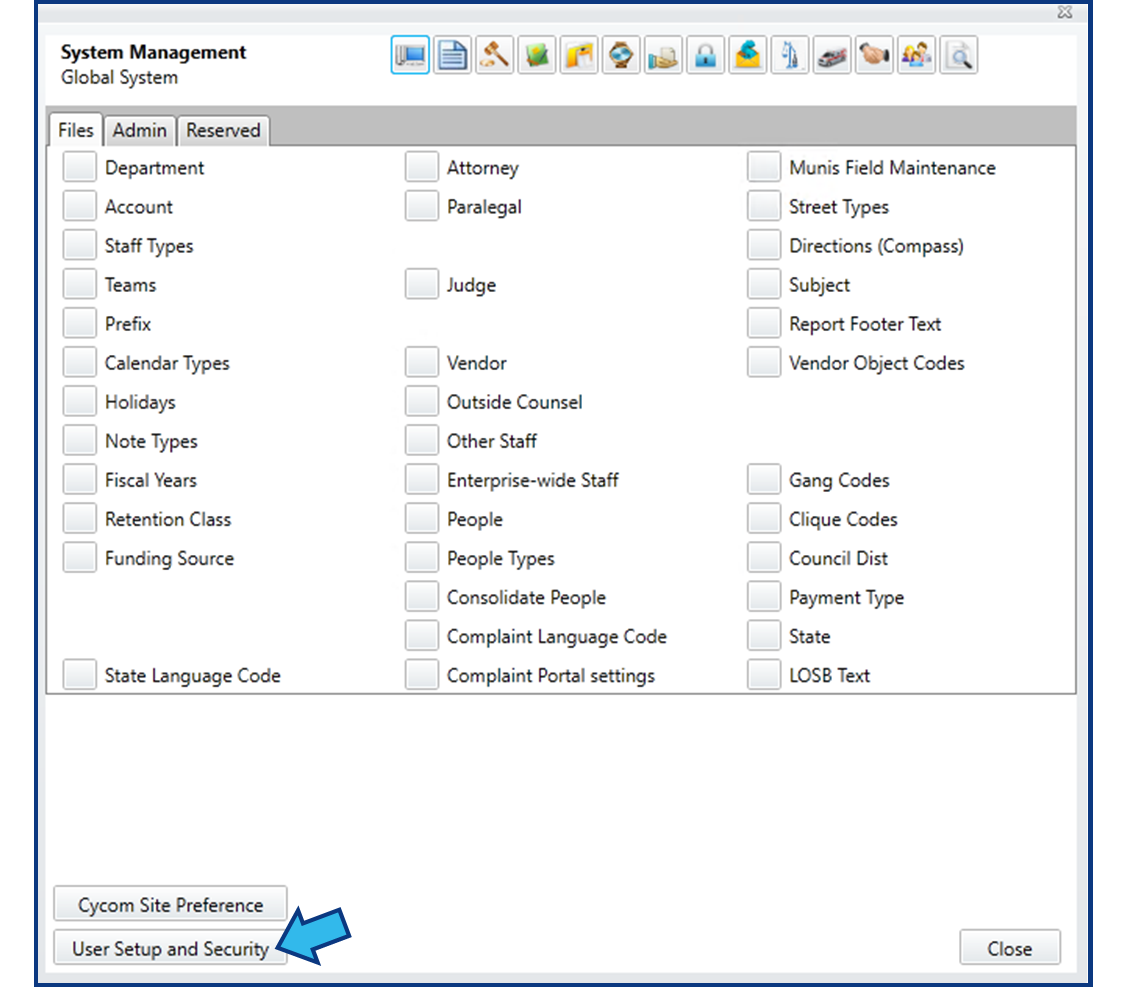
User Setup and Security is also accessible from the System Management module at the bottom-left of the screen in more recent versions.
Step 2. Enter the Admin Password
Enter your Admin Password and press OK to continue.

Step 3. Assign a Security Profile
You will see a grid listing your CLW users. The Profile column displays each user's current Security Profile. Locate the user you created and select the box in the Profile column next to their name to open a list of your configured security profiles.

Select the appropriate security profile for the new user from that list.

Step 4. (Optional) Set a User's Temporary Password
This step only applies if your site requires a password to login to CLW. With the user selected, press the Edit Password button.
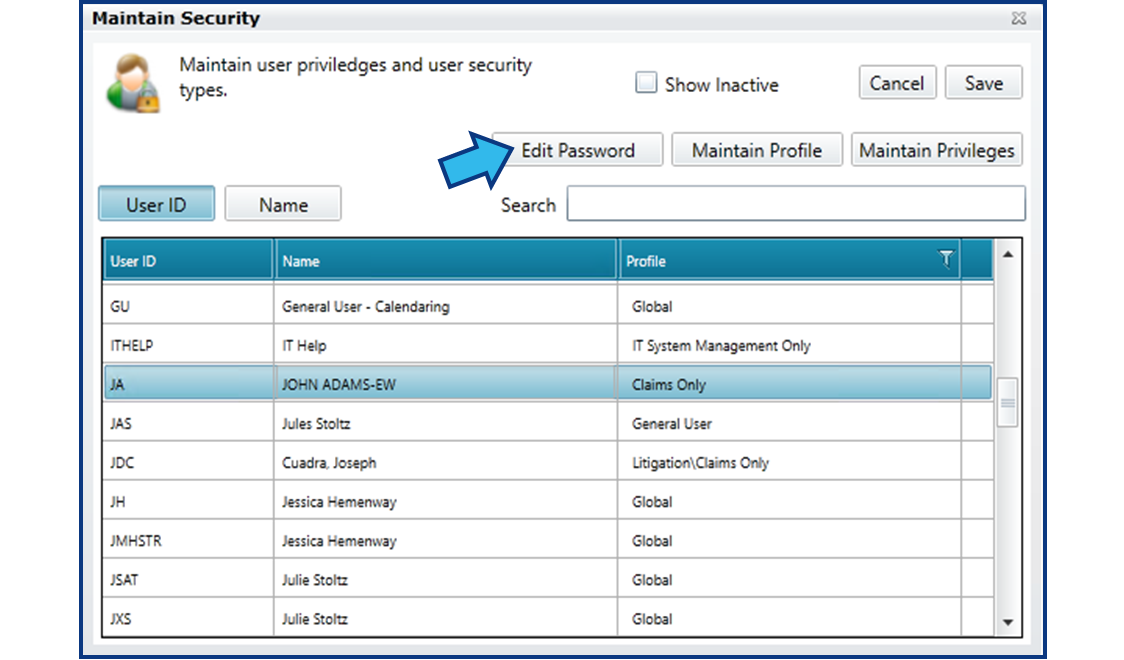
Enter a new password in the window that appears. Press Tab and then re-enter the password to confirm. Press the Save button to save and close.

Communicate the temporary password to the user. When they first log into CLW, they will be prompted to reset their password. They will need to first enter the temporary password you just created.
Step 5. Save the Security Settings
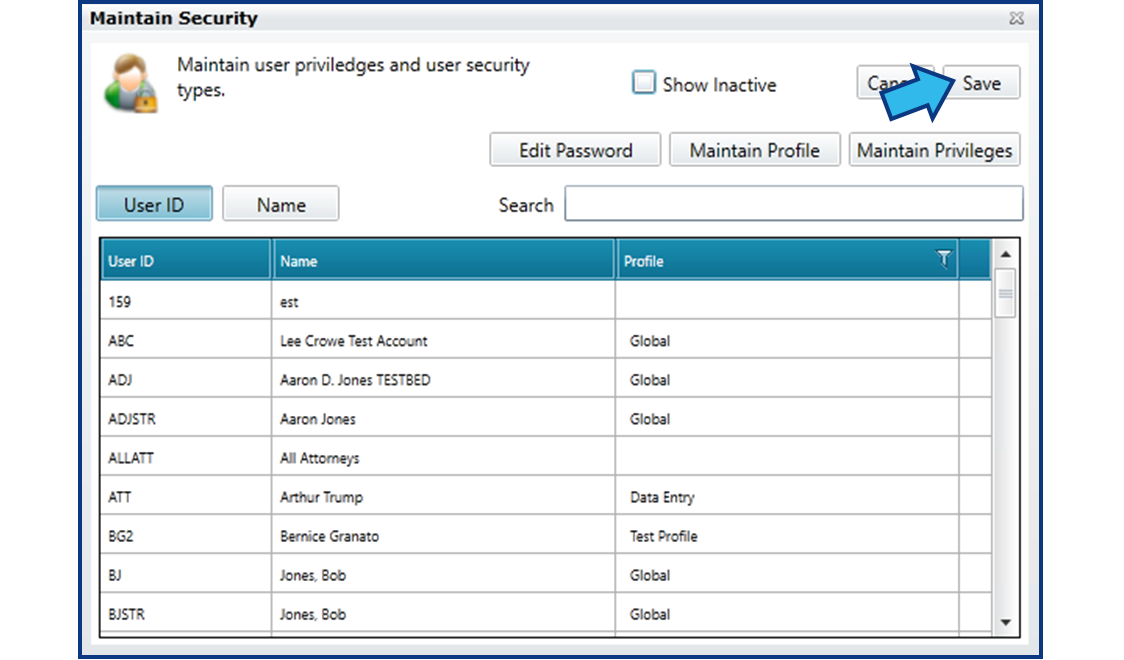
After completing Steps 1 to 3 and 4, if applicable, be sure to select Save in the Maintain Security window to save the profile assignment you have just made.
Comments
0 comments
Please sign in to leave a comment.