
Need a printable version of this article? Download the Article (PDF Version).
The Litigation and Labor Relations modules have an Allegations tab in the Basic Matter Data view. This tab is used to record allegations and track workflow stages. The information in this article is intended to inform System Administrators of the steps to configure this tab to take advantage of the many automated options that exist.
Article Contents:
- Maintain Allegation Codes
- Maintain Issue Codes
- Maintain Stage Codes
- Maintain Stage Disposition Codes
- Map Dispositions for Stage
- Maintain Portal Codes
Maintain Allegation Codes
Instructions for the following tasks are provided below:
Access Allegations Maintenance
Allegation codes, also referred to as basis codes, can be created, edited, or removed by anyone with access to the System Management module following the steps below.
Open System Management by selecting the icon from the Global Toolbar, or by selecting Tools from the Menu Bar and then selecting System Management.
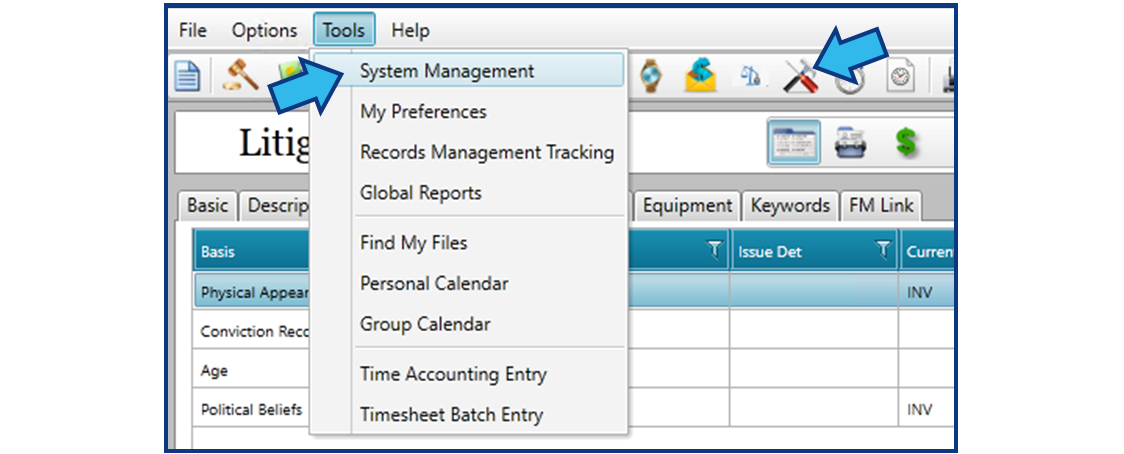
Select either the Litigation or Labor Relations module. Currently, these are the only modules that use the Allegations tab.

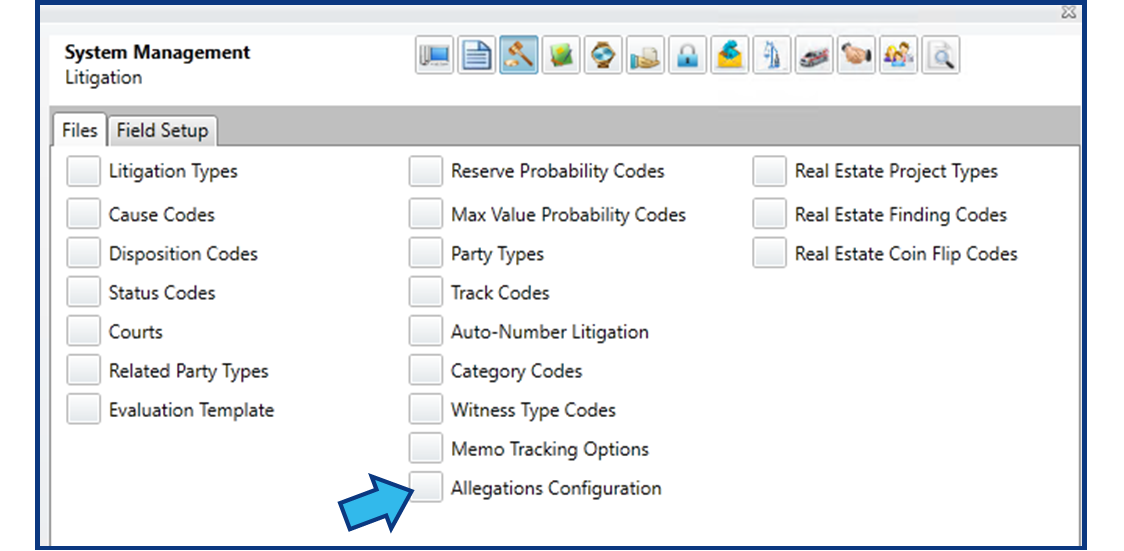
Select Allegations Configuration on the Files tab.
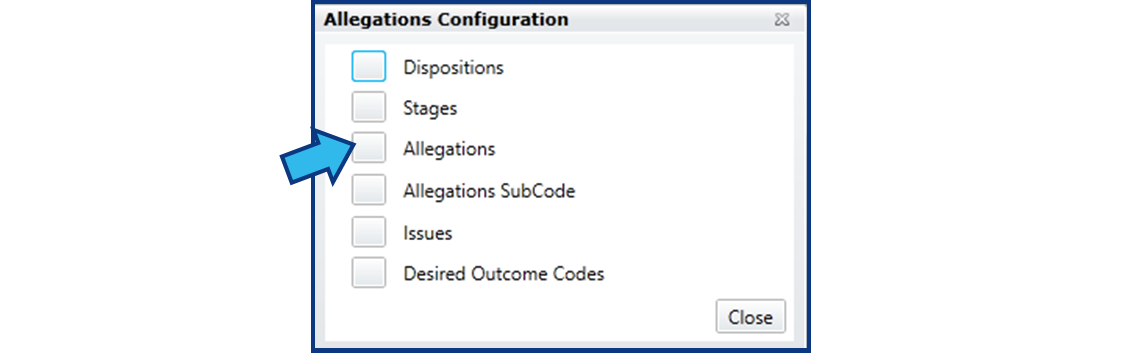
Select Allegations to access the Allegations Maintenance window.
Add an Allegation
From the Allegations Maintenance window, select New.
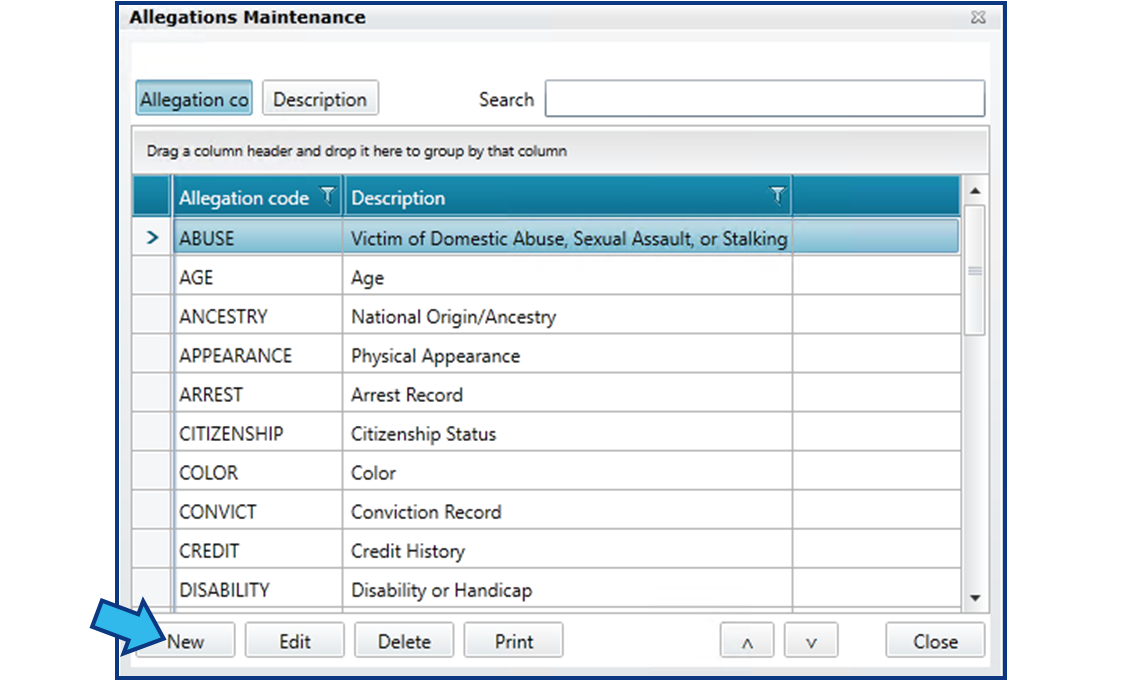
A Maintain Allegations window will appear.
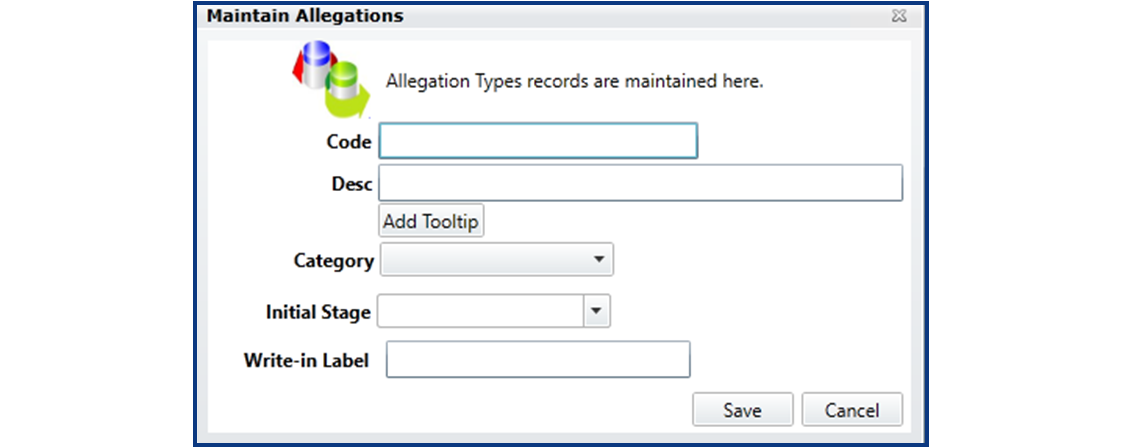
Minimally, a new allegation code must have a Code and Description (Desc) entered. The other fields are optional. Enter values into the fields based on the following:
- Code – This is a unique alphanumeric value. This can be up to 11 characters long.
- Desc – This is a descriptive name for the code. This can be up to 50 characters long.
- Add Tooltip – If this field is linked to a portal, the tooltip is a helpful text box providing the portal user with additional information about this allegation.
- Category – If this field is linked to a portal, this allegation will only appear when 1 of the selected categories are chosen.
- Initial Stage – This sets the default stage when an allegation is created. If an allegation is created from a portal, this stage will be automatically created. If a new allegation is created within CLW, this stage will auto-populate the Initial Stage field in the Add Allegation window, but the user may change or clear this field.
- Write-in Label – If a portal is being used, this field is the label displayed for a write-in box. If a label is provided, when the portal user selects the allegation, a write-in box will appear with the given label. If Write-in Label field is left blank, no write-in box appears in the portal when the allegation is selected.
Edit an Allegation
From the Allegations Maintenance window, select Edit.
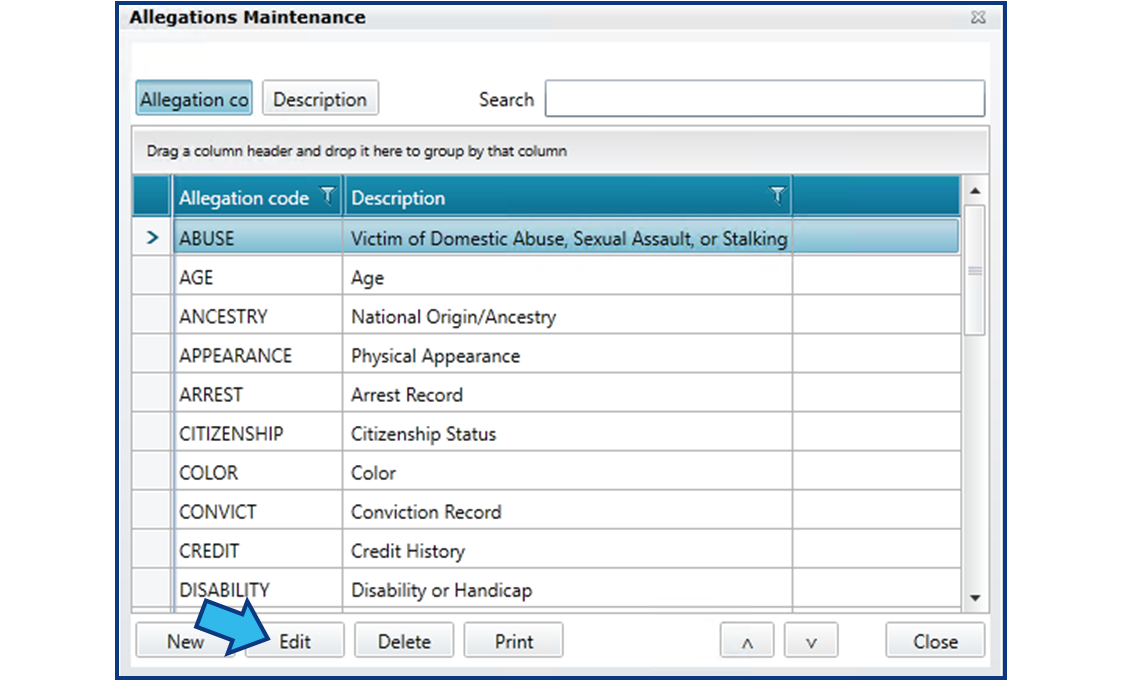
Code will not be editable. All other fields are editable. See section above for field descriptions.
Delete an Allegation
NOTE: Always confirm an allegation is not in use for any current or historical matters. If an allegation in use is deleted, it may cause problems retrieving data from the database. If in doubt about a code’s usage, NEVER delete the code.
From the Allegations Maintenance window, select Delete.
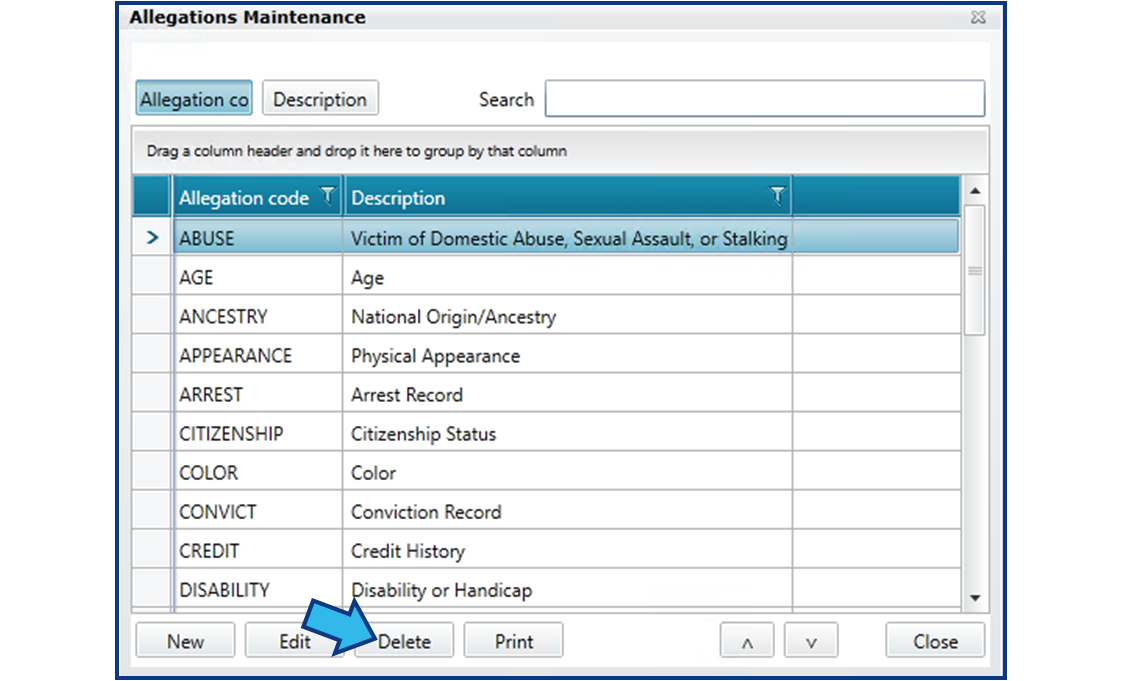
A confirmation will appear. Select Yes to confirm you wish to delete this code.

Maintain Issue Codes
Instructions for the following tasks are provided below:
Access Issues Maintenance
Issue codes can be created, edited, or removed by anyone with access to the System Management module following the steps below.
Open System Management by selecting the icon from the Global Toolbar, or by selecting Tools from the Menu Bar and then selecting System Management.
Select either the Litigation or Labor Relations module. Currently, these are the only modules that use the Allegations tab.
Select Allegations Configuration on the Files tab.
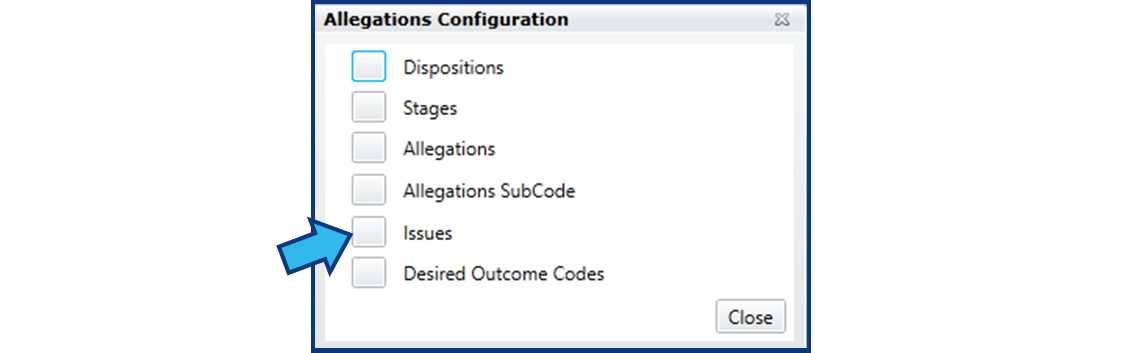
Select Issues to access the Issues Maintenance window.
Add an Issue
From the Issues Maintenance window, select New.
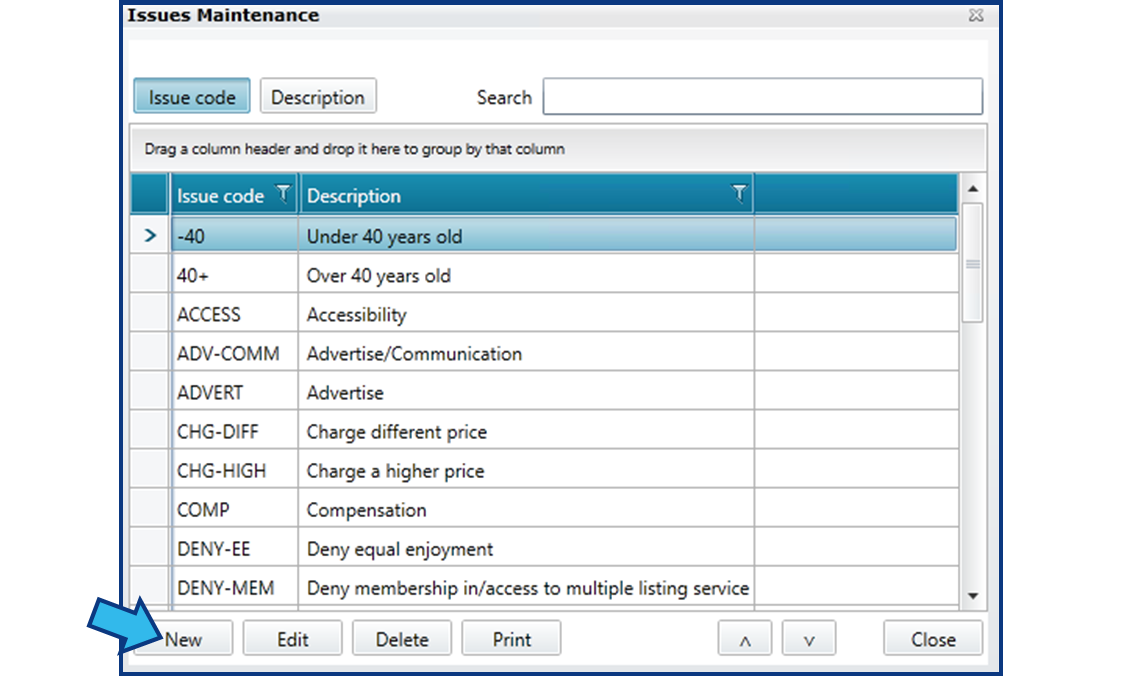
A Maintain Issues window will appear.
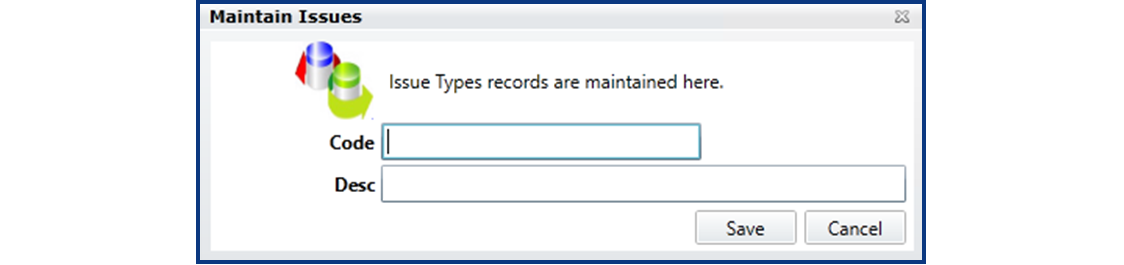
Enter values into the fields based on the following:
- Code – This is a unique alphanumeric value. This can be up to 11 characters long.
- Desc – This is a descriptive name for the code. This can be up to 50 characters long.
Edit an Issue
From the Issues Maintenance window, select Edit.
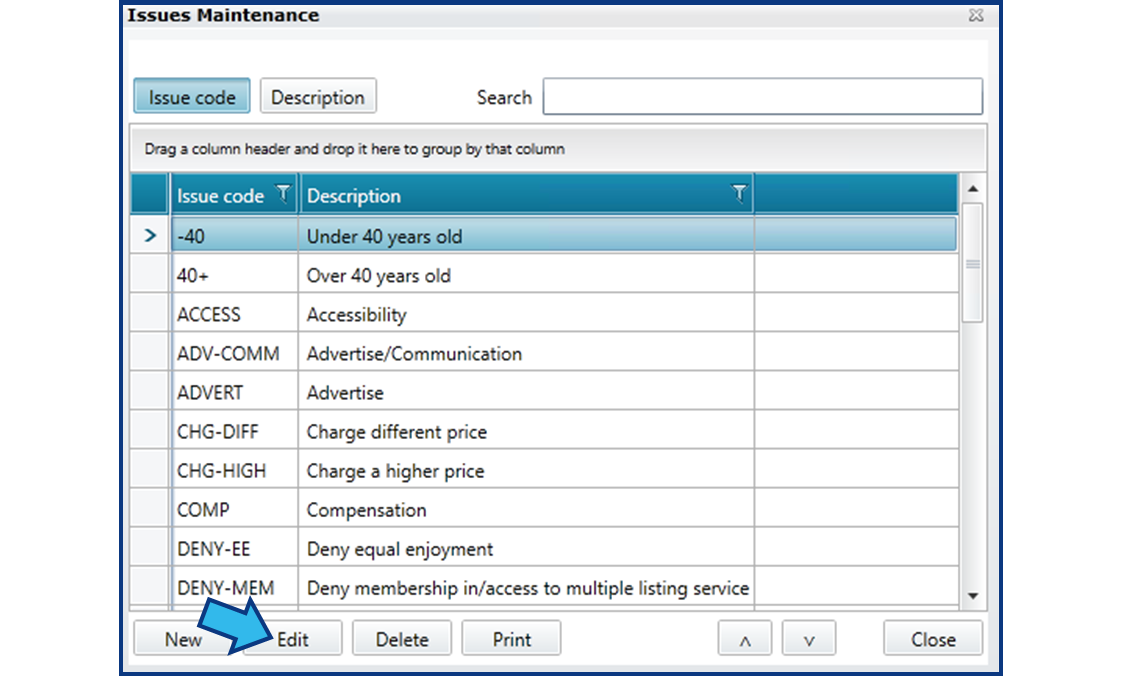
Code will not be editable, but the Description can be changed.
Delete an Issue
NOTE: Always confirm an issue is not in use for any current or historical matters. If an issue in use is deleted, it may cause problems retrieving data from the database. If in doubt about a code’s usage, NEVER delete the code.
From the Issues Maintenance window, select Delete.
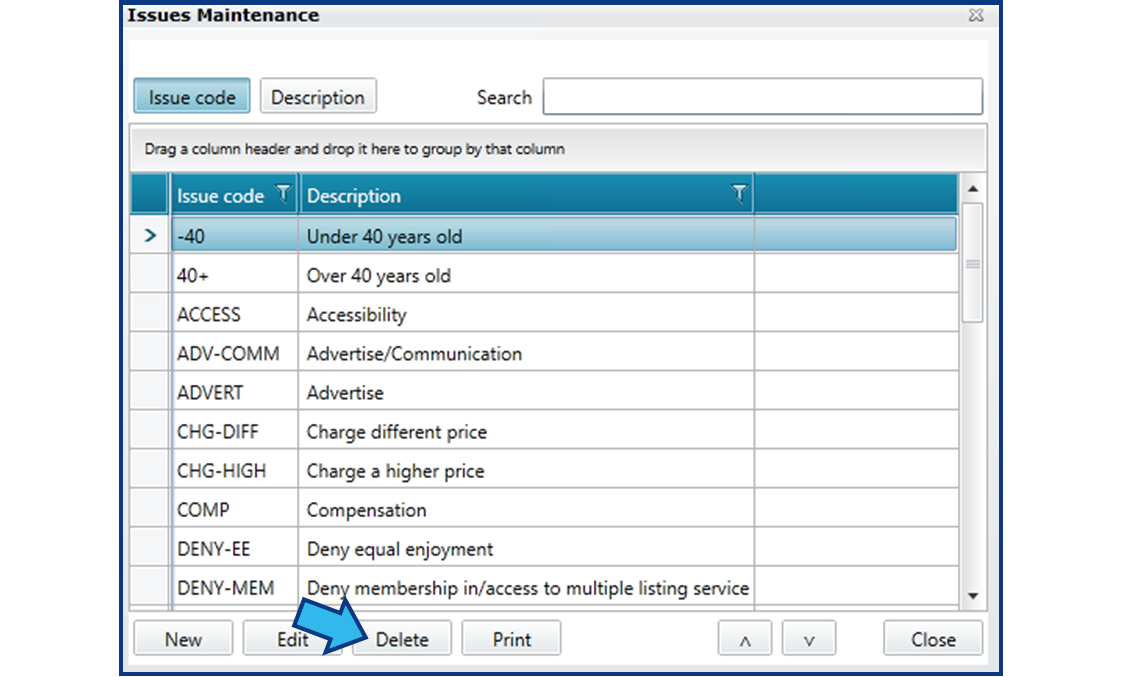
A confirmation will appear. Select Yes to confirm you wish to delete this code.
Maintain Stage Codes
Instructions for the following tasks are provided below:
Access Stages Maintenance
Stage codes can be created, edited, or removed by anyone with access to the System Management module following the steps below.
Open System Management by selecting the icon from the Global Toolbar, or by selecting Tools from the Menu Bar and then selecting System Management.
Select either the Litigation or Labor Relations module. Currently, these are the only modules that use the Allegations tab.
Select Allegations Configuration on the Files tab.
Select Stages to access the Stages Maintenance window.
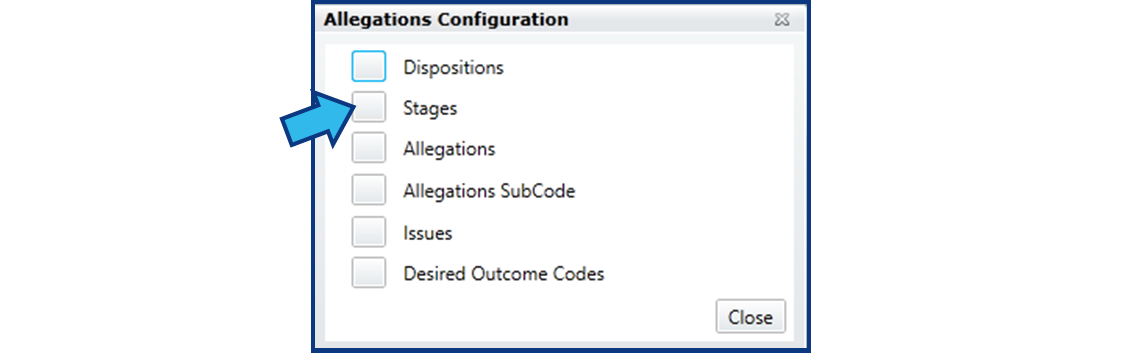
Add a Stage
From the Stages Maintenance window, select New.
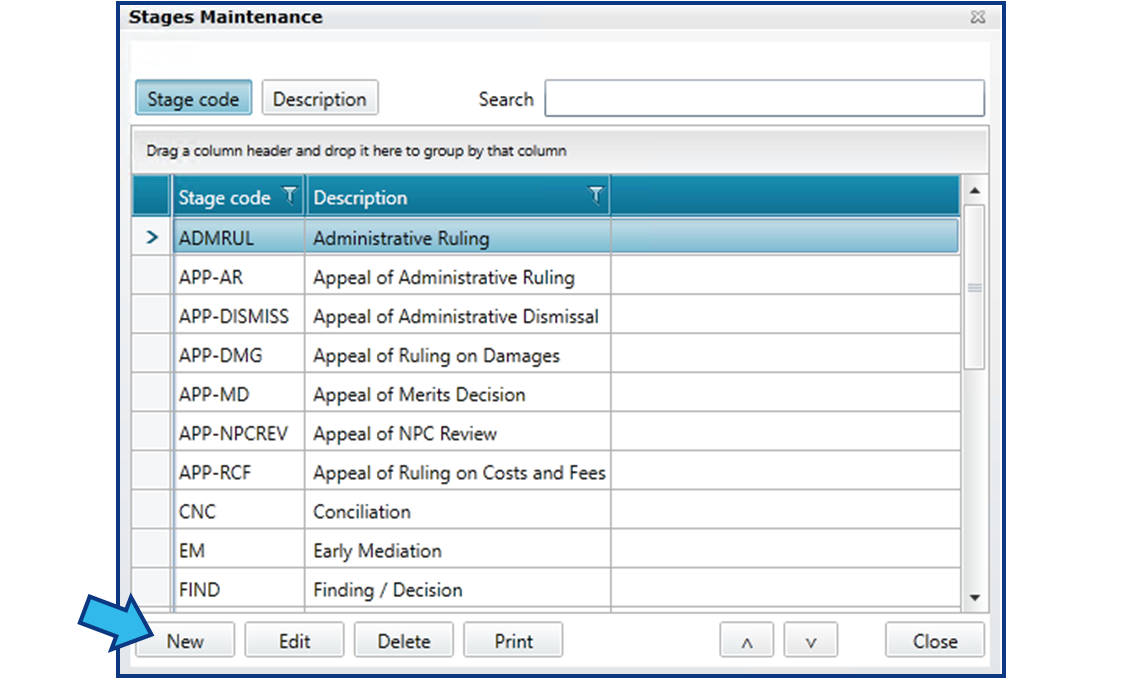
A Maintain Allegation Stages window will appear.
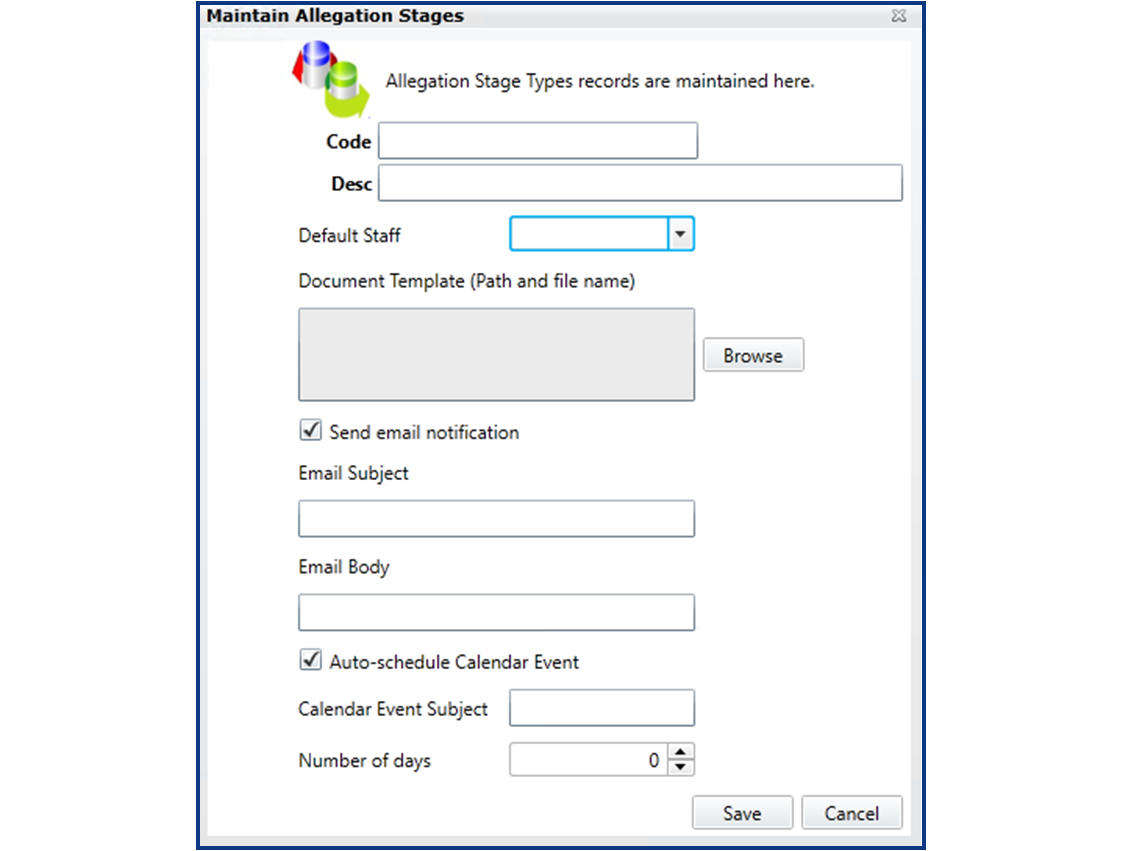
Minimally, a new allegation stage code must have a Code and Description (Desc) entered. The other fields are optional. Enter values into the fields based on the following:
- Code – This is a unique alphanumeric value. This can be up to 11 characters long.
- Desc – This is a descriptive name for the code. This can be up to 50 characters long.
- Default Staff– This is the staff that will be assigned by default when this stage is selected or auto-generated. If Send email notification is checked, this is the staff that will receive that notification.
- Document Template (Path and file name) – This is the location for a template to be created when this stage is created.
- Send email notification – This is used to toggle email notification. If this is checked, the Default Staff will be sent an email when this stage is created.
- Email Subject – This is used to set a default email subject for the email notification.
- Email Body – This is used to set a default email body for the email notification.
- Auto-schedule Calendar Event – This is used to auto-generate a calendar due event when this stage is created.
- Calendar Event Subject – This is used to set a default calendar event subject.
- Number of days – This is used to set the number of calendar days ahead the auto-generated calendar due event should be created.
Edit a Stage
From the Stages Maintenance window, select Edit.
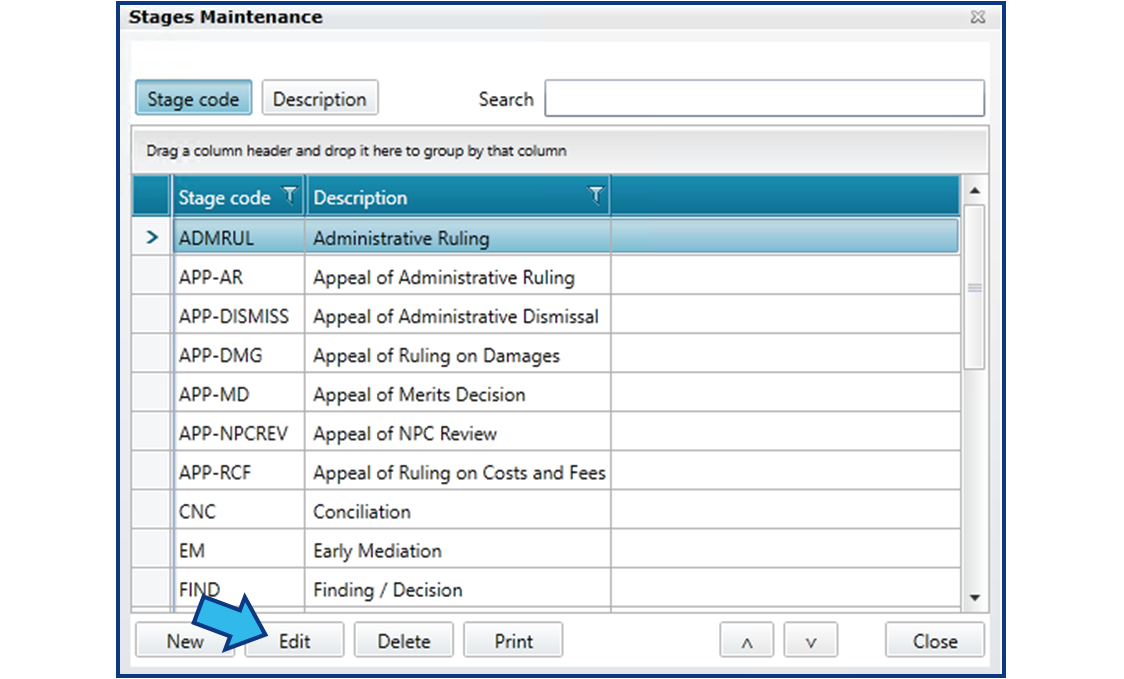
Code will not be editable. All other fields are editable. See section above for field descriptions.
In addition, when editing a stage, a Map Dispositions button will be visible.

For more information, see the section below: Map Dispositions for Stage
Delete a Stage
NOTE: Always confirm a stage is not in use for any current or historical matters. If a stage in use is deleted, it may cause problems retrieving data from the database. If in doubt about a code’s usage, NEVER delete the code.
From the Stages Maintenance window, select Delete.
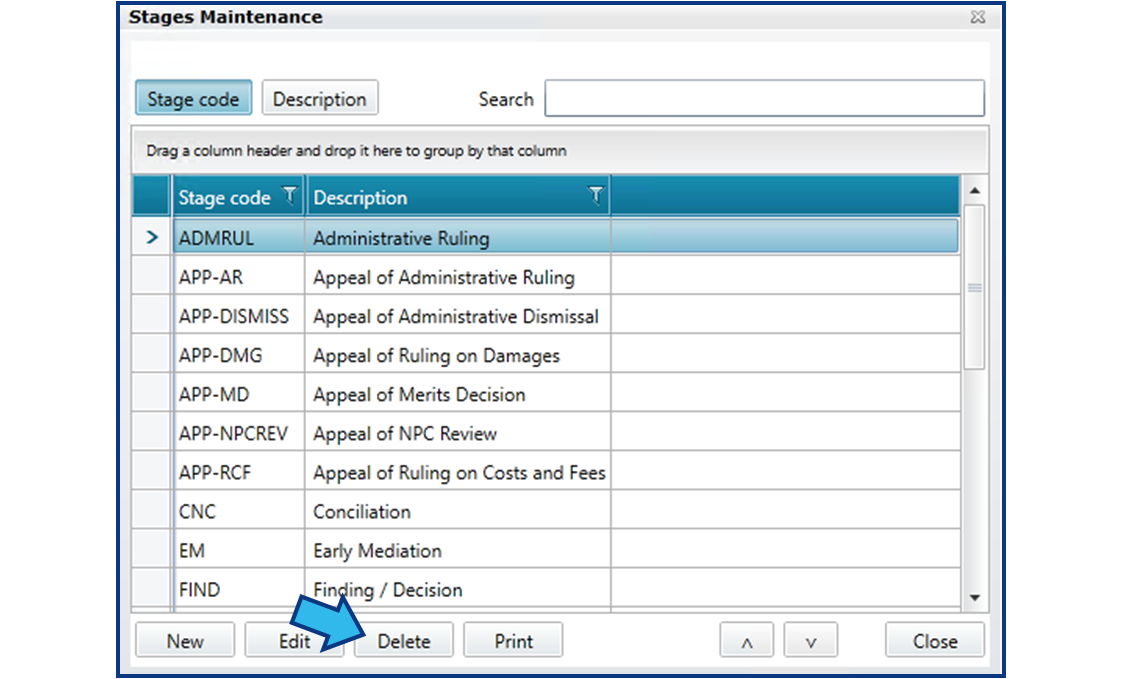
A confirmation will appear. Select Yes to confirm you wish to delete this code.
Maintain Stage Disposition Codes
Instructions for the following tasks are provided below:
-
Access Allegation Dispositions Maintenance
-
Add a Disposition
-
Edit a Disposition
-
Delete a Disposition
Access Allegation Dispositions Maintenance
Stage disposition codes can be created, edited, or removed by anyone with access to the System Management module following the steps below.
Open System Management by selecting the icon from the Global Toolbar, or by selecting Tools from the Menu Bar and then selecting System Management.
Select either the Litigation or Labor Relations module. Currently, these are the only modules that use the Allegations tab.
Select Allegations Configuration on the Files tab.
Select Dispositions to access the Allegation Dispositions Maintenance window.
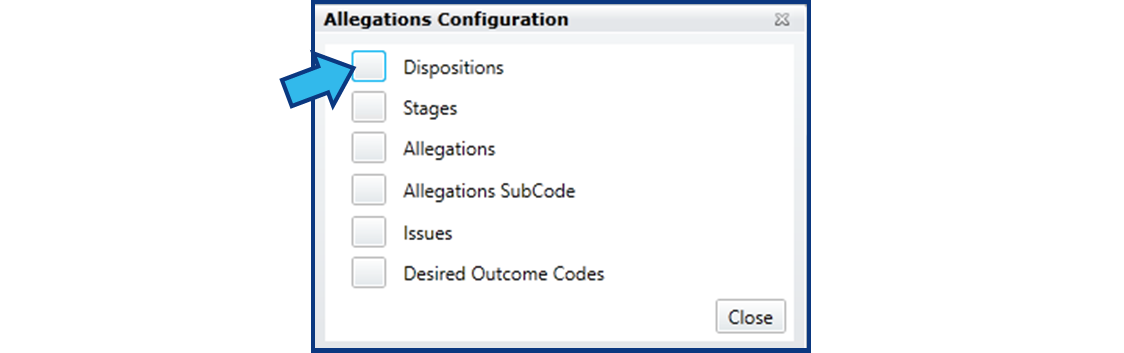
Add a Disposition
From the Allegation Dispositions Maintenance window, select New.
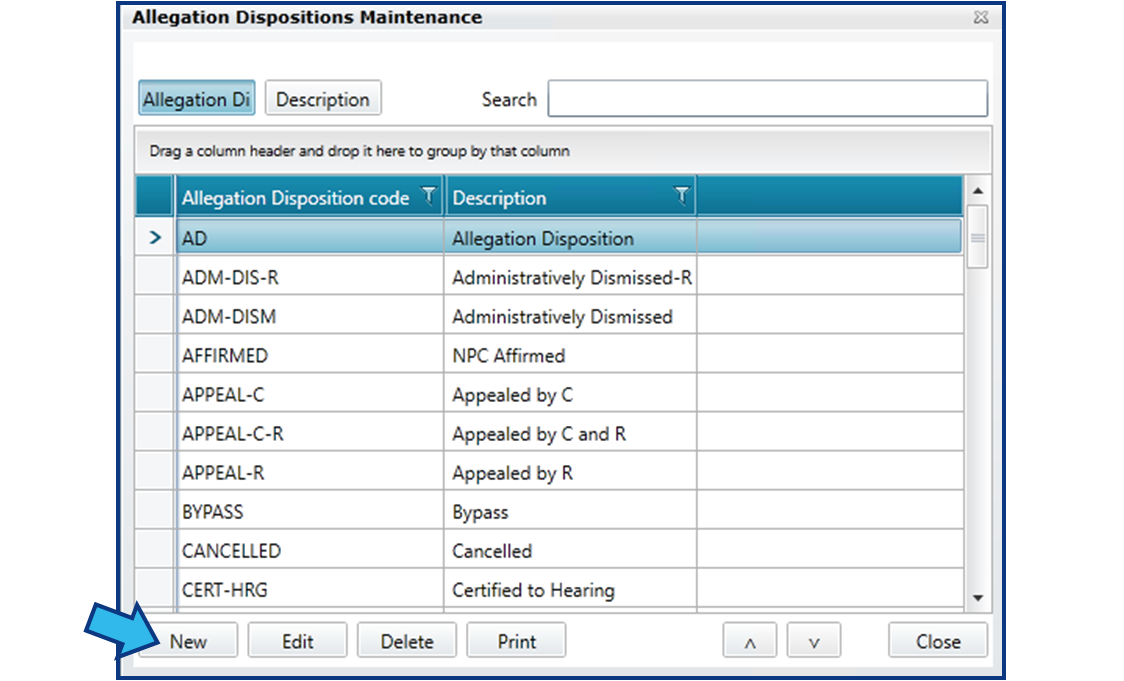
A Maintain Allegation Dispositions window will appear.
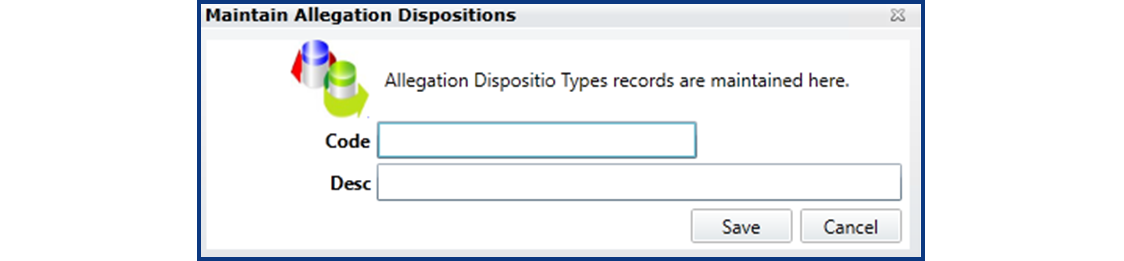
Enter values into the fields based on the following:
- Code – This is a unique alphanumeric value. This can be up to 11 characters long.
- Desc – This is a descriptive name for the code. This can be up to 50 characters long.
Edit a Disposition
From the Allegation Dispositions Maintenance window, select Edit.
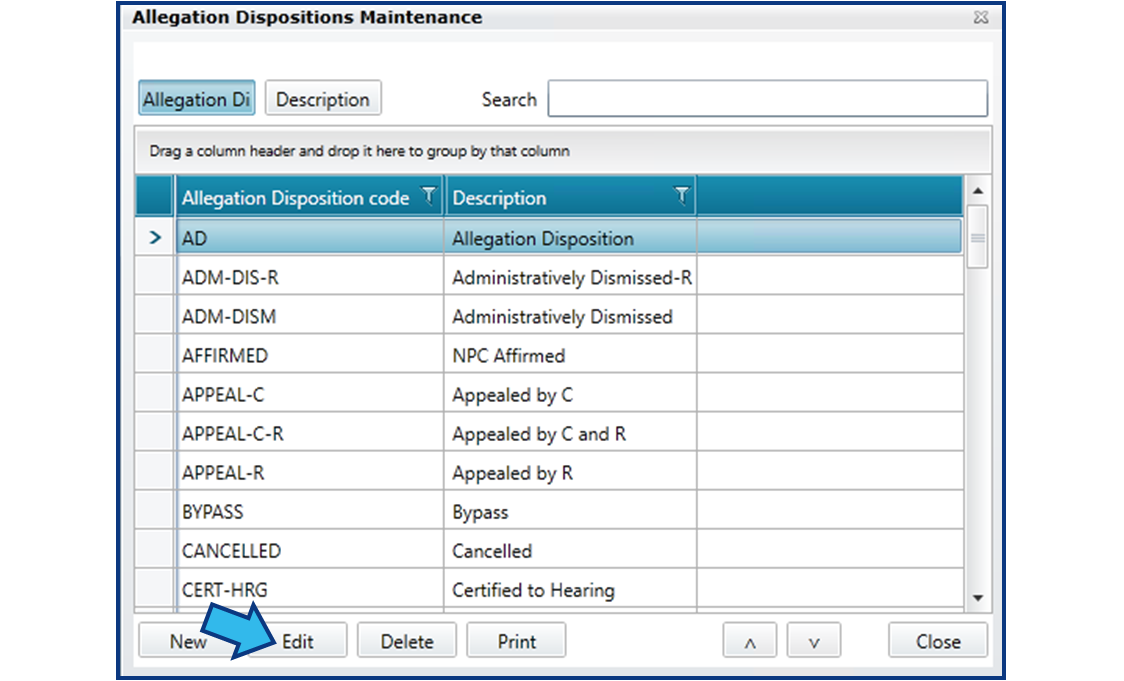
Code will not be editable, but the Description can be changed.
Delete a Disposition
NOTE: Always confirm a disposition is not in use for any current or historical matters. If a disposition in use is deleted, it may cause problems retrieving data from the database. If in doubt about a code’s usage, NEVER delete the code.
From the Allegation Dispositions Maintenance window, select Delete.
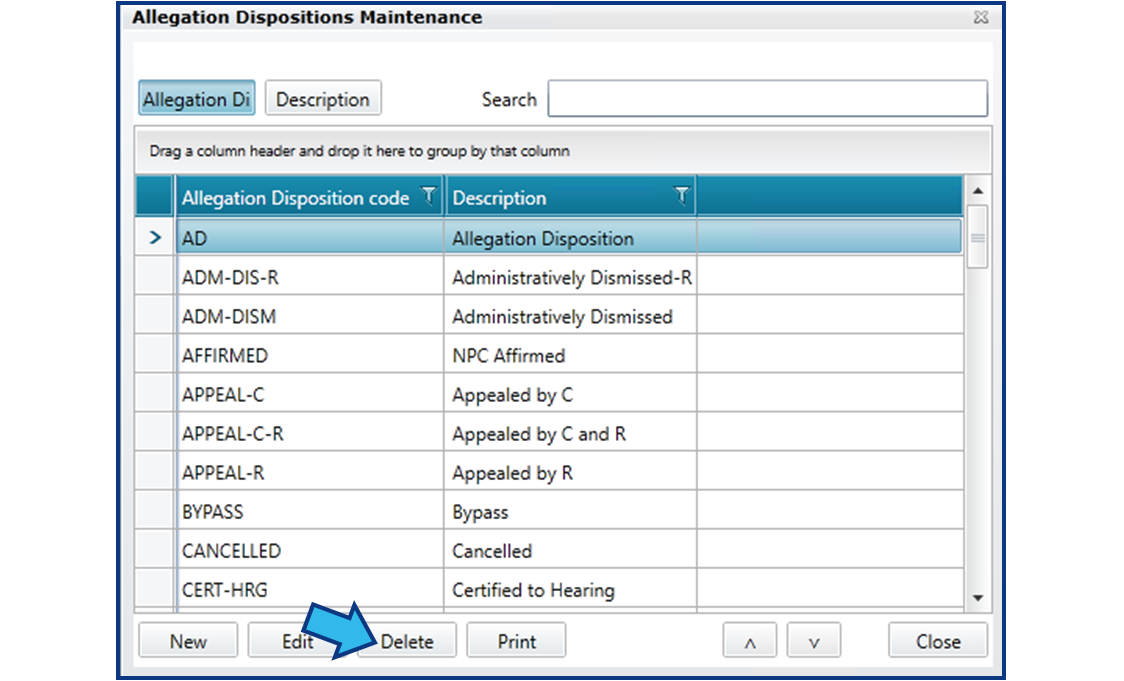
A confirmation will appear. Select Yes to confirm you wish to delete this code.
Map Dispositions for Stage
Instructions for the following tasks are provided below:
Map a New Disposition
When dispositions are mapped to stages, this allows for the auto-generation of the next stage. In addition, this limits the available options in the Disposition drop-down in the Add Allegation Stage and Edit Allegation Stage windows to only show mapped dispositions.
NOTE: If no dispositions are mapped to a stage, all available dispositions will appear in the Disposition drop-down in the Add Allegation Stage and Edit Allegation Stage windows.
To map a new disposition, first access the Stages Maintenance window in System Management. Open System Management by selecting the icon from the Global Toolbar, or by selecting Tools from the Menu Bar and then selecting System Management.
Select either the Litigation or Labor Relations module. Currently, these are the only modules that use the Allegations tab.
Select Allegations Configuration on the Files tab.
Select Stages to access the Stages Maintenance window.
Next, highlight the stage to which you want to map a new disposition. Select Edit.

Select Map Dispositions.

Select New.
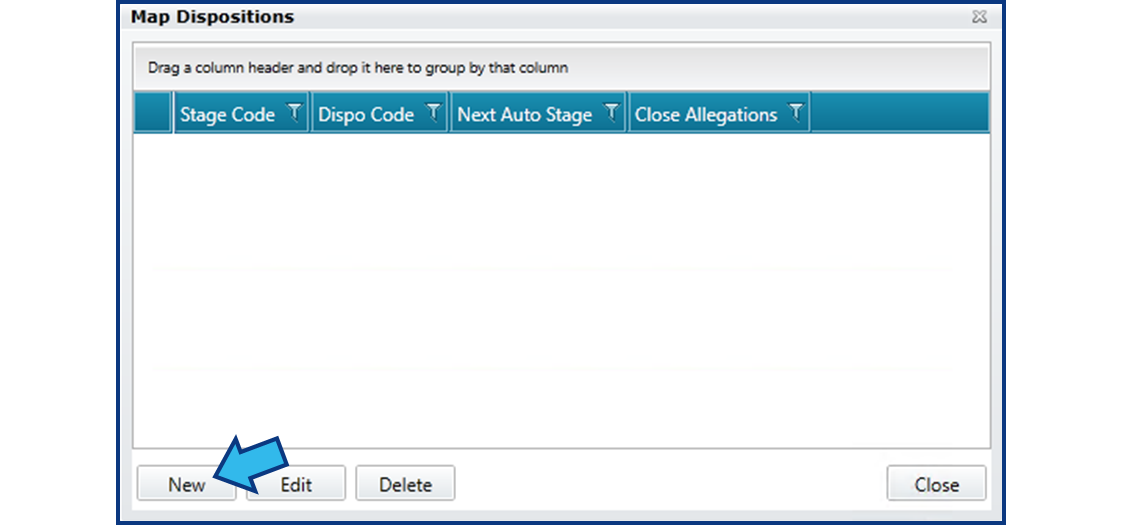
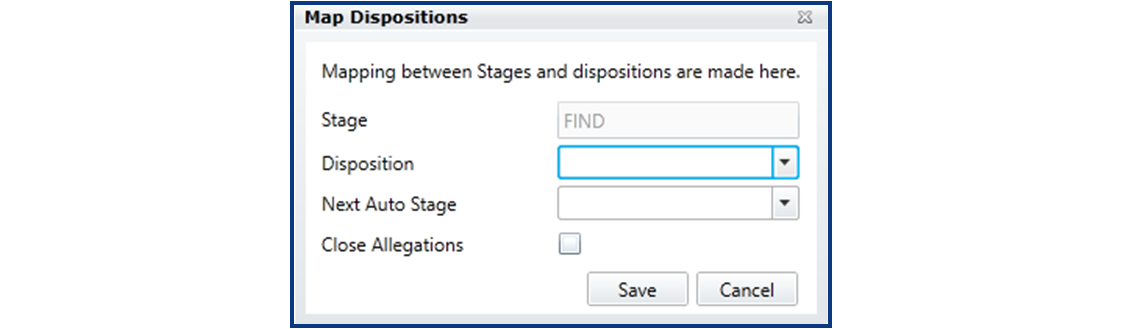
In the Map Dispositions window that appears, enter the mapping information according to the following:
- Stage – This field is not editable. It displays the stage to which you are mapping the disposition.
- Disposition – This is a disposition you want mapped to the current selected stage.
- Next Auto Stage – This is the stage you want to be auto-generated when a user selects the disposition selected in the Disposition field. If you do not want another stage auto-generated, leave this field blank.
- Close Allegations – If the disposition selected in the Disposition field should also close the allegation, place a check in this box. When a user selects this mapped disposition, the allegation to which the stage is created will be closed with a closing date equal to the stage disposition date, or the current date if no stage disposition date is provided.
Edit a Mapped Disposition
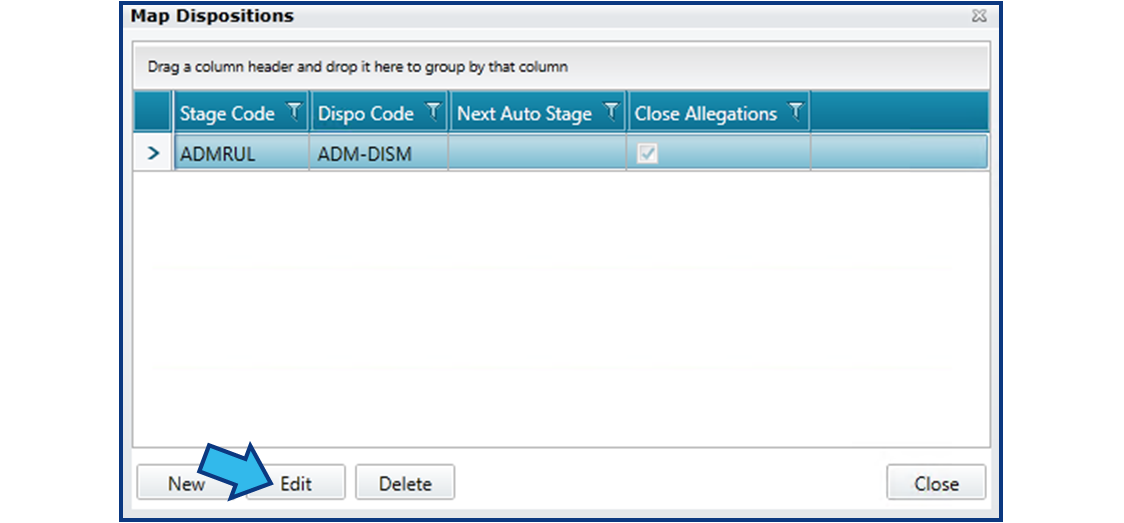
To edit a mapped disposition, repeat the process to map a new disposition with one exception. Once at the Map Dispositions window, highlight the disposition mapping you would like to edit and then select Edit.
Delete a Mapped Disposition
To delete a mapped disposition, repeat the process to map a new disposition with one exception. Once at the Map Dispositions window, highlight the disposition mapping you would like to delete and then select Delete.
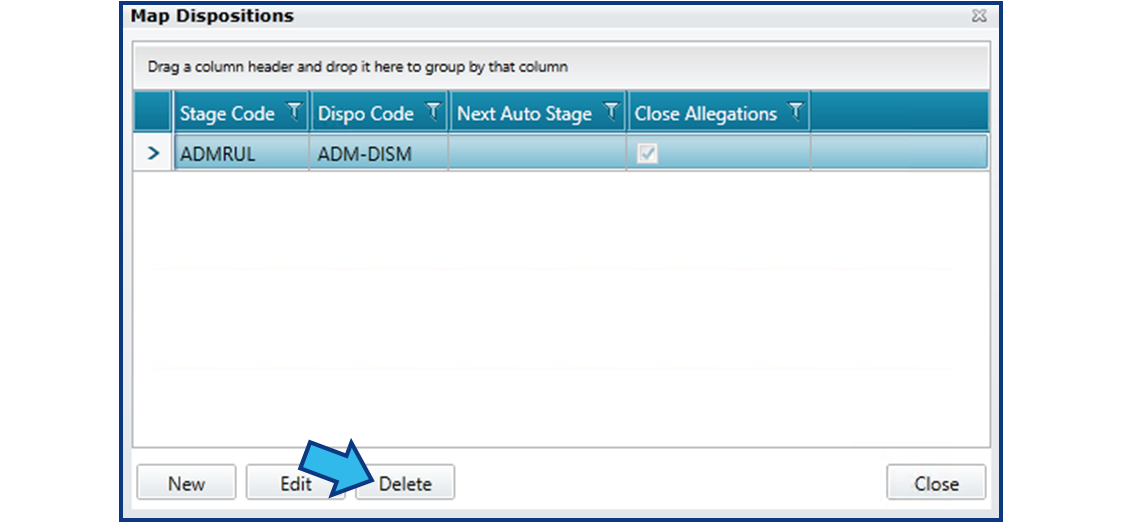
NOTE: This does not delete the stage disposition. It only removes the mapping. Deleting a mapping means the disposition will no longer appear in the Disposition drop-down when adding or editing this stage. All instances of this stage with this disposition already applied will be unchanged. However, if one of these instances is later edited, the user will be required to select a valid disposition from the remaining available options if at least 1 mapped disposition remains.
Maintain Portal Codes
Instructions for the following tasks are provided below:
Maintain Allegation SubCodes
If you have a web portal linked to CLW, you can set up a drop-down for an allegation which presents the portal user with additional categories for the selected allegation. An example is provided below:
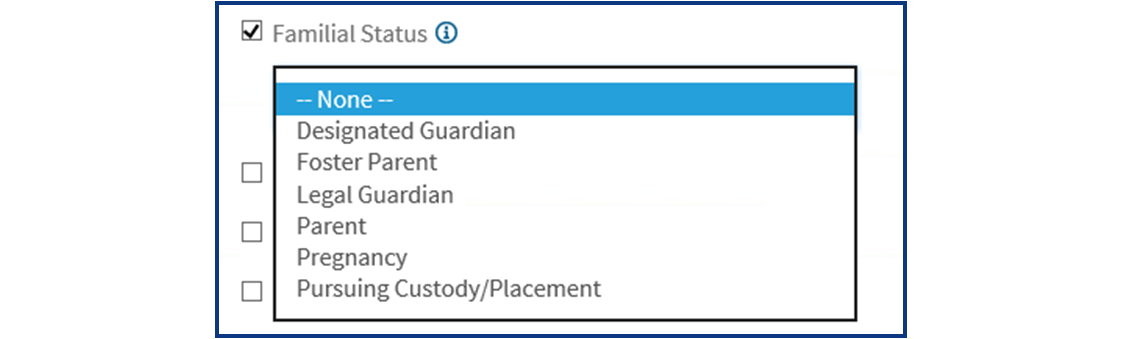
These subcodes are managed in the Allegations SubCode Maintenance window. To access this window, open System Management by selecting the icon from the Global Toolbar, or by selecting Tools from the Menu Bar and then selecting System Management.
Select either the Litigation or Labor Relations module. Currently, these are the only modules that use the Allegations tab.
Select Allegations Configuration on the Files tab.
Select Allegations SubCode to access the Allegations SubCode Maintenance window.
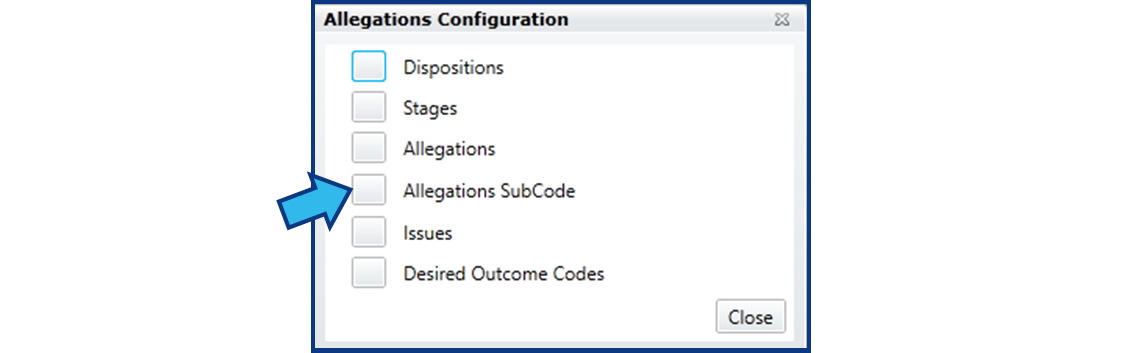
From here you can create a new subcode or edit or remove an existing one. To add a new subcode, select New.

A Maintain Allegations SubCode window will appear.
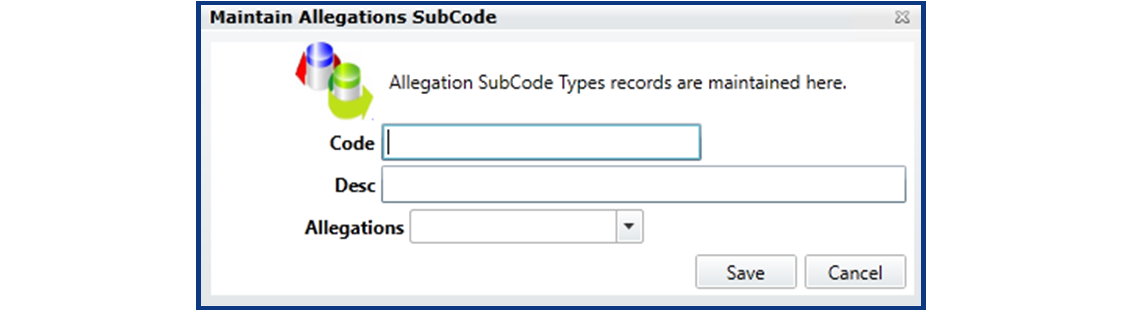
Enter values into the fields based on the following:
- Code – This is a unique alphanumeric value. This can be up to 11 characters long.
- Desc – This is a descriptive name for the code. This can be up to 50 characters long.
- Allegations – This the allegation to which this subcode belongs.
When editing an Allegation SubCode, the Code field will not be editable, but the remaining fields are editable.
When deleting an Allegation SubCode, the code will no longer appear as an option on the portal.
Maintain Desired Outcome Codes
If you have a web portal linked to the Litigation module in CLW, you can set up check boxes of possible desired outcomes for the portal user to select. An example is provided below:

These codes are managed in the Desired Outcome Codes Maintenance window. To access this window, open System Management by selecting the icon from the Global Toolbar, or by selecting Tools from the Menu Bar and then selecting System Management.
Select the Litigation module. Currently, this is only available in the Litigation module.

Select Allegations Configuration on the Files tab.
Select Desired Outcome Codes to access the Desired Outcome Codes Maintenance window.
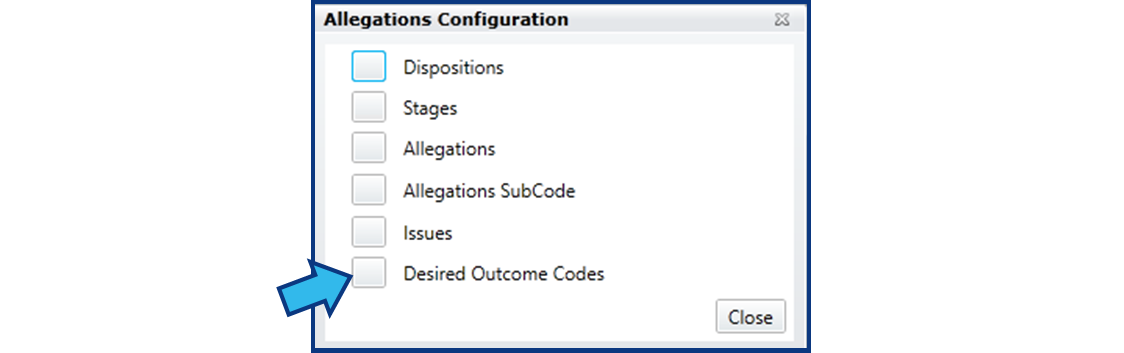
From here you can create a new code or edit or remove an existing one. To add a new code, select New.
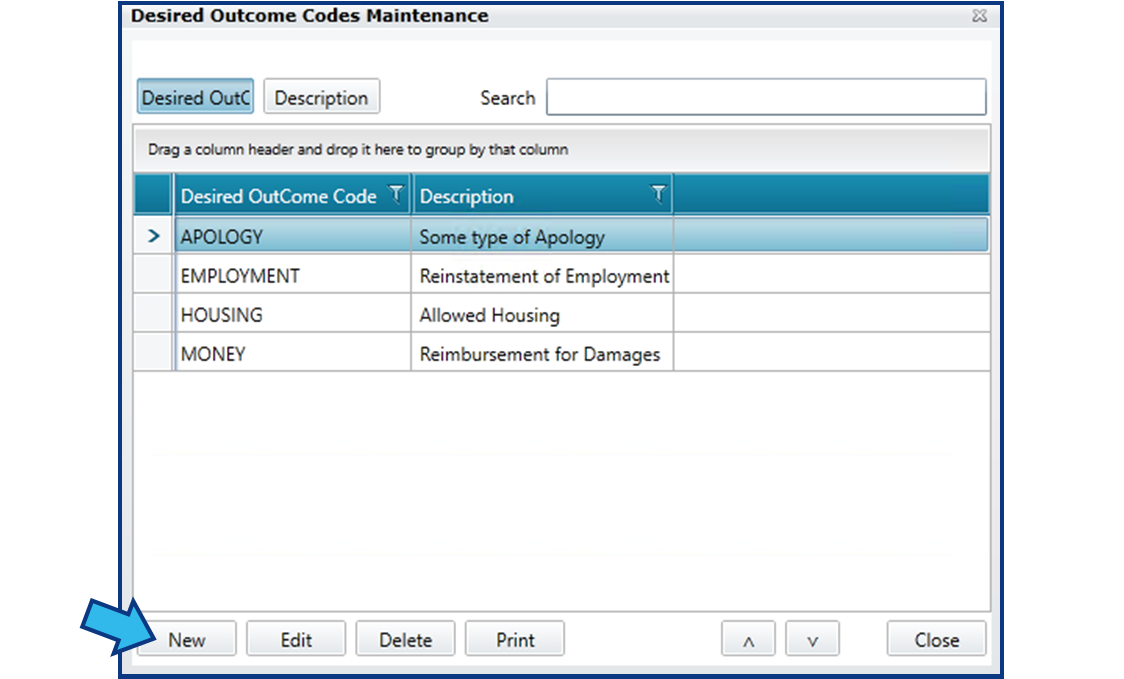
A Maintain Desired Outcome Code window will appear.
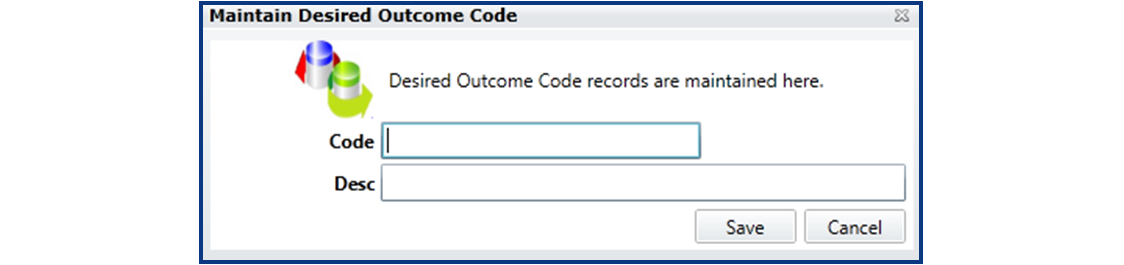
Enter values into the fields based on the following:
- Code – This is a unique alphanumeric value. This can be up to 11 characters long.
- Desc – This is a descriptive name for the code. This can be up to 50 characters long.
When editing a Desired Outcome Code, the Code field will not be editable, but the Description can be changed.
When deleting a Desired Outcome Code, the code will no longer appear as an option on the portal.
Comments
0 comments
Please sign in to leave a comment.