
Need a printable version of this article? Download the Article (PDF Version).
Managing access to a matter, or file, can be done by a System Administrator, or anyone with Password of the Day privileges, who also has access to the matter. Any user can be restricted from accessing any matter. When a matter is blocked to a user, they will not be able to search for the matter or for any documents associated with the matter.
To restrict access to a matter, check out Deny File Access.
To restore access to a matter, check out Grant File Access.
Deny File Access
There are 4 steps to complete this task:
Step 1. Get the Password of the Day
The fastest way to get the Password of the Day is to email Cycom Support (support@cycominc.com). You can also call Cycom Support at 888-292-6688.
Step 2. Open Deny File Access Module
To open the Deny File Access module, select Options on the Menu Bar and select Deny File Access.

Enter the admin password followed by the Password of the Day.

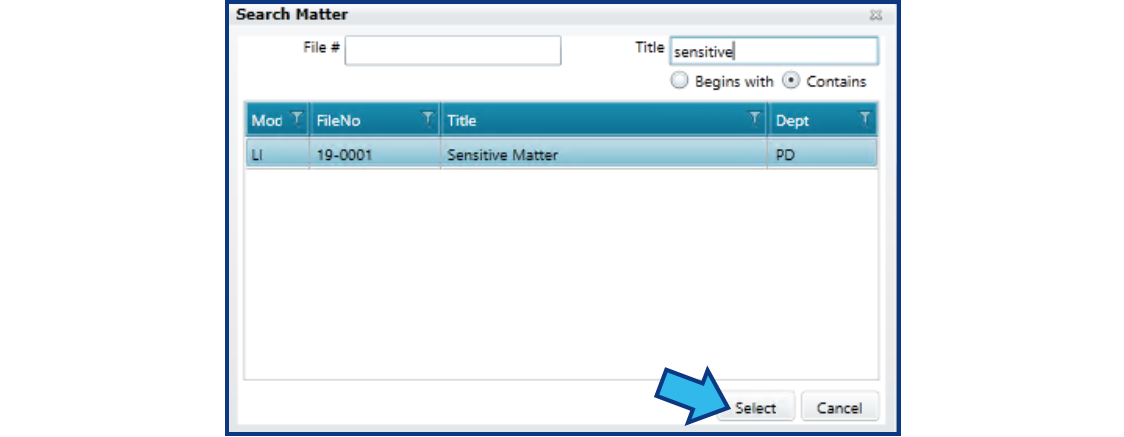
Step 3. Locate Matter
After gaining access to the Deny File Access module, you will need to enter the file number or title of the matter to which you wish to deny access in the Search Matter window. Once highlighted, press Select.
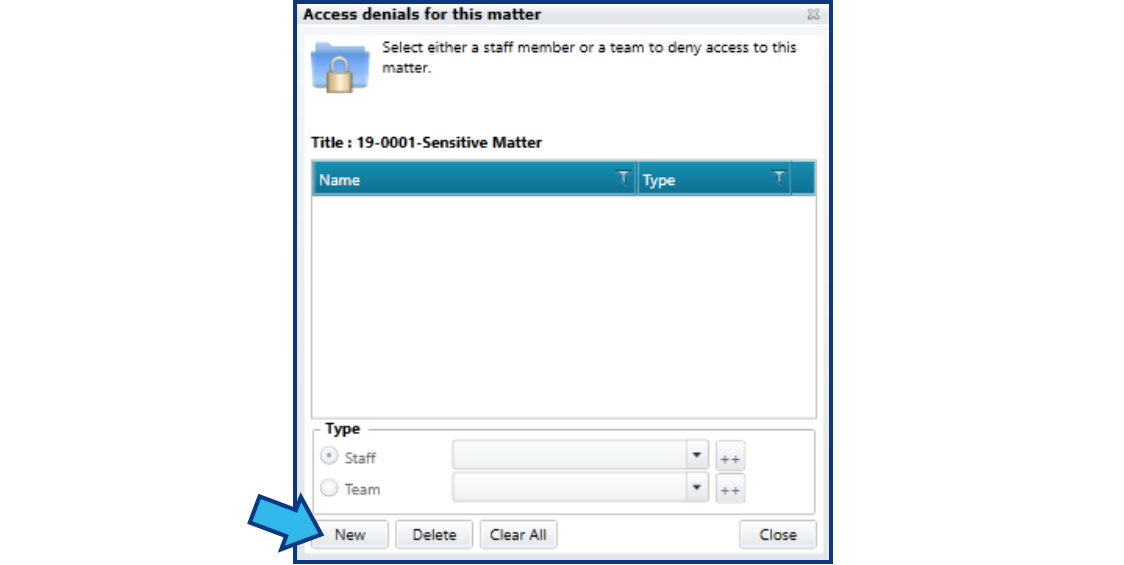
Step 4. Add Staff to Restrict
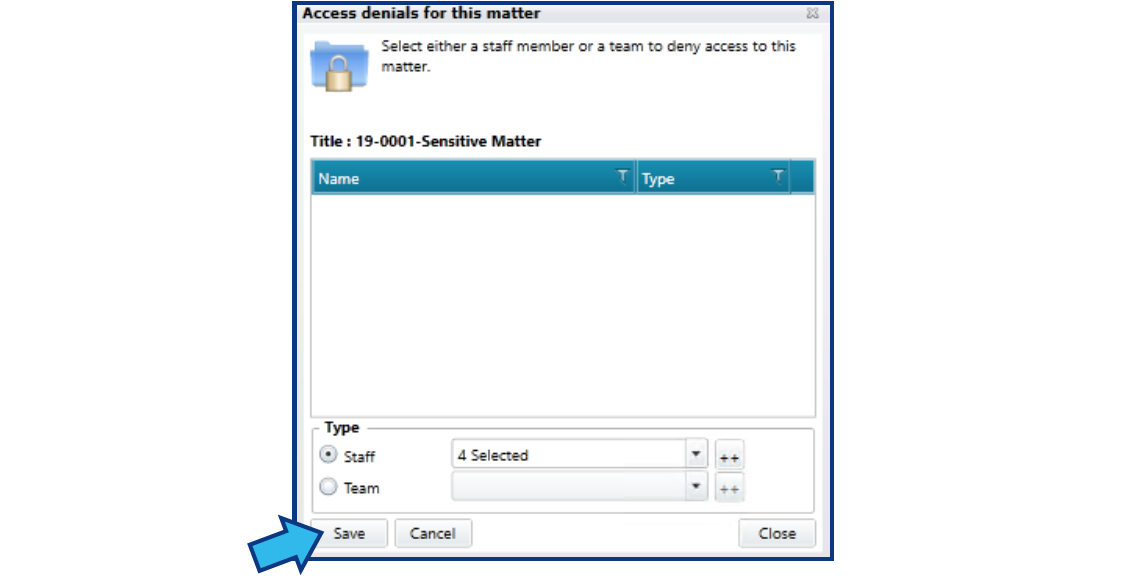
Press the New button in the Access denials for this matter window to add a new individual or team to the denials list for this matter.
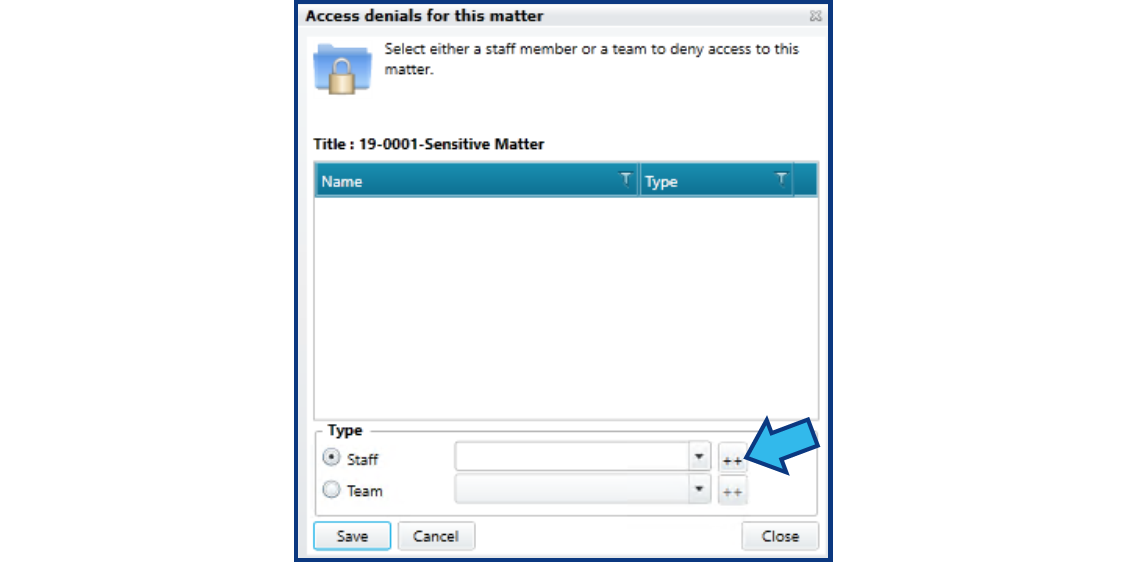
To deny an individual, select the ++ next to the staff option. To deny a team, select the radio button beside Team and select the ++ next to the team option.
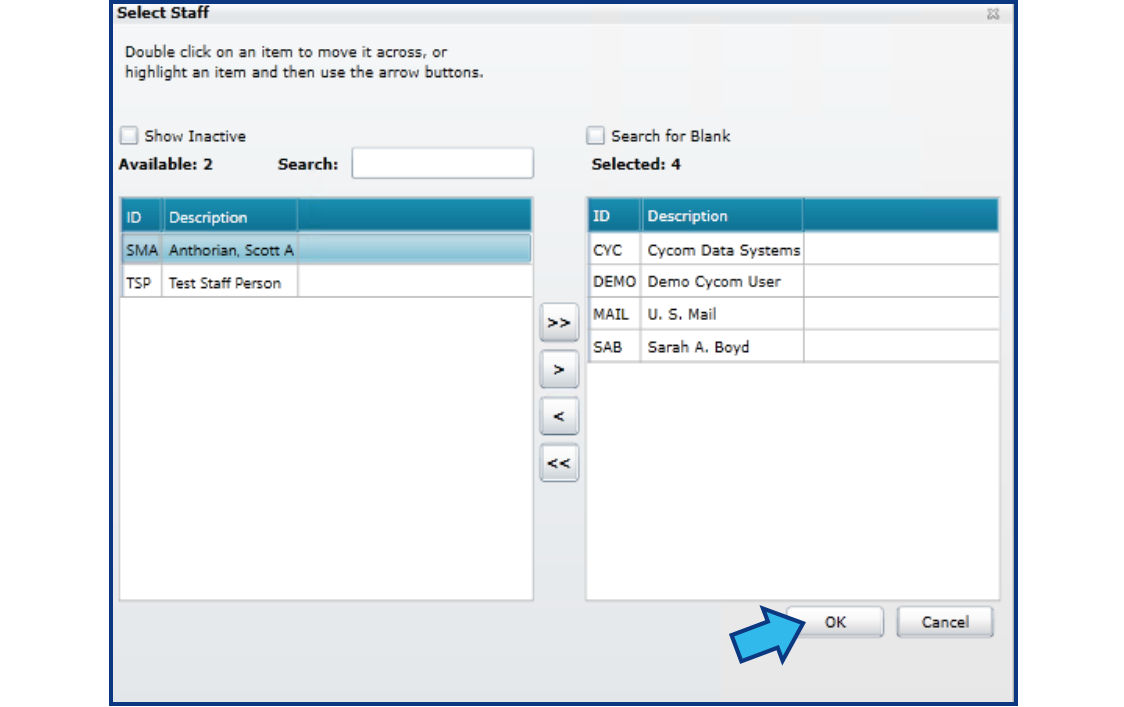
In the Select Staff window, move staff names from the left side to the right side. Those on the right side will be denied access to the file. It is important that you leave your name on the left side or you will also be denied access to the matter.

Once the names of all the staff to be denied access have been moved to the right, press the OK button.
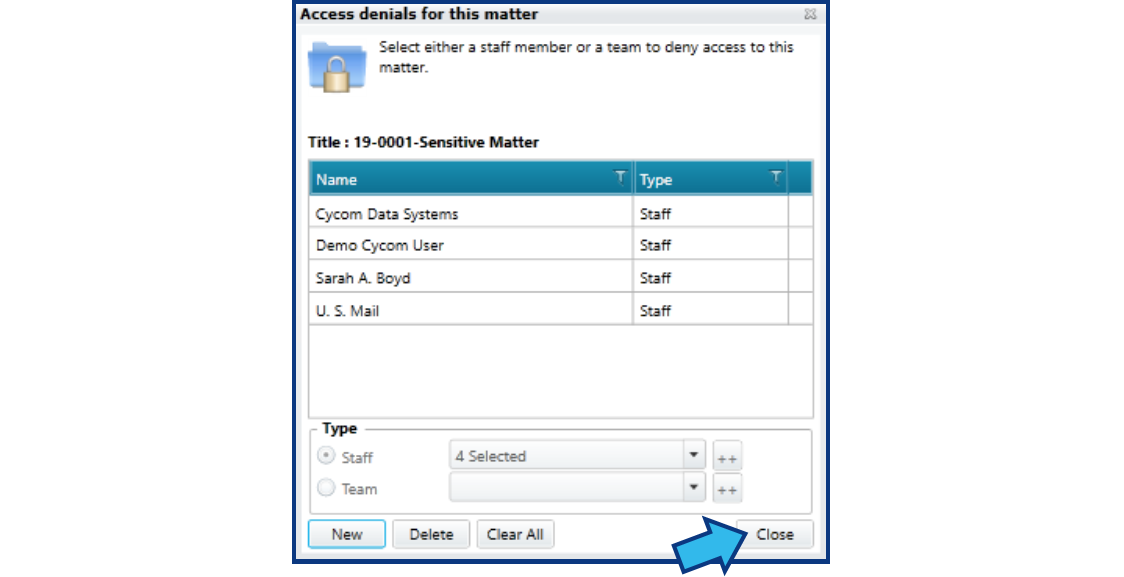
Press the Save button to save your changes. Those denied access will appear in the list once they have been saved.
Press Close to close the Deny File Access module.
It is best to put a minimum amount of information into a new matter to which you wish to deny file access. After that, you can do the deny file access process and then add more information to the matter. Doing it this way ensures access to any sensitive information is restricted.
If you accidentally find that you have denied yourself access to the matter, contact Cycom Support.
All new users entered into Tools\System Management will automatically be denied access to any file that has a deny file access associated with it. Users can have access restored by granting file access for that user (see below).
Grant File Access
There are 4 steps to complete this task:
-
Get the Password of the Day
-
Open Show All File Access Restrictions Module
-
Locate Staff and Matter
-
Confirm Access Denial
Step 1. Get the Password of the Day
The fastest way to get the Password of the Day is to email Cycom Support (support@cycominc.com). You can also call Cycom Support at 888-292-6688.
Step 2. Open Show All File Access Restrictions Module
To open the Show All File Access Restrictions module, select Options on the Menu Bar and select Show All File Access Restrictions.

Enter the Password of the Day.

Step 3. Locate Staff and Matter
All the denials to which you have access will be displayed. Located the staff and the matter to which you wish to grant access. Select the denial and press Delete. A selected denial will be highlighted in blue as shown below.
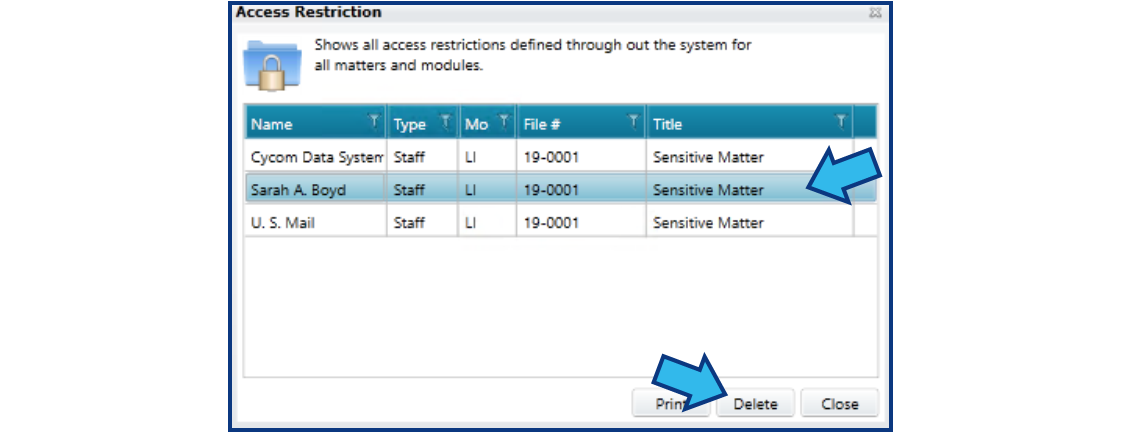
Step 4. Confirm Access Denial
On pressing Delete, a confirmation dialog will appear. After pressing Yes, the user’s name will be removed from the denial list and they will have access to that file.

Comments
0 comments
Please sign in to leave a comment.